Home Assistant dashboard: Floor plan

![]()
This page explains how to create your own interactive floor plan for Home Assistant.
The main advantage of a floor plan dashboard is that it gives you a single, comprehensive overview of multiple statuses at once.
You can use a background image of your floor plan and overlay it with icons and sensor values, such as room temperatures, light controls, or motion detection indicators. Clicking on an entity allows you to define specific follow-up actions based on your preferences.
Table of Contents
Introduction
The ability to create an interactive floor plan was the main reason I started using Home Assistant.
Previously, I used an app to control lights and monitor temperatures, alongside Node-RED for automation.
However, as I added more sensors to my network, it became increasingly difficult to get a quick overview of everything.
Searching for a solution, I discovered videos showcasing the floor plan capabilities of Home Assistant.
With a floor plan, you can visualize detailed information about each room using icons, colors, and overlays.
This provides a clear and comprehensive overview of your home, which inspired me to create my own interactive floor plan.
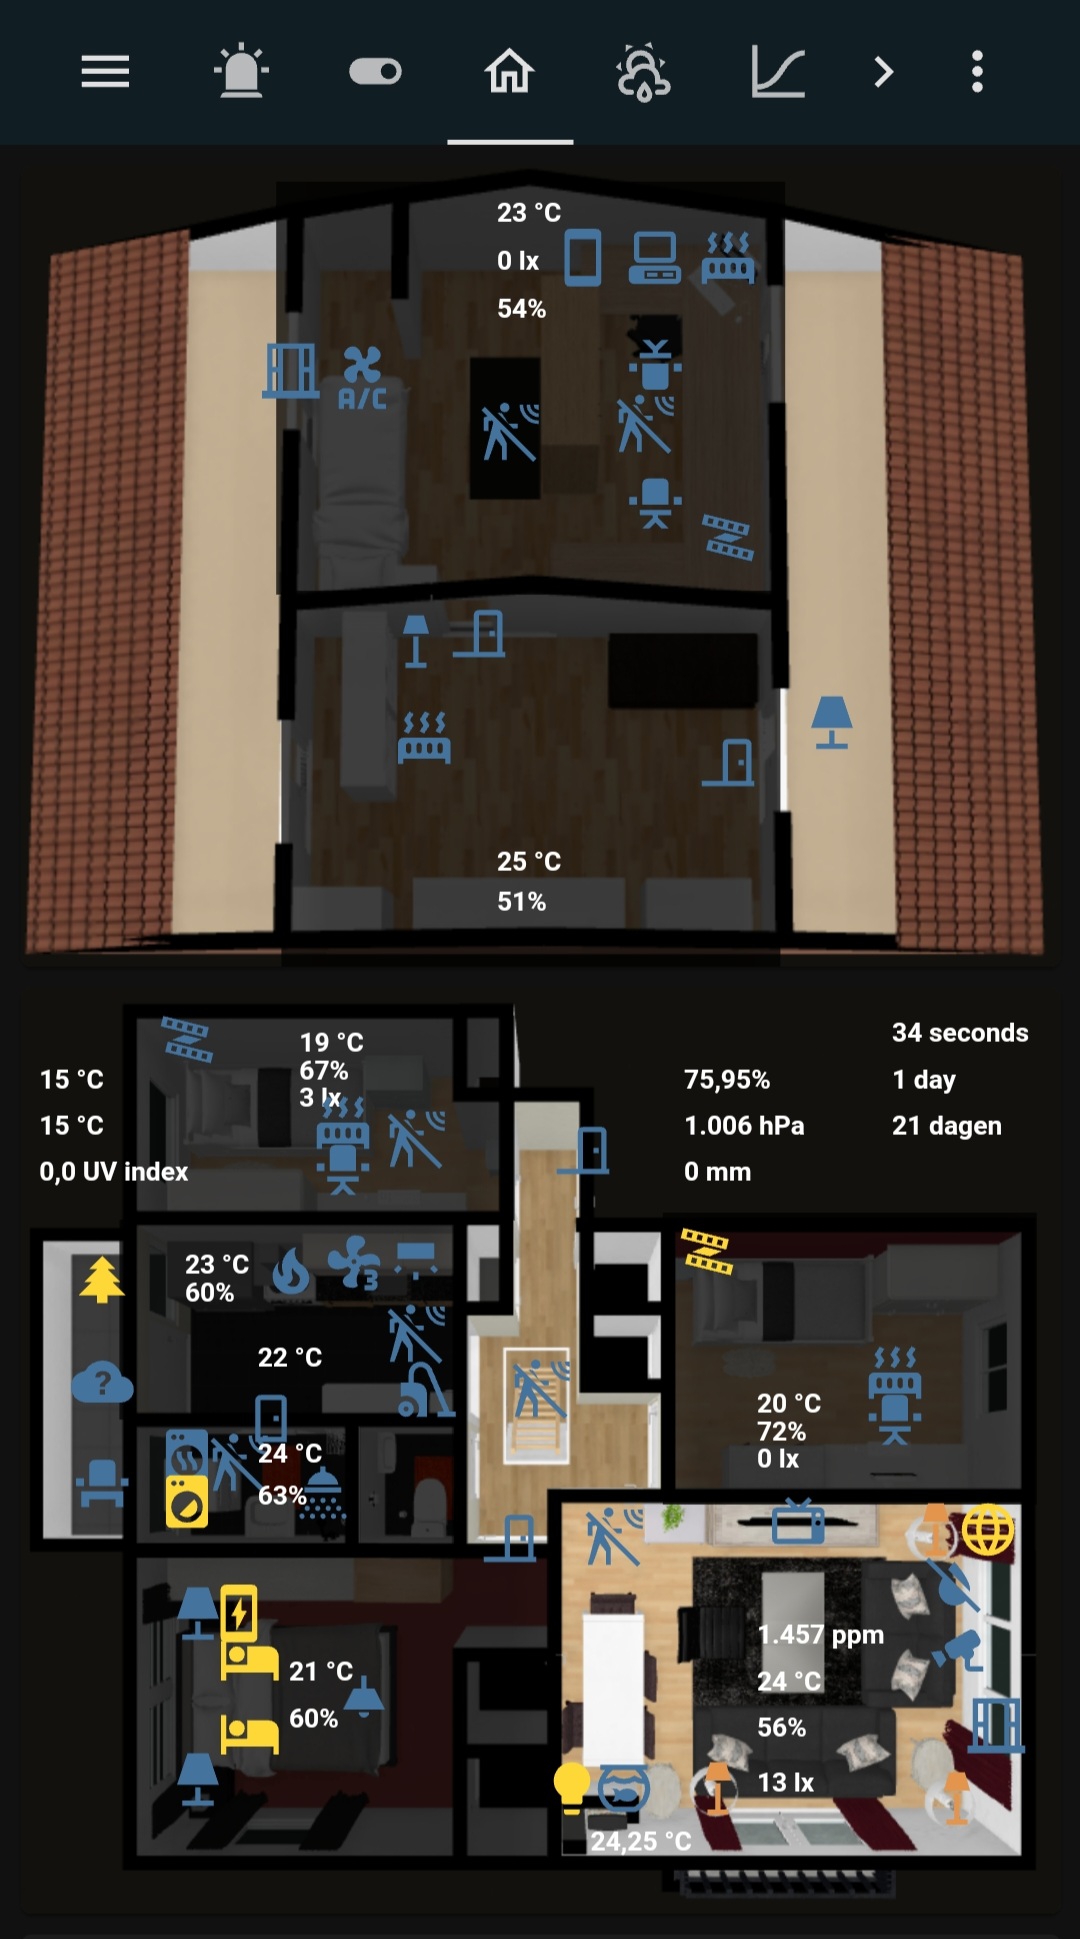
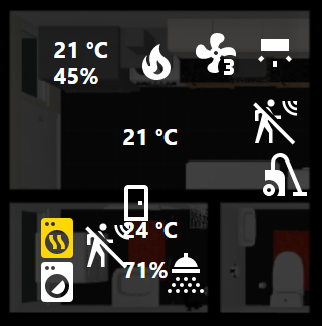
Here is an example of what it might look like.
It may seem busy with icons and labels, but it gives a very fast overview of the sensors throughout the house.
Since I know each room and what every icon means, the layout is logical and easy to read for me.
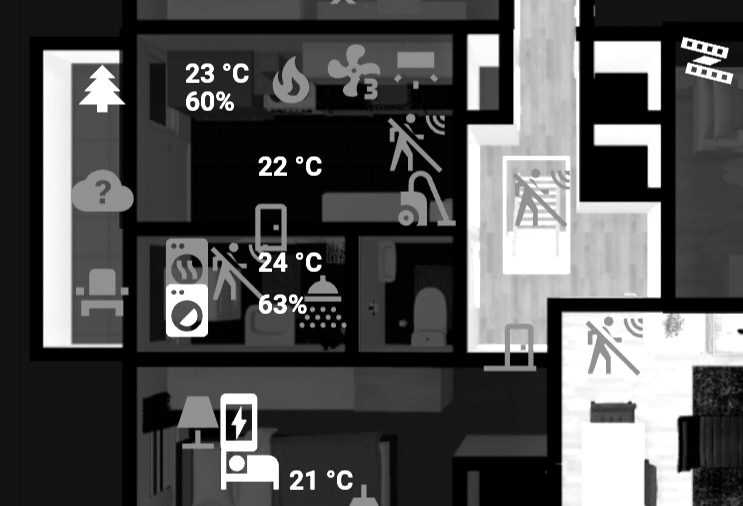
You can also choose to use fewer colors.
Or only use the room walls and don’t add furniture to the floor plan.
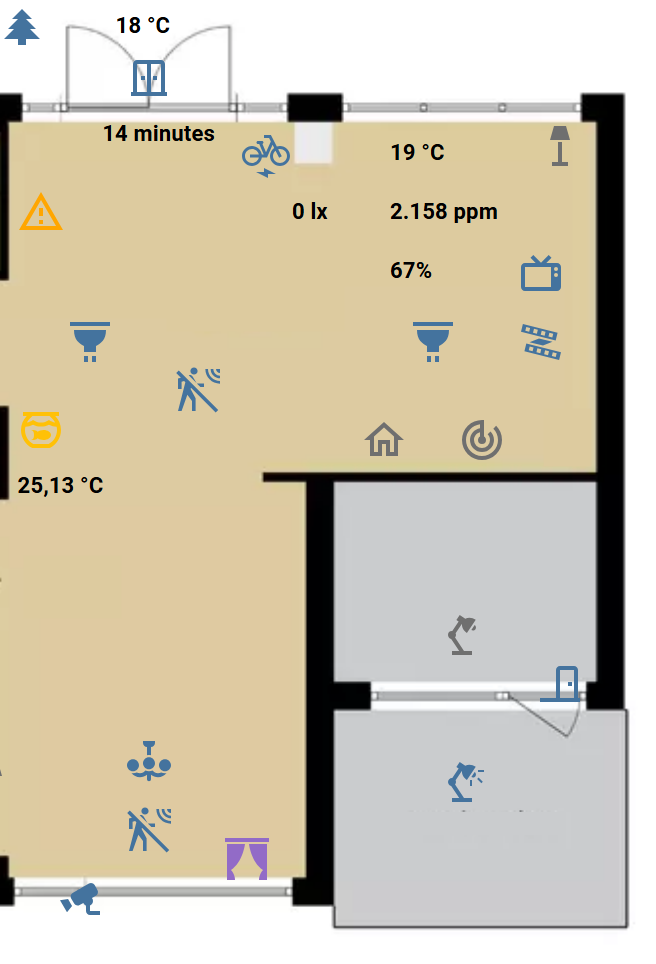
It is up to you what works best for your own dashboard.
Before you start, be aware that this takes a lot of time to create.
But it is worth it.
Get inspired
Before you begin, explore examples of floor plans created by others to find inspiration. Choose one that you like and use it as a reference for your own design.
Here are some sites where you can find such examples:
- Google: floorplan Home Assistant
- Pinterest: floorplan Home Assistant
- https://github.com/theone11/HomeAssistantConfig
Applications
If you already have a digital version of your floor plan, you can use that as a starting point.
If you don’t have one, there are two commonly used applications to create a floor plan.
Floorplanner.com

Floorplanner.com is a free online tool to create a 3D model of your house. It is easy to use, and even the free version gives you a lot of furniture options. This is also the tool I used for my floor plan.
- You can use it everywhere because it’s online
- No installation required
Sweet Home 3D
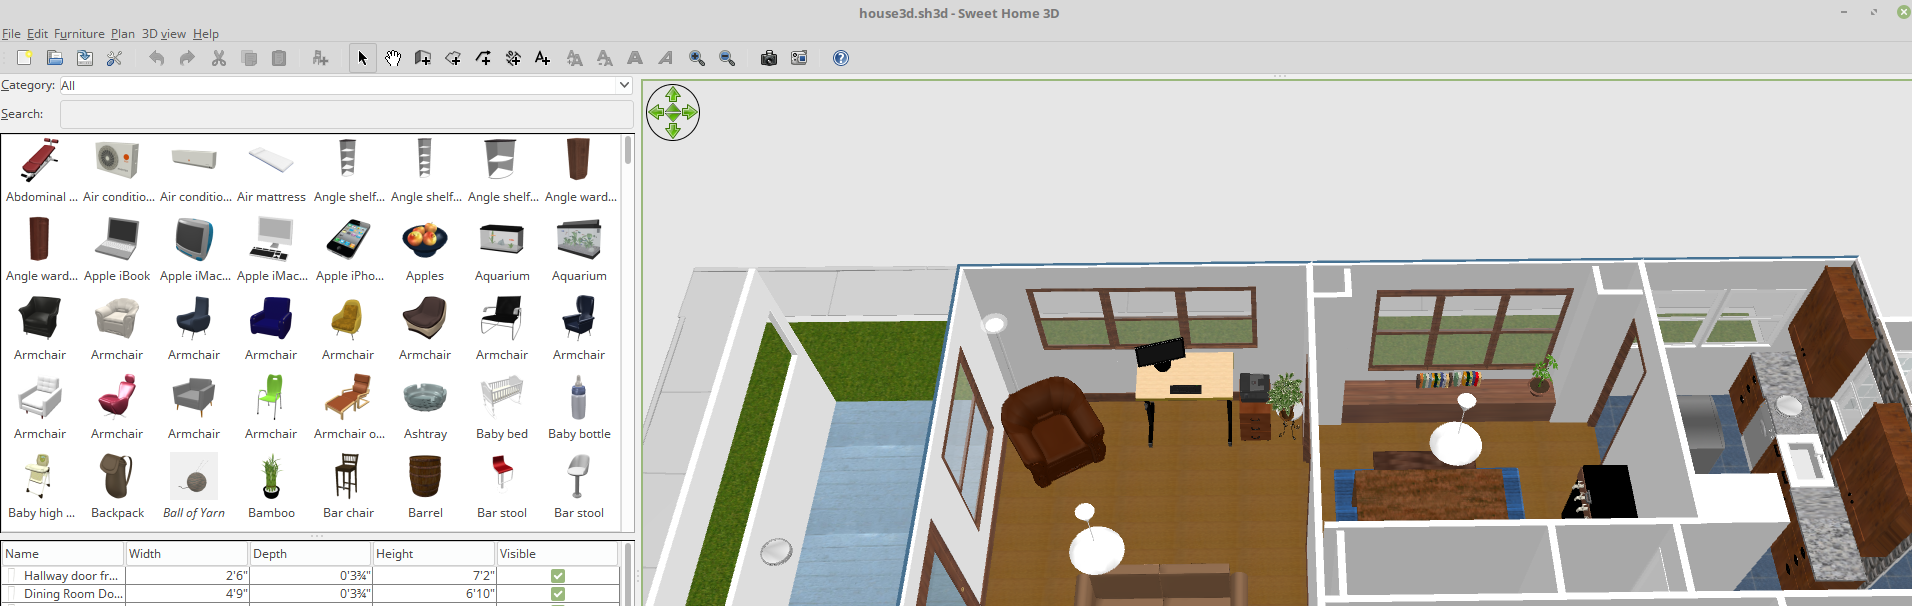
Sweet Home 3D is an application you need to install on your PC. It is available for all desktop platforms.
- You have your own data locally
- It has realistic light effects which you can use as overlay
With this Home Assistant Floor Plan Generator Plugin you can export images directly in a format you can use in Home Assistant.
Creating your floor plan
Once you have chosen an application, you can start.
The first step is to create a basic digital map of your house by drawing the walls, doors, and windows. You can already start using that in your interactive floor plan.
It is always possible to create a fancier floor plan with the actual wall colors, floor types, and furniture. That takes a lot of time, but it can be very rewarding. Once you finish it, you can be proud of the result every time you use it.
Steps to take:
- Get online inspiration for what you want it to look like.
- Start by collecting the official dimensions of each room.
- Draw the walls and place the doors and windows.
- Then add the furniture to each room.
- Then, as an extra step, you can add floors and wall colors.
- After that, you can start adding the digital information:
- Start with the light icons
- Add labels like room temperature
Make it interactive
Your floor plan will be a layered model with the raw floor plan as the base, then a layer with entities, and on top of that overlays.
Floor plan images
The first, bottom layer is the static image of your floor plan.
Use the picture card element and upload the image to the www directory, also known as /local/, in Home Assistant.

# Sourcecode by vdbrink.github.io
# Dashboard card code
type: picture-elements
image: /local/base.png
elements:
  ...
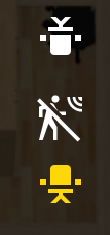
Entity icons
Entity icons (state-icon) show the icon of an entity.
By default, when you click on it, it toggles or shows the details.
![]()
# Dashboard card code
- type: state-icon
  title: motion
  entity: binary_sensor.motion_occupancy
  style:
    top: 34%
    left: 47%
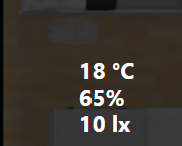
Entity labels
Entity labels (state-label) show the text value of an entity.
To format a temperature, see here.
# Dashboard card code
- type: state-label
  title: temp at room X
  entity: sensor.temp_temperature_rounded
  style:
    top: 6%
    left: 45%
    width: 10px
    text-align: left
    font-size: 0.8em
    font-weight: bold
    color: '#FFF'
Open different view on click
I use rounded temperature values on my map, but when I click on it, I want to see the normal temperature value with decimals. For this you need the extra HACS module hass-browser_mod .
Install this integration, via this button, into your own Home Assistant instance.

# Dashboard card code
- type: state-label
    title: Living temperature
    entity: sensor.tempX_temperature_rounded
    tap_action:
      action: fire-dom-event
      browser_mod:
        service: browser_mod.more_info
        data:
          entity: sensor.tempX_temperature
Click, Double-click and Long-press actions
With click actions (tap_action), double-click (double_tap_action), and long-press (hold_action), you can ignore the click (none),
toggle the status (toggle), navigate to another card (navigate),
show more info in a popup (more-info), or call a script (call-service).
Click: No action
tap_action:
  action: none
Click: Toggle status (default)
tap_action:
  action: toggle
Click: Navigate to another card
tap_action:
  action: navigate
  navigation_path: /lovelace/weather
Click: More info
tap_action:
  action: more-info
Click: Service call
tap_action:
  action: call-service
  service: script.do_something
See also the Home Assistant action documentation for the full list.
Rotations
You can rotate icons at any angle.
style:
  top: 72%
  left: 90%
  rotate: degrees(90)
or with
- type: state-icon
  entity: binary_sensor.chair_occupied
  style:
    top: 10%
    left: 20%
    transform: rotate(180deg)
Scale icons
You can change the size of an icon by defining the scale property under style.
- type: state-icon
  entity: switch.xxx
  style:
    top: 47%
    left: 62%
    scale: 150%
Change icons
You can override the default icon for each entity.
- type: state-icon
  icon: mdi:cctv
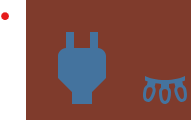
Overlays
With overlays, you can darken a room to indicate that no one is there or that no lights are on.
![]()
If you use rooms in your floor plan and they all have 90-degree angles, you can use a single small black square image to create the semi-transparent overlay.
With the right settings, you can scale it to any size by changing the style and aspect_ratio values.
In this example, I use a smart plug as the entity for the overlay.
When the plug has the state on, it is fully transparent, and when it is off, it is 75% transparent.
That way, you still see all the elements, but with a dark layer over the room.
The tap_action is disabled here.
You can also choose to control the switch by clicking the icon.
Sometimes you need to create a binary helper sensor to indicate when the layer should be active, for example when the lux value is above a certain threshold.
> Click here to see an example of a binary helper sensor >>
# Sourcecode by vdbrink.github.io
# configuration.yaml
binary_sensor:
  - platform: template
    sensors:
      overlay_x:
        friendly_name: "overlay x"
        value_template: >-
          {% if is_state('sensor.motion_illuminance_lux', 1) > 5 %}
             on
          {% else %}
             off
          {% endif %}
Overlay based on a smart plug status.
# Sourcecode by vdbrink.github.io
# Dashboard card code
- type: image
  entity: binary_sensor.overlay_x
  title: overlay
  tap_action:
    action: none
  image: /local/black.png
  aspect_ratio: 10x8.1
  style:
    top: 54%
    left: 49%
    width: 48%
    height: 2%
  state_filter:
    'on': opacity(0%)
    'off': opacity(75%)
Change layer order
When you cannot click on an entity, you need to change the order in the list. The higher it is in your YAML file, the higher it is in the layer order.
That is it from my side. I hope this information is useful and inspires you to create your own interactive floor plan in Home Assistant.
« See also my other Home Assistant tips and tricks
^^ Top | Homepage | Best Buy Tips | Automation Ideas | Blog posts