Home Assistant: Templates
![]()
Here you will find some Home Assistant helper template examples.
With these helper templates, you can create new custom sensors (conditions) based on other sensor values to use on the dashboard or in automations.
This new sensor can have a textual output or a boolean value true/false.
Table of Contents
- Home Assistant
- Template examples
- Is it a specific day in the year?
- Count the number of lights on
- Count the number of open windows
- Calculate temperature differences
- Unavailable devices
- Low battery
- Floor activity
- Day of the week translation
- Day countdown
- Minutes since mail is delivered
- Mail delivered in the last 30 minutes
- What to wear outside
- Calculate daylight brightness percentage
- Daylight brightness to opacity
- Is it morning
- Is it afternoon
- Is it night based on the sun
- Rain conditions
- CO2 threshold values
- Overlay based on lux
- Moon image based on state
- DIY Sink leak status
- DIY Chair occupancy status
Home Assistant
What is the difference between a binary and normal sensor?
A normal sensor can have any output, text, number or a boolean, and a binary sensor can only have a boolean value as output.
It can only have the state true or false.
Binary sensors are useful in automations when you want to check whether a condition matches.
How to add a template
There are two ways to add a template to your Home Assistant:
Via configuration.yaml
One way to add a new template is by adding the code to the configuration.yaml file.
In 2022, the configuration for template entities changed.
Where the configuration previously lived under the sensor: or binary_sensor: section, a new template section was introduced.
The modern template format has several advantages.
You can use a trigger and action like in automations, which gives more control over when the entity updates, and it allows you to set a state_class so the state of the entity is stored in Long Term Statistics. It also allows you to create button, image, number, and select entities, which is not possible with the legacy platform.
For more information, also see the Home Assistant documentation. The legacy format is still documented all the way at the bottom.
All the examples below start with the template: key. Be sure to define this only once in your configuration.yaml.
All template entities should be created under the same template: key.
Example directory structure
In the configuration.yaml, you can add a line that links to a file with your templates, for example a file only for binary sensors.
Add the line binary_sensors: !include binary_sensor.yaml to the configuration file.
Place the file binary_sensor.yaml in the root next to the configuration file.
That file can look like this:
# Sourcecode by vdbrink.github.io
# binary_sensor.yaml
- platform: template
  sensors:
    office_chair: # your defined name
      friendly_name: "office chair"
      value_template: >-
        {% if is_state('binary_sensor.contact10_contact', 'off') %}
           on
        {% else %}
           off
        {% endif %}
You can also create a directory and place multiple files in it, one for each different subject.
This makes it very clear and maintainable.
Create a directory, for example called sensors, in the Home Assistant root.
Now create the different .yaml files in it.
This way, you do not have to specify each filename in the configuration file, and all files in this directory will be included.
Use the following definition in configuration.yaml to accomplish this:
# Sourcecode by vdbrink.github.io
# configuration.yaml
...
sensor: !include_dir_merge_list sensors/
binary_sensor: !include binary_sensor.yaml
Via the frontend
The other way is via the frontend. You can create a new template via the Settings menu item,
then go to Devices and Services and select Helpers in the top bar.
This button opens the Helpers page directly in your Home Assistant:

Select the bottom-right button + Create Helper,
then choose Template and one of the two options: Template a sensor or Template a binary sensor.
Copy the value_template part from the examples below and add it in the visual editor under State template*.
In this example animation, a (binary) template is created to check if the current month is August.
Template helpers are easier to create, but they lack some of the options available in the YAML configuration, such as templating the sensor icon and working with triggers.
They also do not support a template for the entity availability.
How to debug a template
Via the Home Assistant frontend you can create and test a template.
Go to the Developer tools menu item,
then open the Template tab.
Or use this button to open the Helpers in your Home Assistant:

Now you are here:
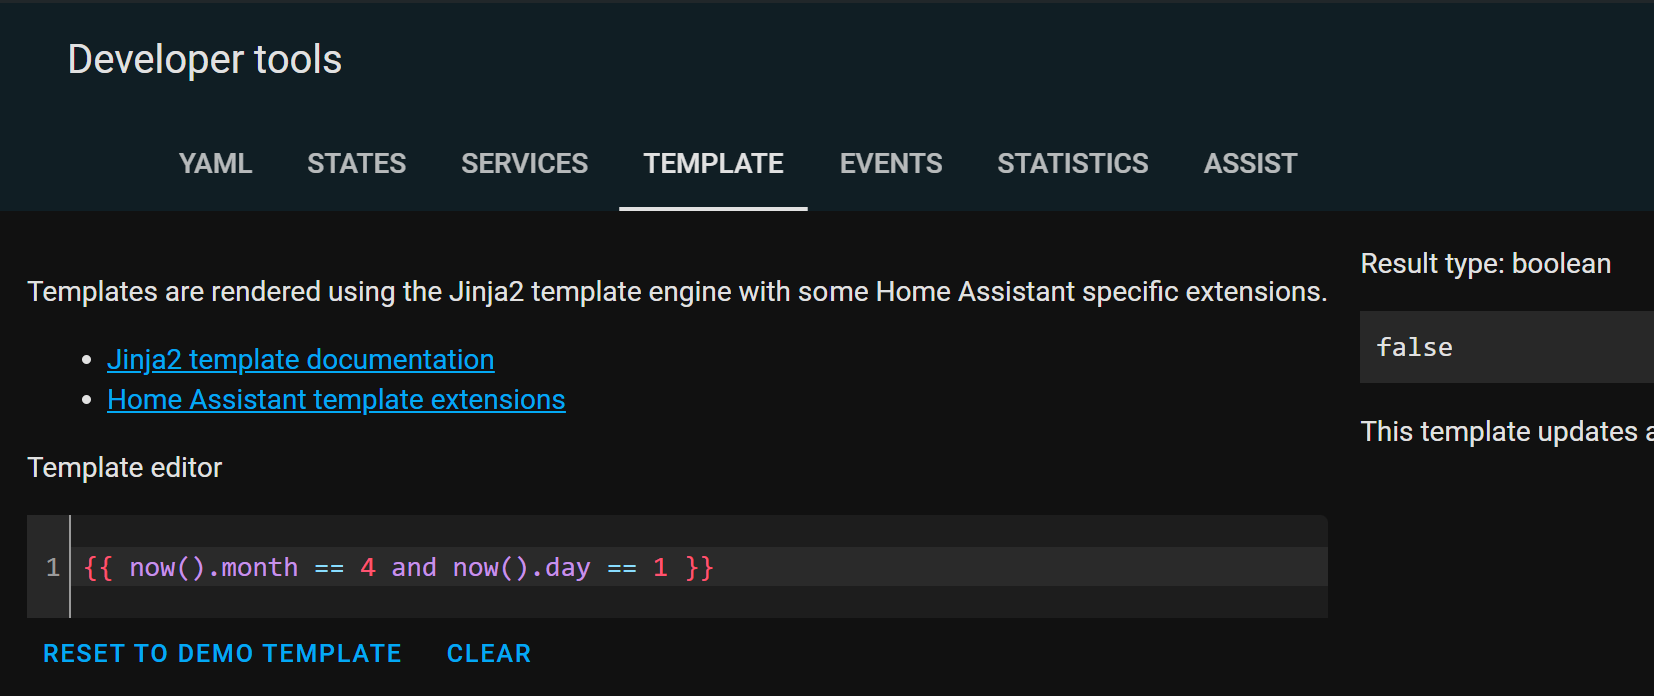
In the Template editor the code can be placed and edited, and on the right you immediately see the output.
Home Assistant uses Jinja as a template engine to combine static text with variables.
Where to get help
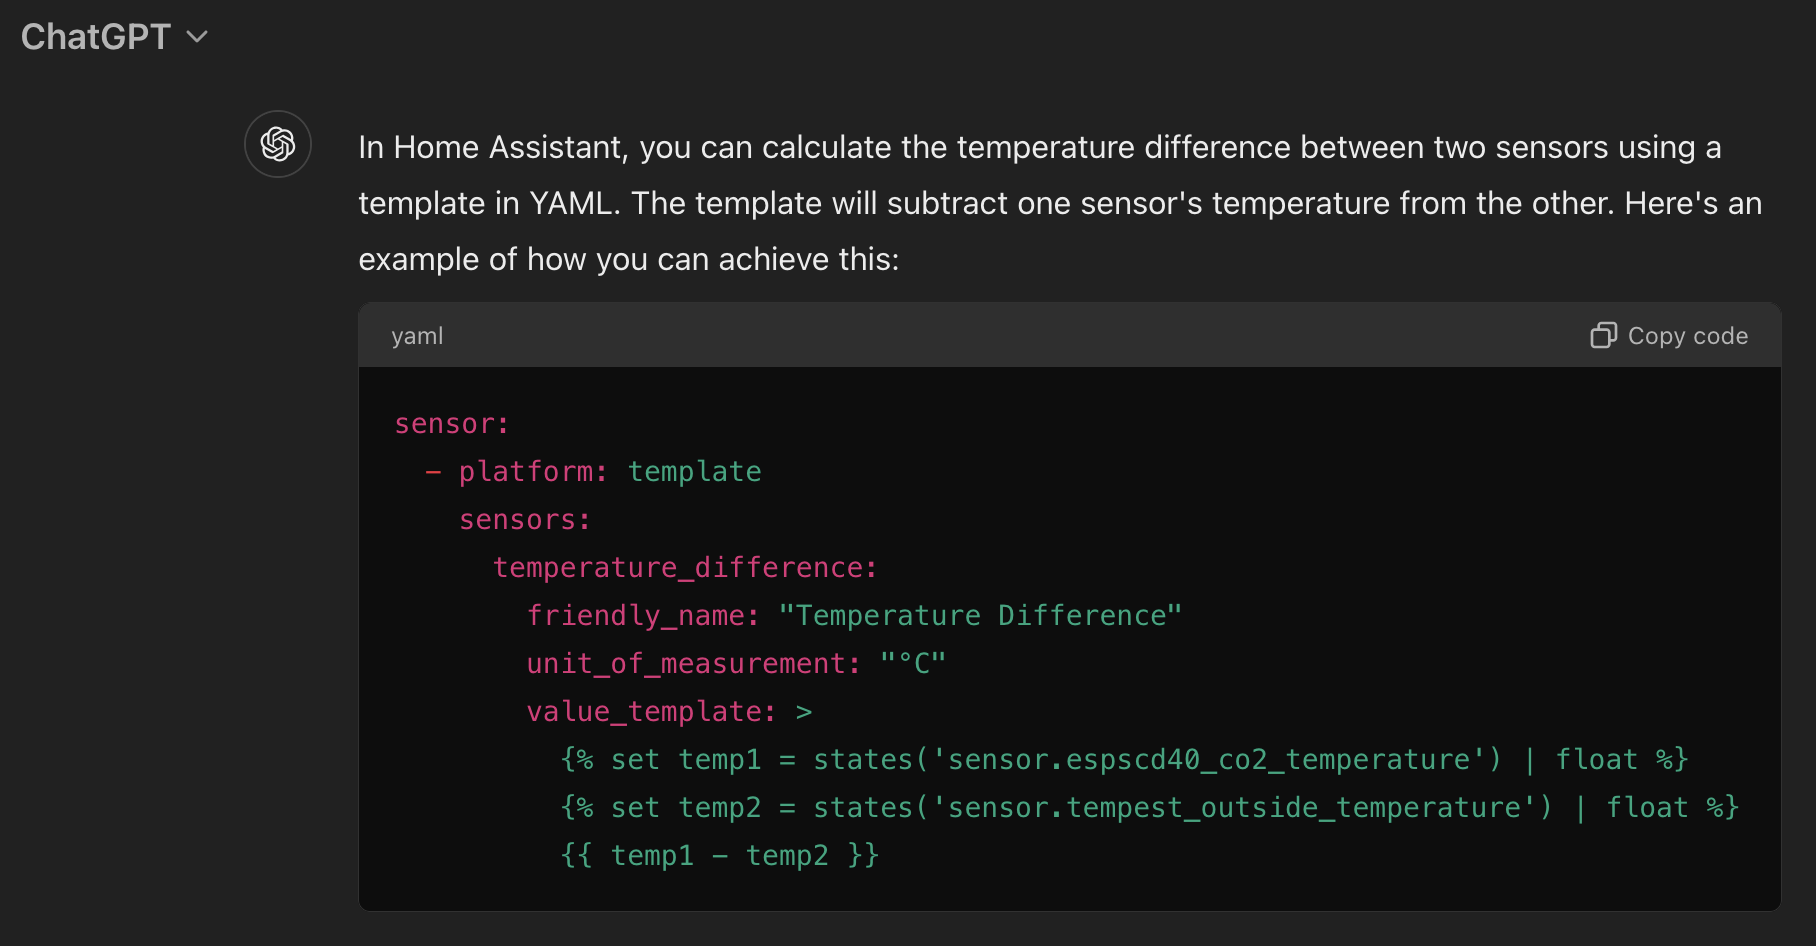
Use the examples below, search the internet, and check the Home Assistant Community forum, HA Facebook groups, Reddit, or ChatGPT to help you create your own templates.
The Home Assistant website also contains many examples.
ChatGPT is useful and fast when you want help creating a new template or refining an existing one.
Template examples
Here are all kinds of different template examples.
Note that every entity has a unique_id. This does not define the entity_id; the entity_id is defined by the name, so name: "Lights On" will generate sensor.lights_on.
By providing a unique_id, you can change the name, icon, and entity_id, and depending on the entity type, also the device_class in the frontend.
It also prevents suffixes like _2 after you change the configuration and reload the template entities.
Is it a specific day in the year?
A binary sensor can test whether it is a specific month, season, or day, such as Christmas or April Fools’ Day.
This will create binary_sensor entities that are on when the template returns true and off otherwise.
You can optionally refine the entities even more by providing a template for the icon.
# Sourcecode by vdbrink.github.io
# configuration.yaml
template:
  - binary_sensor:
      - name: "Is January"
        unique_id: is_january
        state: >
          {{ now().month == 1 }}
      - name: "Is Monday"
        unique_id: is_monday
        state: >
          {{ now().isoweekday() == 1 }}
      - name: "Is April Fools Day"
        unique_id: is_april_fools
        state: >
          {{ now().month == 4 and now().day == 1 }}
      - name: "Is Christmas"
        unique_id: is_christmas
        state: >
          {{ now().month == 12 and now().day == 25 }}
      - name: "Is around Christmas"
        unique_id: is_around_christmas
        state: >
          {{ (now().month == 12 and now().day > 10) or (now().month == 1 and now().day < 11) }}
      - name: "Is new years eve"
        unique_id: is_new_years_eve
        state: >
          {{ now().month == 12 and now().day == 31 }}
Count the number of lights on
Count the number of lights with the status on.
By checking whether the entity_id attribute exists on the light entities, it excludes the light groups created in Home Assistant.
Otherwise, it would count both the group and the members as lights, which would give a higher number than expected.
The icon changes dynamically based on the state of the sensor itself and references the state using this.state.

# Sourcecode by vdbrink.github.io
# configuration.yaml
template:
  - sensor:
      - name: "# lights on"
        unique_id: count_lights_on
        icon: "{{ 'mdi:lightbulb' if this.state | int(0) > 0 else 'mdi:lightbulb-off' }}"
        unit_of_measurement: "lights"
        state: >
          {{ states.light | rejectattr('attributes.entity_id', 'defined') | selectattr('state', 'eq', 'on') | list | count }}
Count the number of open windows
Similar to the previous example, count the number of open windows.
# Sourcecode by vdbrink.github.io
# configuration.yaml
template:
  - sensor:
      - name: "# open windows"
        unique_id: count_windows_open
        icon: "{{ 'mdi:window-open-variant' }}"
        unit_of_measurement: "windows"
        state: >
          {{ states.binary_sensor | selectattr('attributes.device_class', 'eq', 'window') | selectattr('state', 'eq', 'on') | list | count }}
Calculate temperature differences
Calculate the temperature difference between an inside room temperature and the outside temperature, and round it to two decimals.
This sensor introduces an availability template, which ensures the template sensor is only available when both source sensors are working properly.
If not, the template sensor will show as unavailable.

# Sourcecode by vdbrink.github.io
# configuration.yaml
template:
  - sensor:
      - name: "Temperature diff office and outside"
        unique_id: template_diff_office_and_outside
        icon: mdi:thermometer
        unit_of_measurement: "°C"
        state: >
          {% set temp1 = states('sensor.espscd40_co2_temperature') | float %}
          {% set temp2 = states('sensor.tempest_outside_temperature') | float %}
          {{ (temp1 - temp2) | round(2, 'ceil') }}
        availabilty: "{{ 'sensor.espscd40_co2_temperature' | has_value and 'sensor.tempest_outside_temperature' | has_value }}"
Unavailable devices
Get all devices by name that have the state unavailable in a sorted list.
As states are limited to 255 characters, the list is stored in an attribute, and the state of the entity will be a count of the unavailable devices.
The device is considered unavailable when all entities belonging to that device are unavailable, because it can happen that only one entity is unavailable for specific reasons.
The icon changes dynamically and will also show the number of devices, using 9+ when the count is over 9.
# Sourcecode by vdbrink.github.io
# configuration.yaml
template:
  - sensor:
      - name: "Unavailable devices"
        unique_id: count_unavailable_devices
        state: " {{ this.attributes.get('devices', []) | count }}"
        icon: >
          {% set count = this.attributes.get('devices', []) | count %}
          {{ 'mdi:numeric-9-plus-circle' if count > 9 else ('mdi:numeric-' ~ count ~ '-circle') }}
        attributes:
          devices: >
            {% set devices = states
                               | map(attribute='entity_id')
                               | map('device_id')
                               | select()
                               | unique
            %}
            {% set ns = namespace(unavailable=[]) %}
            {% for d in devices %}
              {% set u = device_entities(d) | select('has_value') | list | count %}
              {% if device_entities(d) | count > 0 and u == 0 %}
                {% set ns.unavailable = ns.unavailable + [device_attr(d, 'name_by_user') or device_attr(d, 'name')]  %}
              {% endif %}
            {% endfor %}
            {{ ns.unavailable }}
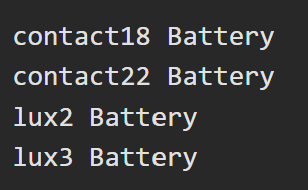
Low battery
Get all devices by name that have a battery level below 10 percent in a sorted list.
It is not possible to simply filter on the state, because all states in Home Assistant are strings, and comparing "6" with "10" gives unwanted results ("6" < "10" returns false).
Therefore, the strings need to be converted to numbers first.
Because we also want to access the other properties, this requires a for-loop.
To access the data created in the for-loop outside the loop, a namespace has to be used.
Just like in the previous example, the names are listed in an attribute, because otherwise the 255 character limit for an entity state can become an issue.
# Sourcecode by vdbrink.github.io
# configuration.yaml
template:
  - sensor:
      - name: "Low Battery Devices"
        unique_id: count_low_batt_devices
        state: " {{ this.attributes.get('devices', []) | count }}"
        icon: >
          {% set count = this.attributes.get('devices', []) | count %}
          {{ 'mdi:numeric-9-plus-circle' if count > 9 else ('mdi:numeric-' ~ count ~ '-circle') }}
        attributes:
          devices: >
            {% set threshold = 10 %}
            {% set batt_sensors = states.sensor | selectattr('attributes.device_class', 'defined') | selectattr('attributes.device_class', 'eq', 'battery') | list %}
            {% set ns = namespace(batt_low=[]) %}
            {% for s in batt_sensors if s.state | float(101) <= threshold %}
              {% set ns.batt_low = ns.batt_low + [device_attr(s.entity_id, 'name_by_user') or device_attr(s.entity_id, 'name') or s.name] %}
            {% endfor %}
            {{ ns.batt_low }}
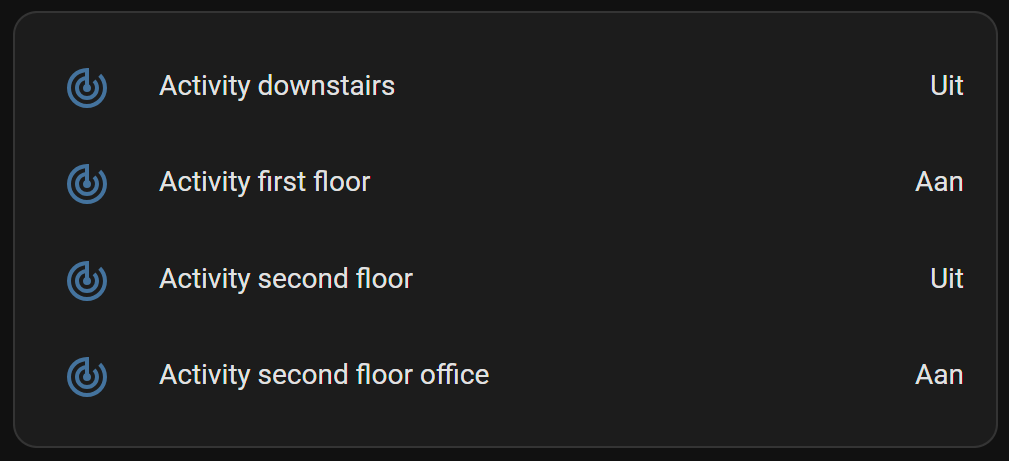
Floor activity
Check whether there is any activity on a specific floor or section based on multiple sensors.
One minute after the last trigger, the state goes back to off.
# Sourcecode by vdbrink.github.io
# configuration.yaml
template:
  - binary_sensor:
      - name: "Activity downstairs"
        unique_id: activity_downstairs_sensor
        state: >
         {{ is_state("binary_sensor.motion1_occupancy", "on")
           or is_state("binary_sensor.motion2_occupancy", "on")
           or is_state("binary_sensor.motion3_occupancy", "on")
         }}
        device_class: occupancy
        delay_off: "00:01:00"
Day of the week translation
By default, the day of the week is in English.
With this template, it translates the day to a non-English language, in this case Dutch.
# Sourcecode by vdbrink.github.io
# configuration.yaml
template:
  - sensor:
      - name: "Day of week"
        unique_id: day_of_week_sensor
        icon: mdi:calendar
        state: >
          {{ ["maandag", "dinsdag", "woensdag", "donderdag", "vrijdag", "zaterdag", "zondag"][now().weekday()] }}
Day countdown
This day countdown can be used to show the days until a special day, such as a wedding, the birth of a child, a birthday, Christmas, or, in this example, Home Assistant Community Day.

Create date sensor
First, you need to create two helpers:
- One to define the date itself, which can be done with a
Date and/or timehelper; - The other to calculate the difference between the date and today, which can be done with a
template a sensorhelper.
Check here (also on this page) how to create these two helpers via the frontend.
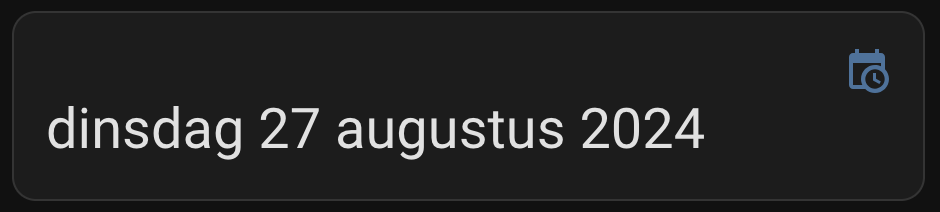
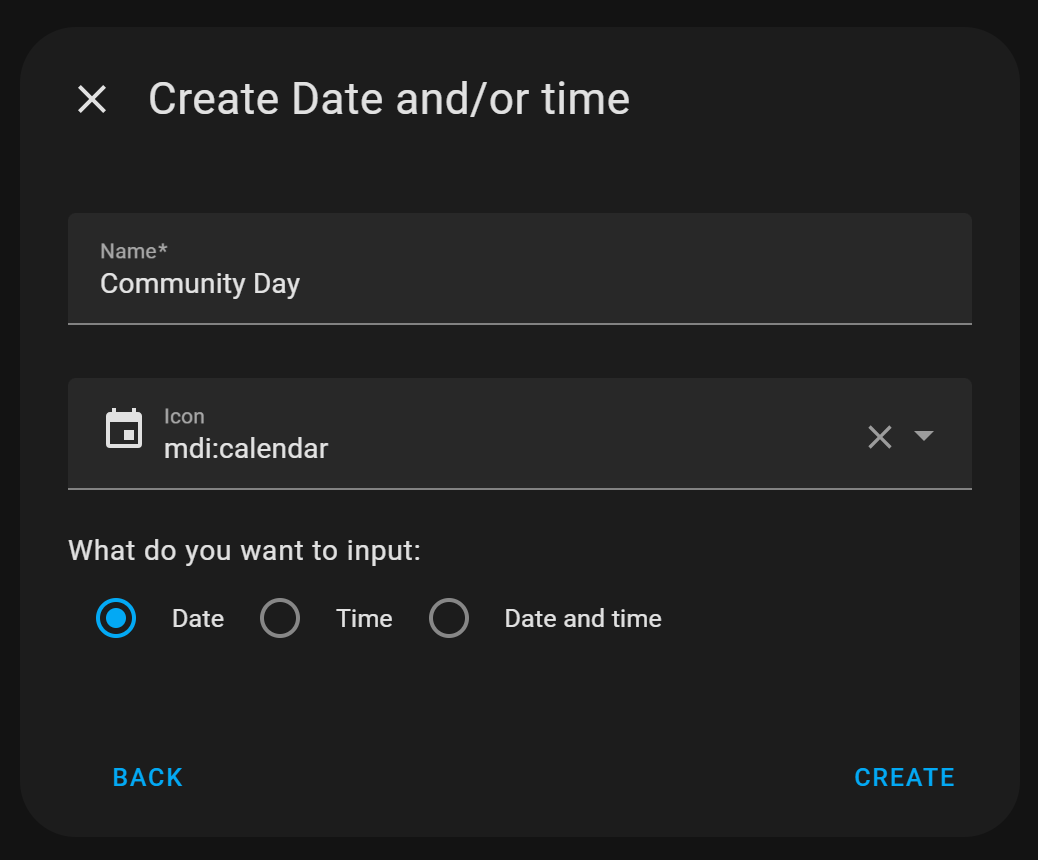
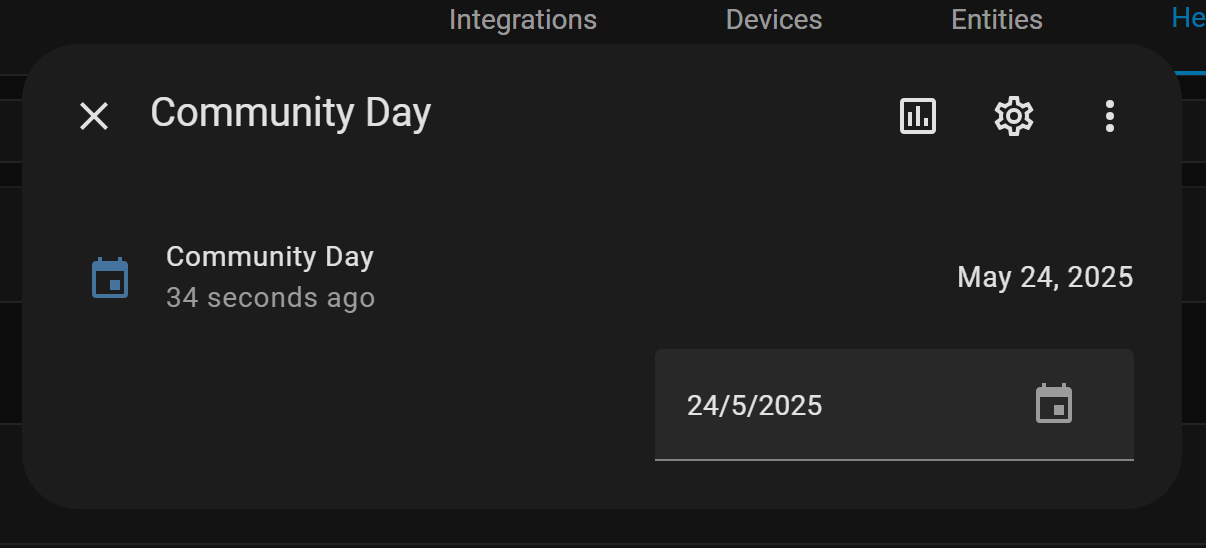
The first helper is a Date and/or time helper.
Give it a name, in this case Community Day.
Select Date as the input type.
Once the helper input_datetime.community_day is created, click it and set the correct date.
Now the helper is ready.
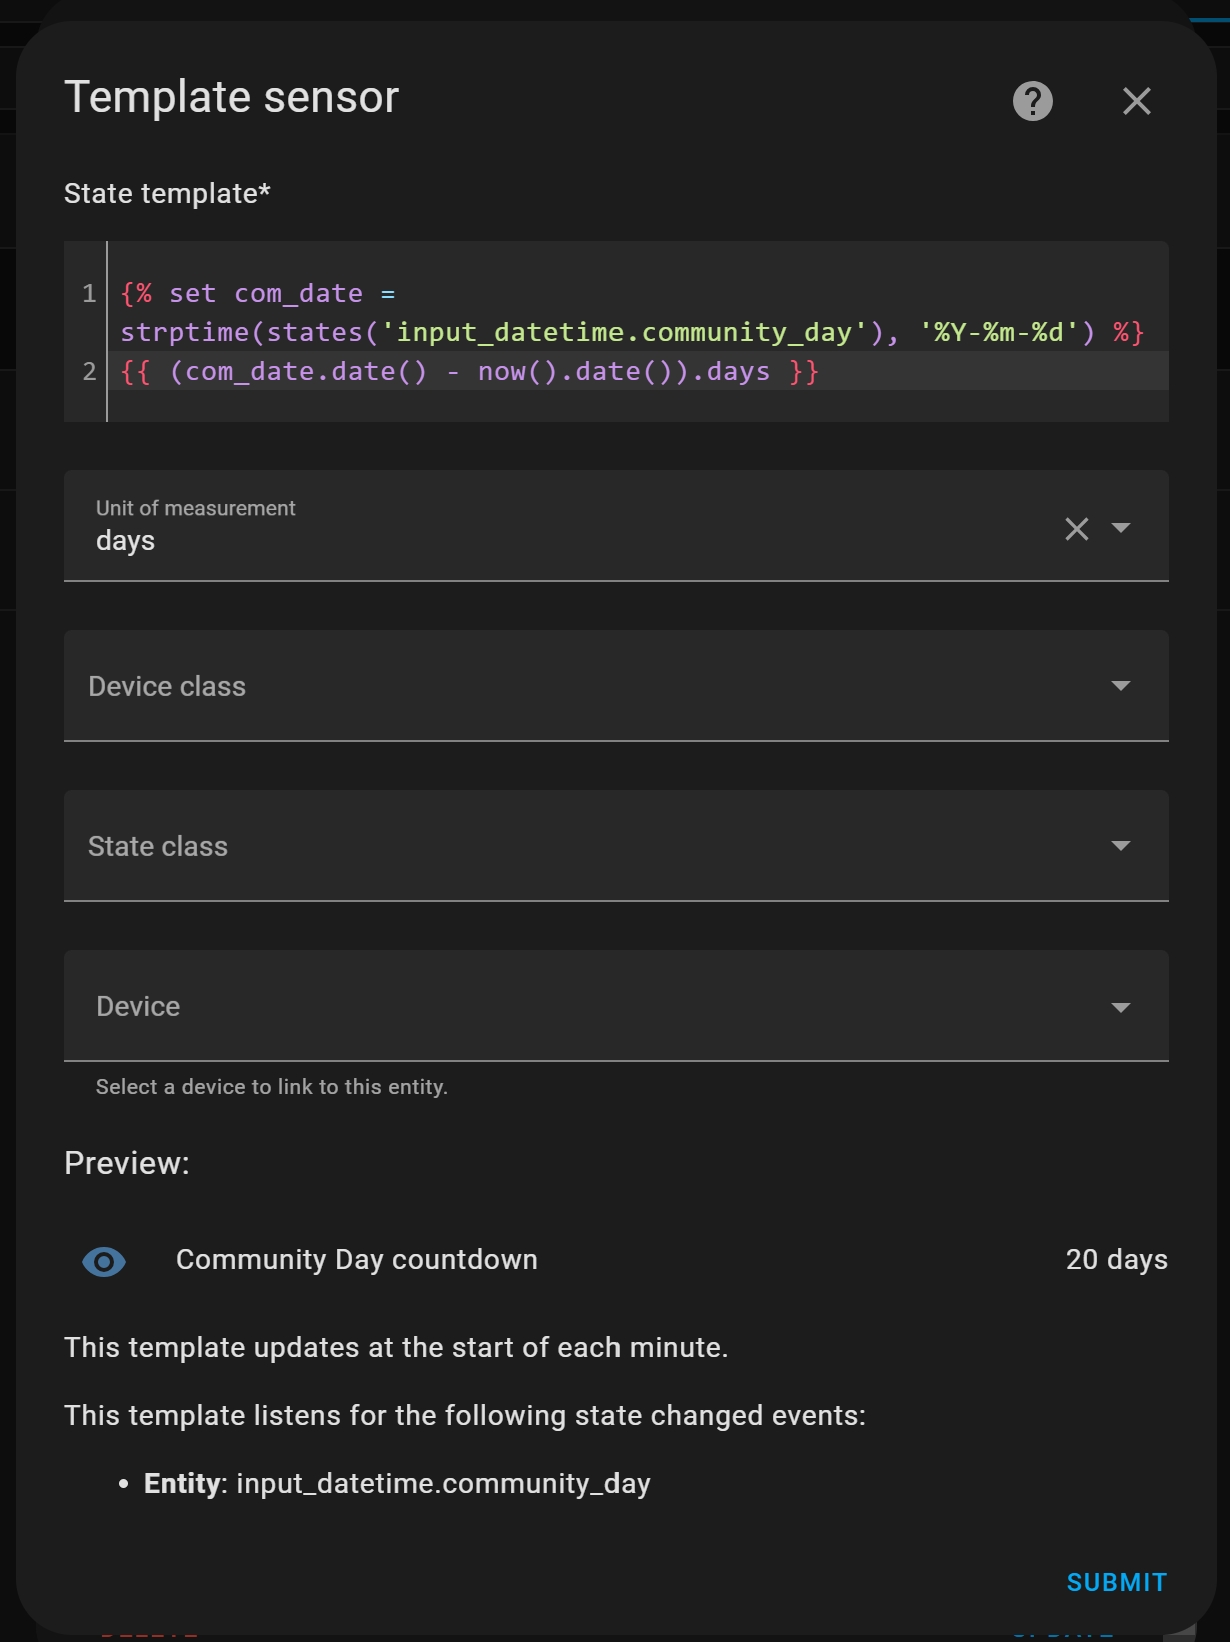
Now we need to create another sensor,
of the type template a sensor, to calculate the days until the defined date.
The State template must be:
# Sourcecode by vdbrink.github.io
{% set com_date = strptime(states('input_datetime.community_day'), '%Y-%m-%d') %}
{{ (com_date.date() - now().date()).days }}
In the Unit of measurement field, you can enter days as the unit.
The other fields are not required.
Now you have created the two required helpers.
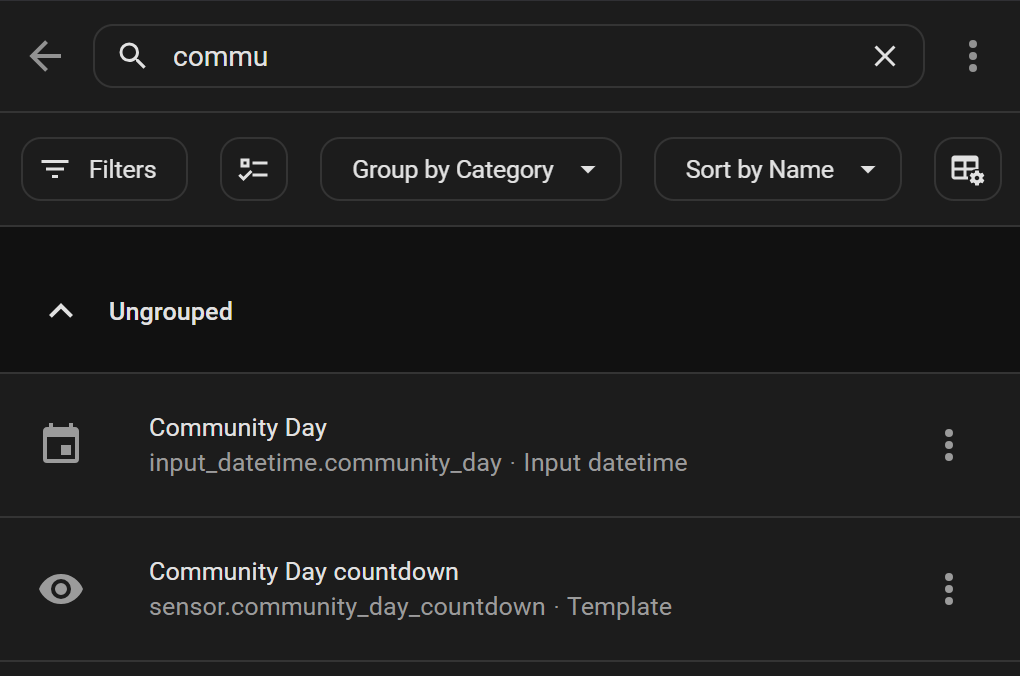
Now we can create a presentation with this data.
Community day countdown
To present the number of days before Home Assistant Community Day, I used a Picture Entity card, so I could use a matching background image. This is what I added to my own dashboard:
The corresponding code:
# Sourcecode by vdbrink.github.io
type: picture-entity
entity: sensor.community_day_countdown
show_state: true
show_name: false
image: >-
  https://images.lumacdn.com/cdn-cgi/image//calendar-cover-images/ud/ec89cf26-ebe8-4966-b2b6-ac982a5ebf57.png
Alternative presentation
I also created a slightly different presentation for the countdown with some CSS modifications to the Picture Entity card.
- No transparent background
- black text color
- bigger font
For the Picture Entity card, I used the card_mod integration.
You can install this integration via this button in your own Home Assistant instance.


# Sourcecode by vdbrink.github.io
type: picture-entity
entity: sensor.community_day_countdown
show_state: true
show_name: false
image: >-
  https://images.lumacdn.com/cdn-cgi/image//calendar-cover-images/ud/ec89cf26-ebe8-4966-b2b6-ac982a5ebf57.png
card_mod:
  style: |
    ha-card {
      .footer {
        background: none;
        color: black;
        font-weight: 800;
      }
    }
You can also use this taller alternative image: https://www.home-assistant.io/images/blog/2025-04-community-day/art.png
Trash bin day countdown
Count the days until the paper bin is picked up.

# Sourcecode by vdbrink.github.io
# configuration.yaml
template:
  - sensor:
      - name: "Paper Waste Pickup Countdown"
        unique_id: paper_waste_pickup_countdown
        icon: mdi:delete-empty
        state: >
          {% set pickup_date = strptime(state_attr('sensor.cyclus_papier','Sort_date'), '%Y%m%d') %}
          {{ (pickup_date.date() - now().date()).days }}
        unit_of_measurement: days
        availability: "{{ strptime(state_attr('sensor.cyclus_papier','Sort_date', none), '%Y%m%d') is not none }}"
The sensor sensor.cyclus_papier has an attribute Sort_date that holds the date for the bin pickup day in the format YYYYMMDD.
Based on today’s date, the difference in days is calculated.
(The sensor value is not always accurate, which is why I use the attribute value.)

Is tomorrow a trash bin day
Check if tomorrow is any waste pickup day.
This sensor will be named sensor.waste_tomorrow.
# Sourcecode by vdbrink.github.io
# configuration.yaml
template:
  - sensor:
      waste_tomorrow:
        friendly_name: tomorrow bin day
        value_template: >
          {{
            is_state('sensor.gft_waste_pickup_countdown', '1') or
            is_state('sensor.paper_waste_pickup_countdown', '1') or
            is_state('sensor.plastic_waste_pickup_countdown', '1') or
            is_state('sensor.rest_waste_pickup_countdown', '1')
          }}
See here for how to create the *_waste_pickup_countdown sensors.
Minutes since mail is delivered
Minutes since the snail mail was delivered.

# Sourcecode by vdbrink.github.io
# configuration.yaml
template:
  - sensor:
      - name: "Mail delivered"
        unique_id: sensor_mail_delivered
        state: >
          {% set mailbox_datetime = states.binary_sensor.contact2_contact.last_changed %}
          {{ (now() - mailbox_datetime).total_seconds() // 60  }}
        icon: mdi:mailbox
        unit_of_measurement: minutes
Mail delivered in the last 30 minutes
Boolean sensor binary_sensor.mailbox_recently_changed to indicate that mail was delivered in the last 30 minutes.
Used in my snail mail detection.
# Sourcecode by vdbrink.github.io
# configuration.yaml
template:
  - sensor:
      mailbox_recently_changed:
        friendly_name: "Mail delivered last 30 minutes"
        icon_template: mdi:radar
        value_template: >
          {{ (now() - states.binary_sensor.contact2_contact.last_changed).total_seconds() < 1800 }}
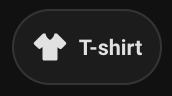
What to wear outside
Based on the outside temperature, determine what to wear when you go outside.
# Sourcecode by vdbrink.github.io
# configuration.yaml
template:
  - sensor:
      - name: "Wear outside"
        unique_id: sensor_wear_outside
        icon: mdi:tshirt-crew
        state: >-
          {% set temp = states('sensor.tempest_temperature_feels_like_rounded') | float %}
          {% if temp <= 5 %}
            winter jacket and hand gloves
          {% elif temp <= 14 %}
            softshell
          {% elif temp <= 18 %}
            thin jacket
          {% else %}
            T-shirt
          {% endif %}
        availability: "{{ 'sensor.tempest_temperature_feels_like_rounded' | has_value }}
This is the code for the Mushroom card shown in the image, based on this template.
# Sourcecode by vdbrink.github.io
# dashboard card code
type: custom:mushroom-chips-card
chips:
  - type: entity
    entity: sensor.what_to_wear_outside
    icon: mdi:tshirt-v
Calculate daylight brightness percentage
Based on the sun sensor elevation and cloud coverage, calculate the daylight brightness percentage. This can be used to control the lights, the window blinds, or a floor map overlay image.
# Sourcecode by vdbrink.github.io
# configuration.yaml
template:
  - sensor:
      - name: "Sunlight pct"
        unique_id: sunlight_pct_sensor
        state: >
          {%- set elevation = state_attr('sun.sun','elevation') | float %}
          {%- set cloud_coverage = states('sensor.dark_sky_cloud_coverage') | float %}
          {%- set cloud_factor = (1 - (0.75 * ( cloud_coverage / 100) ** 3 )) %}
          {%- set min_elevation = -6 %}
          {%- set max_elevation = 90 %}
          {%- set adjusted_elevation = elevation - min_elevation %}
          {%- set adjusted_elevation = [adjusted_elevation,0] | max %}
          {%- set adjusted_elevation = [adjusted_elevation,max_elevation - min_elevation] | min %}
          {%- set adjusted_elevation = adjusted_elevation / (max_elevation - min_elevation) %}
          {%- set adjusted_elevation = adjusted_elevation %}
          {%- set adjusted_elevation = adjusted_elevation * 100 %}
          {%- set brightness = adjusted_elevation * cloud_factor %}
          {{ brightness | round }}
        unit_of_measurement: '%'
        device_class: 'illuminance'
Daylight brightness to opacity
Daylight brightness, from the previous template, converted to opacity for CSS to use as an overlay on a floor map.
# Sourcecode by vdbrink.github.io
# configuration.yaml
template:
  - sensor:
      - name: "Sunlight Opacity"
        unique_id: sensor_sunlight_opacity
        state: >
          {%- set sunpct = states('sensor.sunlight_pct') | float %}
          {{ sunpct / 100 | float }}
Is it morning
Boolean state for whether it is morning based on the current time.
It is on before 12:00.
# Sourcecode by vdbrink.github.io
template:
  - binary_sensor:
      - name: "Is it morning"
        unique_id: binary_sensor_morning_state
        state: "{{ as_timestamp(now()) | timestamp_custom('%H') | int > 12 }}"
Is it afternoon
Boolean state for whether it is afternoon based on the current time.
It is on after 12:00 and before 18:00.
# Sourcecode by vdbrink.github.io
template:
  - binary_sensor:
      - name: "Is it morning"
        unique_id: binary_sensor_morning_state
        state: "{{ 12 <= (as_timestamp(now()) | timestamp_custom('%H') | int) < 18 }}"
Is it night based on the sun
Boolean state if it is night.
Will be on when it’s night, otherwise it will be off.
# Sourcecode by vdbrink.github.io
# configuration.yaml
template:
  - binary_sensor:
      - name: "Night State"
        unique_id: binary_sensor_night_state
        state: "{{ is_state('sun.sun', 'below_horizon') }}"
        icon: "{{ 'mdi:weather-night' if is_state('sun.sun', 'below_horizon') else 'mdi:weather-sunny' }}"
Rain conditions
In the Netherlands, there are two main data providers for expected rain: Buienalarm and Buienradar.
For now, I created a few example conditions based on the Buienalarm data.
If there is interest, I will add the same conditions for Buienradar and for both combined.
First, you need to get the expected rain data as a sensor in Home Assistant. Install the Neerslag App integration. This generates the required sensors and includes a dashboard graph.
Any rain expected
Check whether any rain is expected in the next 2 hours based on the Buienalarm data.
This can be used as a conditional helper sensor.
# Sourcecode by vdbrink.github.io
# configuration.yaml
template:
  - binary_sensor:
      - name: "Rain expected binary"
        unique_id: rain_expected_binary
        state: "{{ state_attr("sensor.neerslag_buienalarm_regen_data","data").precip | sum > 0 }}"
        availability: "{{ 'sensor.neerslag_buienalarm_regen_data' | has_value }}"
Expected rain amount
Expected rain amount for the coming hours based on the Dutch Buienalarm data.

# Sourcecode by vdbrink.github.io
# configuration.yaml
template:
  - sensor:
      - name: "Rain Expected"
        unique_id: sensor_expected_rain
        state: >
          {% set rain = state_attr('sensor.neerslag_buienalarm_regen_data', 'data').precip %}
          {{ rain | sum | round }}
        unit_of_measurement: 'mm'
Rain intensity
Rain intensity for the coming hours based on the Dutch Buienalarm data.

# Sourcecode by vdbrink.github.io
# configuration.yaml
template:
  - sensor:
      - name: Buienalarm Rain Level
        icon: mdi:weather-pouring
        state: >-
          {% set threshold_light = '0.4' | float %}
          {% set threshold_medium = '2.0' | float %}
          {% set threshold_heavy = '5.0' | float %}
          {% set rain = state_attr('sensor.neerslag_buienalarm_regen_data', 'data').precip[0] %}
          {% if rain >= threshold_light %}
            light rain
          {% elif rain >= threshold_medium %}
            medium rain
          {% elif rain >= threshold_heavy %}
            heavy rain
          {% else %}
            no rain
          {% endif %}
Buienradar data
The Buienradar data looks completely different.
The sensor name is sensor.neerslag_buienradar_regen_data.
And the data looks like:
data: 000|11:00 000|11:05 000|11:10 000|11:15 000|11:20 000|11:25 000|11:30 000|11:35 000|11:40 000|11:45 000|11:50 000|11:55 000|12:00 000|12:05 000|12:10 000|12:15 000|12:20 000|12:25 000|12:30 000|12:35 000|12:40 000|12:45 000|12:50 000|12:55
NOTE: Later, I may add more examples with this data if people ask for them.
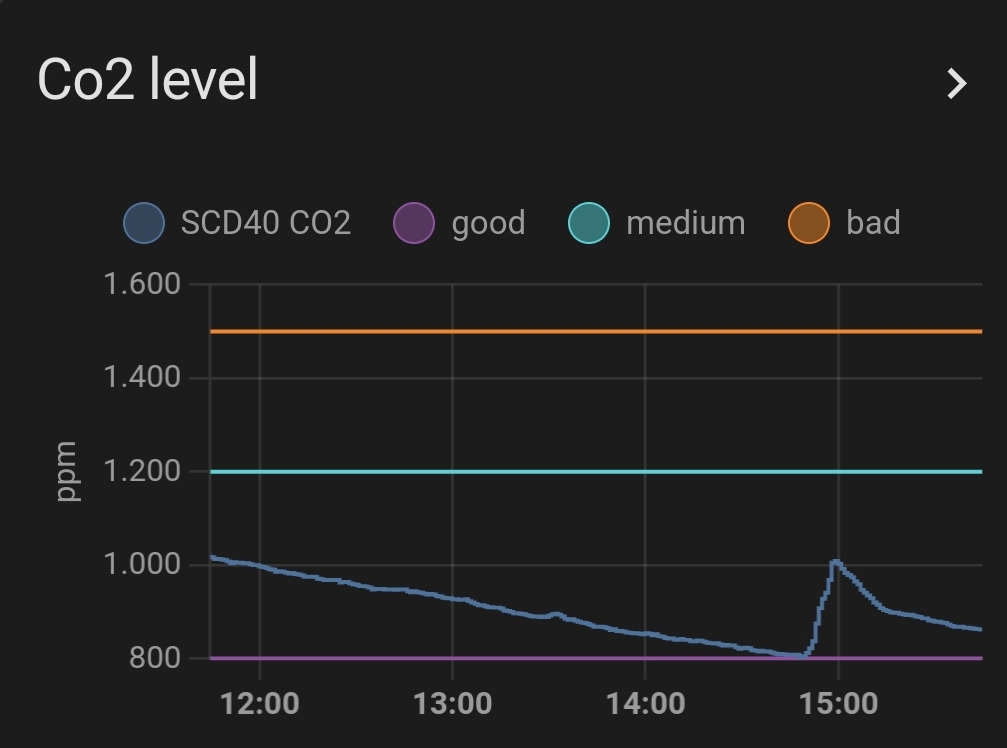
CO2 threshold values
Create three static value sensors with the threshold values 800, 1200, and 1500.
Because the entity_id is based on the name field, this template sensor uses a trick to give it the right name when the entity is created.
After that, the name will indicate the threshold.
# Sourcecode by vdbrink.github.io
# configuration.yaml
template:
  - sensor:
      - name: "{{ 'CO2 value 800' if this.state == 'unknown' else 'Good' }}"
        unique_id: sensor_co2_value_800
        state: 800
        unit_of_measurement: "ppm"
      - name: "{{ 'CO2 value 1200' if this.state == 'unknown' else 'Good' }}"
        unique_id: sensor_co2_value_1200
        state: 1200
        unit_of_measurement: "ppm"
      - name: "{{ 'CO2 value 1500' if this.state == 'unknown' else 'Good' }}"
        unique_id: sensor_co2_value_1500
        state: 1500
        unit_of_measurement: "ppm"
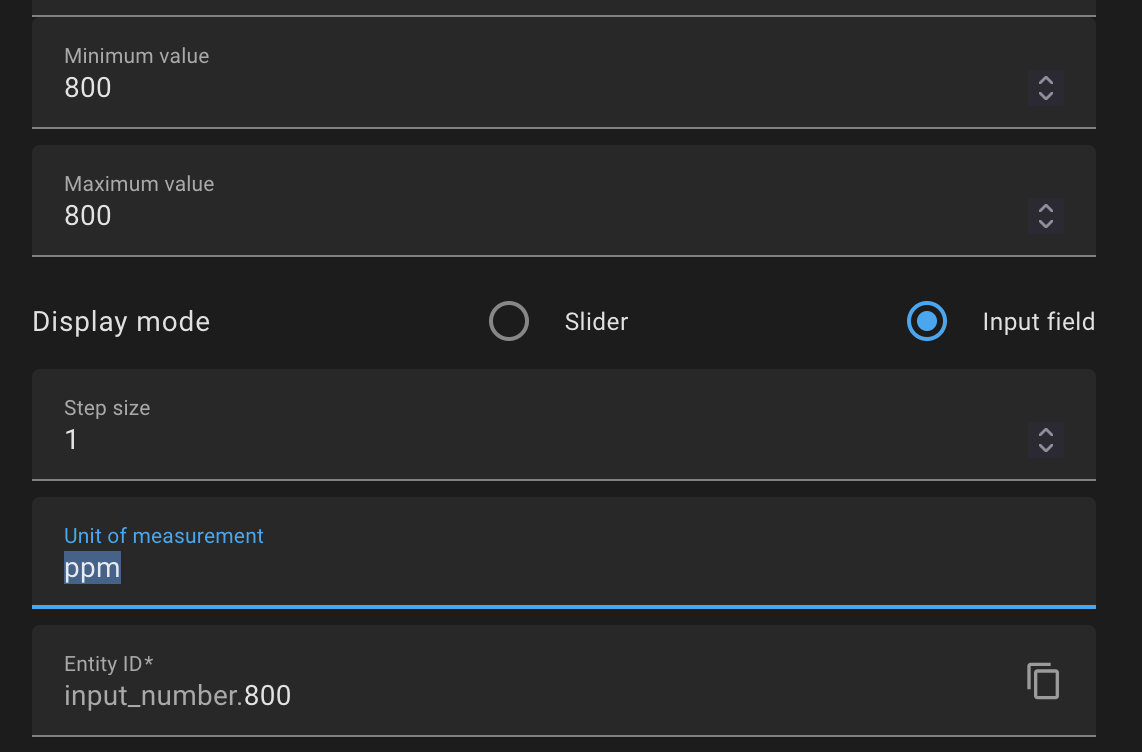
It is also possible to use a Number helper for this.
This generates an input_number.800 entity, which can also be used in graphs.
It is important to set the correct unit of measurement here as well.
Overlay based on lux
When you have a floor plan and want to show a dark overlay when the lux is low, you can create a new binary sensor based on the lux value.
# Sourcecode by vdbrink.github.io
# configuration.yaml
template:
  - binary_sensor:
      - name: "Overlay"
        unique_id: sensor_overlay
        state: "{{ states('sensor.motion_illuminance_lux') | float > 5 }}"
        availability: "{{ 'sensor.motion_illuminance_lux' | has_value }}"
Moon image based on state
The default moon component in Home Assistant gives the moon phase as a text value. With an image for each phase, you can show the moon phase as an image.
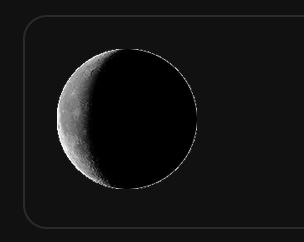
Download here the moon images.
# Sourcecode by vdbrink.github.io
# configuration.yaml
# the template for the moon phase pictures using the original moon component
template:
  - sensor:
      - name: "Moon phase"
        unique_id: sensor_moon_phase
        state: "{{ states('sensor.moon') }}"
        entity_picture: /local/moon_phases/{{ this.state }}.png
DIY Sink leak status
I created a custom leak sensor based on a contact sensor.
The sensor stores the value in the contact attribute when it detects a leak.
This attribute is then used to create a boolean value.

# Sourcecode by vdbrink.github.io
# configuration.yaml
template:
  - sensor:
      - name: "Leak Sink"
        unique_id: sensor_leak_sink
        icon: mdi:water
        state: >
          {{ state_attr('binary_sensor.water_contact', 'contact') | lower }}
DIY Chair occupancy status
I created a custom chair occupancy sensor based on a contact sensor.
If you sit on it, the contact sensor returns off.
The normal value of the contact sensor needs to be inverted.
That is what happens here.

# Sourcecode by vdbrink.github.io
# configuration.yaml
template:
  - binary_sensor:
      - name: "Chair"
        unique_id: binary_sensor_chair
        state: >
          {{ is_state('binary_sensor.contact1_contact', 'off') }}
        device_class: presence
That is it. I hope you can use some of these templates in your own setup.
Let me know which cool templates you use!
« See also my other Home Assistant tips and tricks
See also my Smart home Best Buy Tips:
^^ Top | Homepage | Best Buy Tips | Automation Ideas | Blog posts