Home Assistant - HACS Afvalbeheer
Here you find Home Assistant (lovelace) dashboard examples related to the custom HACS integration Afvalbeheer which you can easily use on your own dashboards.
Afvalbeheer is a Dutch and Belgium integration that works for many waste collectors. This integration adds sensors to Home Assistant to show when a specific trash bin a.k.a. “kliko” (or for people in the east of NL call it “otto”) get picked up.
Check the git repository to find all the options and if you can use it in your city: https://github.com/pippyn/Home-Assistant-Sensor-Afvalbeheer/
UPDATE 01-08-2025: Since version 6.0.0 YAML configuration is deprecated. All new installations and configurations should use the Home Assistant UI (Config Flow). Existing YAML configurations will automatically be imported and should be removed manually from configuration.yaml after the migration.
For myself: I had enabled the prefix, but it wasn’t migrated correct and I had to rename the new sensors from
sensor.papiertosensor.<prefix>_papiermanually.
Table of Contents
Introduction
I want to show the upcoming waste collecting not with a date, like 15-04-2024, as state but with a number of days countdown.
Also, a presentation that shows only the ones that are relevant for the upcoming few days.
This is not available by default, but I’ve made it the way I wanted it.
I also add some extra dashboard presentation examples.
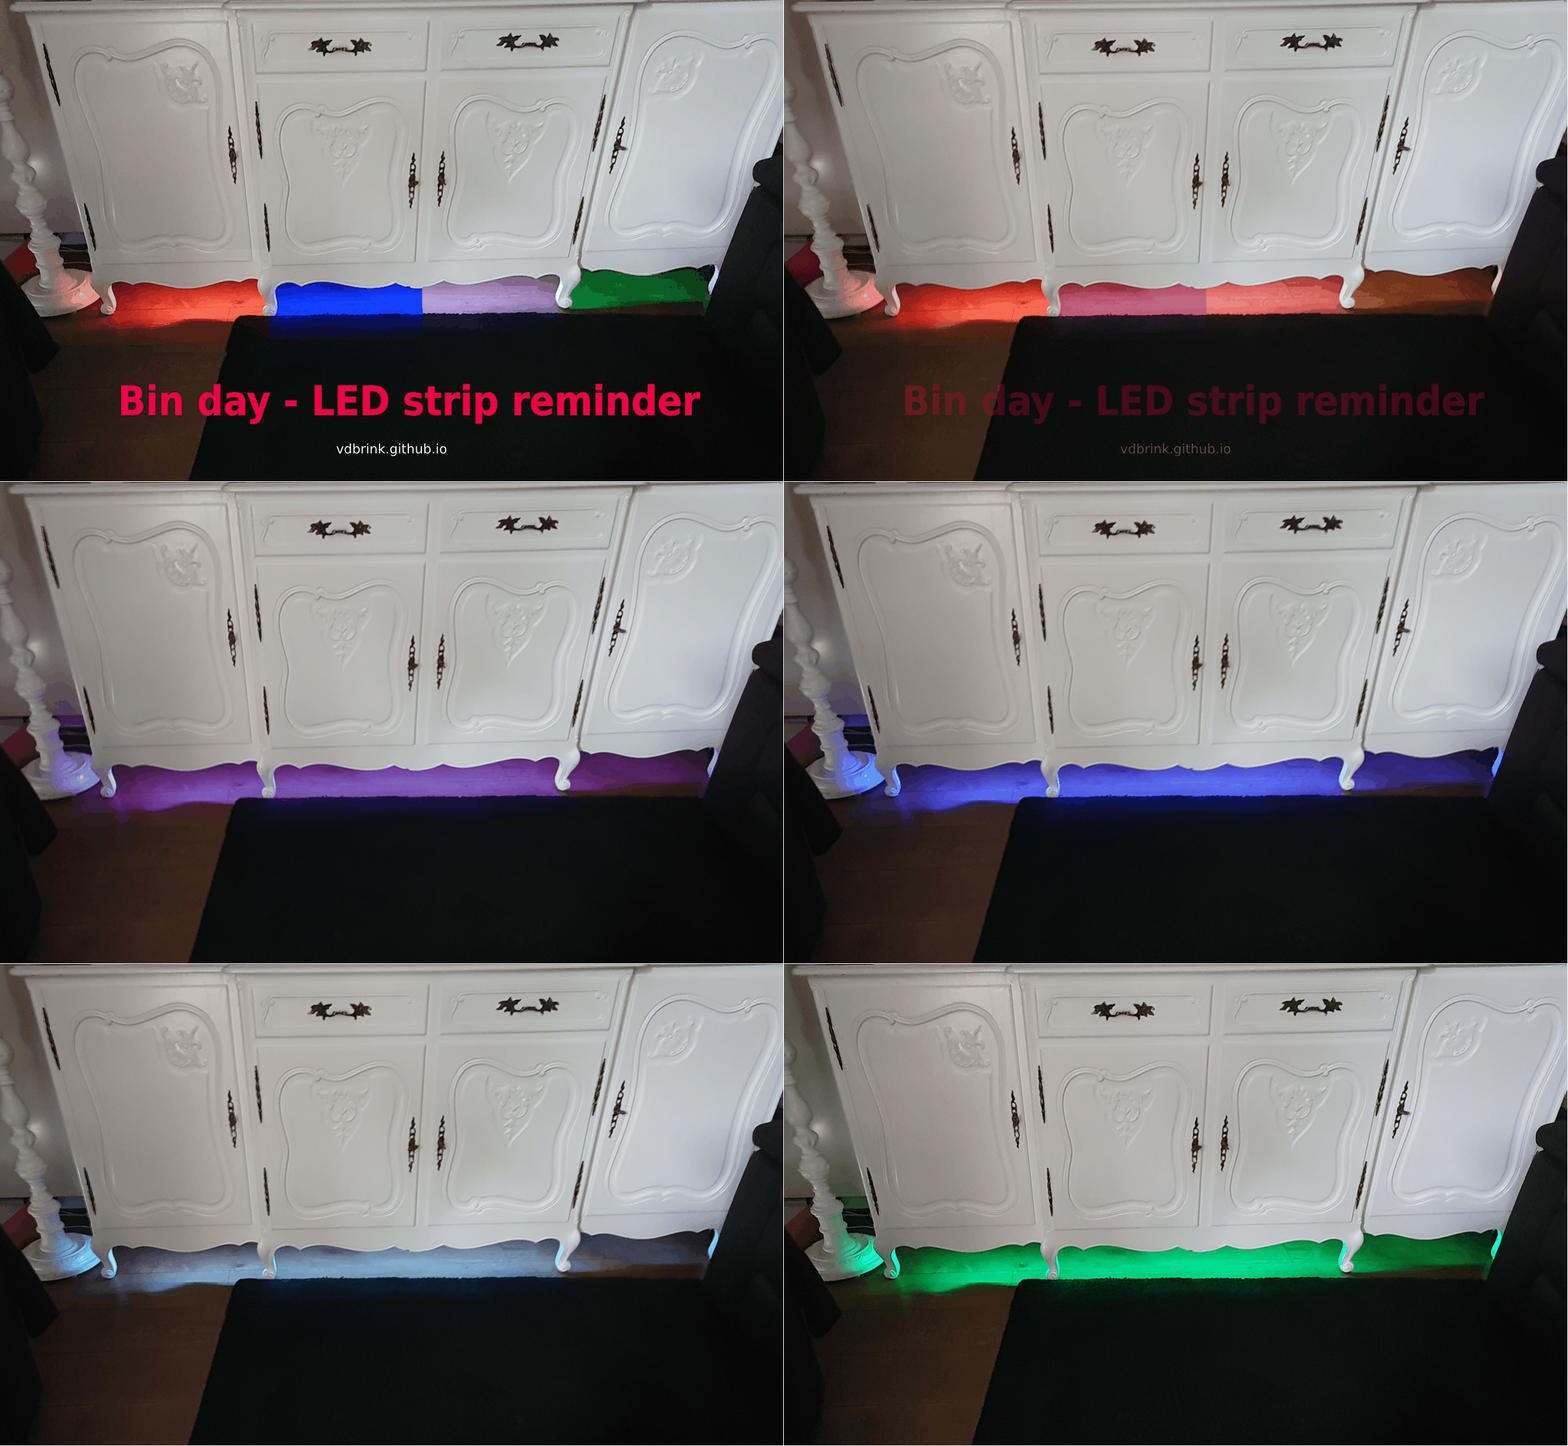
With this data, I also automated a LED strip to indicate which bin has to put outside for tomorrow.
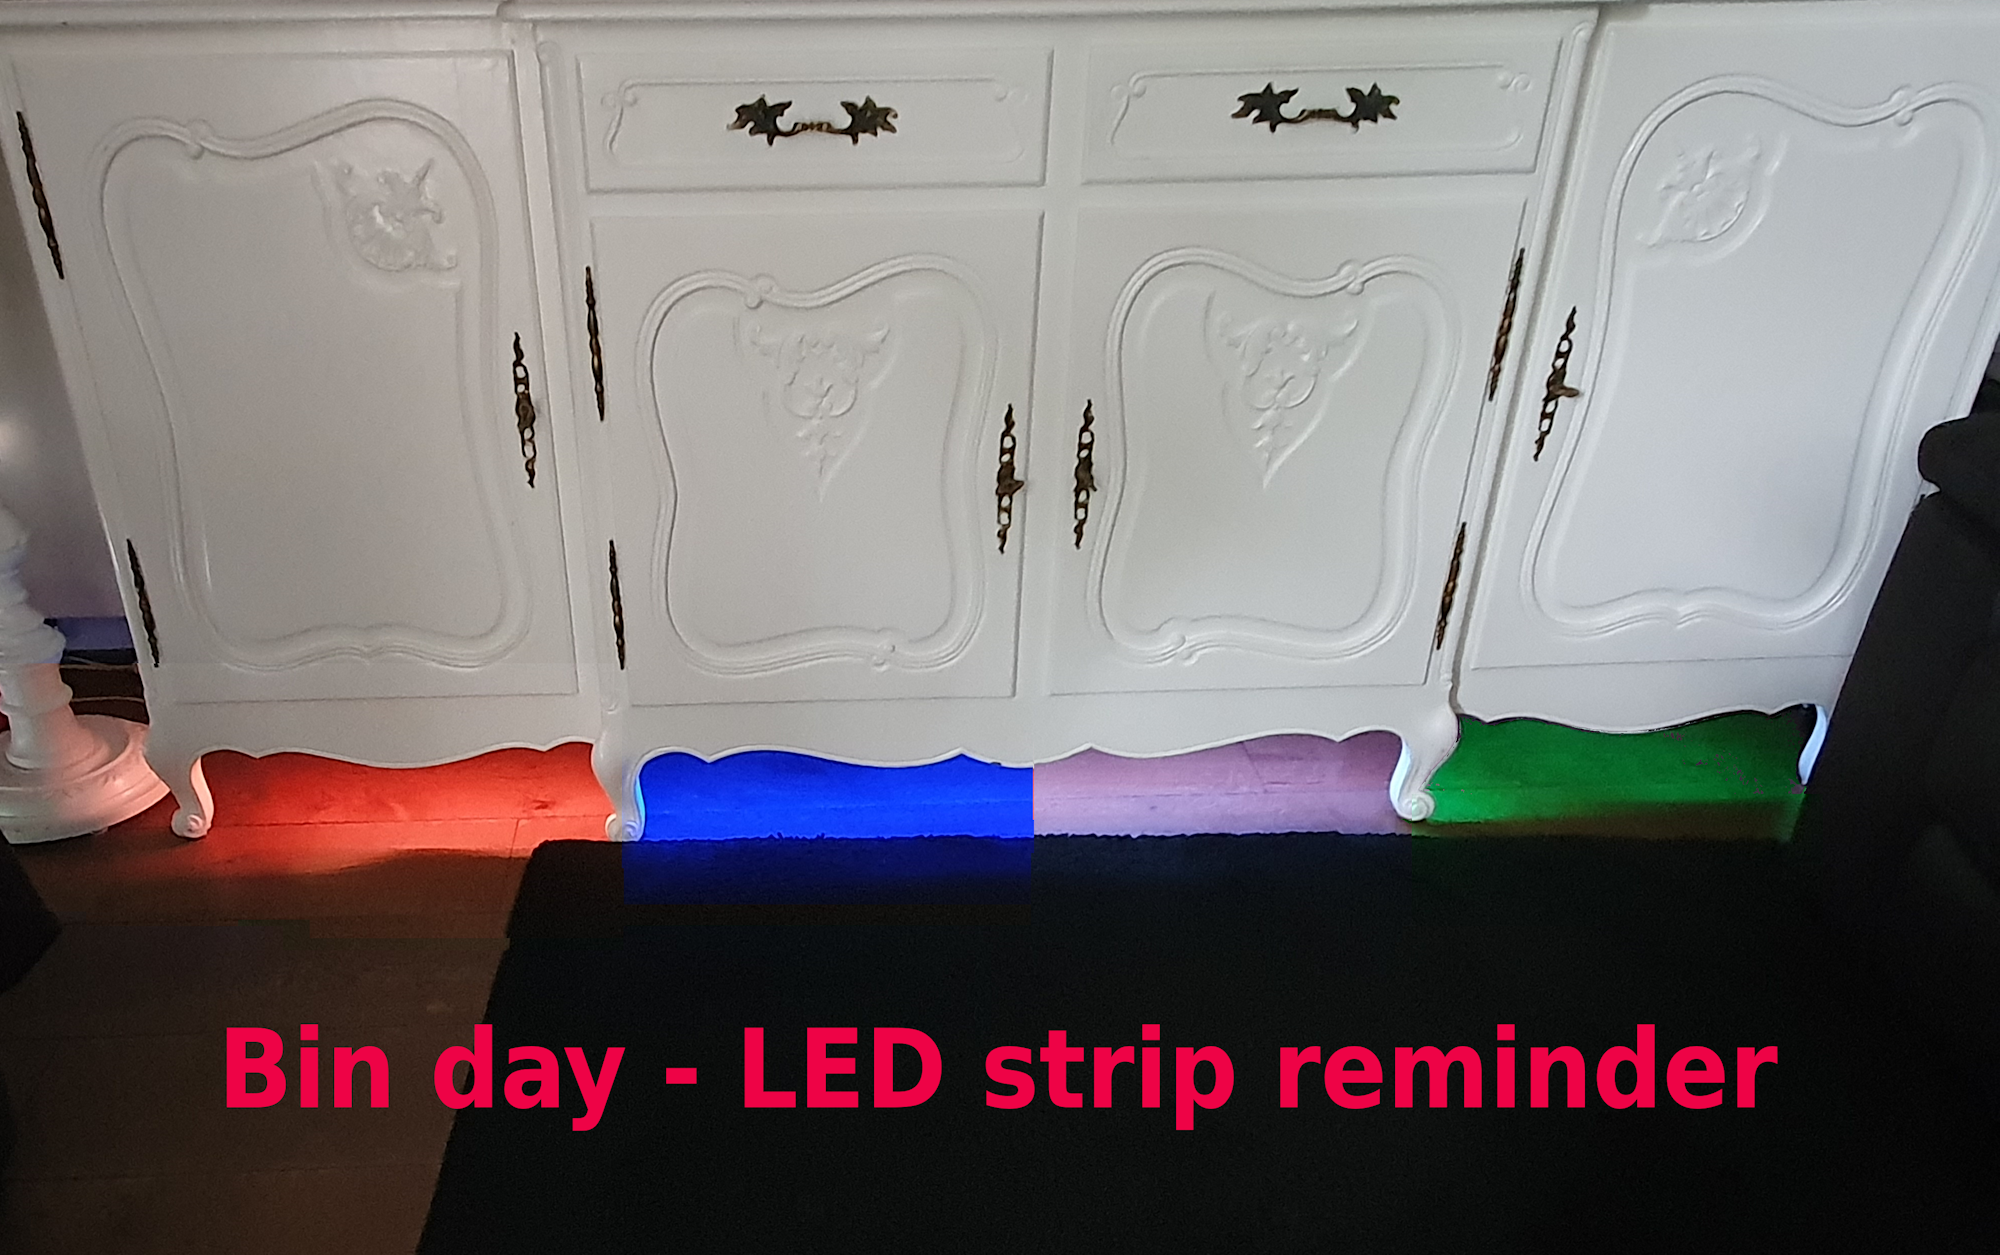
Enjoy reading it, and hopefully you can use it for your own dashboard.
Installation
Afvalbeheer integration
The HACS integration afvalbeheer is available for a lot of Dutch and Belgium cities to get the collection days.
After the installation you need to add and config these settings in your configuration.yaml.
# Sourcecode by vdbrink.github.io
# configuration.yaml
afvalbeheer:
    wastecollector: XXX  # Check https://github.com/pippyn/Home-Assistant-Sensor-Afvalbeheer/?tab=readme-ov-file#wastecollector
    resources:
        - restafval
        - gft
        - papier
        - pmd
    postcode: 1234AB
    streetnumber: 1
    upcomingsensor: 0        # (optional)
    dateformat: '%d-%m-%Y'   # (optional)
    dateonly: 1              # (optional)
    name: ""                 # (optional)
    nameprefix: 1            # (optional)
    builtinicons: 0          # (optional)
    dutch: 1                 # (optional)
Auto-entities integration
I used here the HACS integration auto-entities it is very useful and makes it possible to show only the (countdown) entities and sort them by date.
Install this integration via this button in your own HA instance
HA presentations
Default presentation
When the installation is complete, you get at least four entities which you can add to your dashboard.
This is the default presentation.

The downside is that it isn’t ordered by date, you get a colored (distracting and not matching with the default other) icons, and you don’t see the numbers of days. Now you need to know the current date and calculate for yourself when it’s the right date to put it on the street. So work todo to make it more practical and a cleaner presentation.
This dashboard code belongs to the above presentation screenshot.
In my case my wastecollector is cyclus that’s why I have that name in my sensor name. Yours can be different.
# Sourcecode by vdbrink.github.io
# Dashboard Entities card code
type: entities
entities:
  - entity: sensor.cyclus_pmd
  - entity: sensor.cyclus_restafval
  - entity: sensor.cyclus_papier
  - entity: sensor.cyclus_gft
show_header_toggle: false
Sort by date
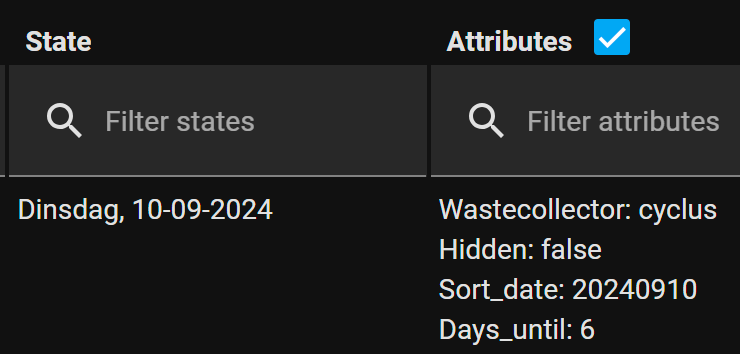
Each entity comes with extra data which can be used to sort by date, for example.
It has an attribute called Days_until which contains the numeric days to bin day.
It can be used for sorting on date by using the custom HACS card auto-entities.
As row - order by date
An example to show the entities sorted by date in a row.
In this example dateonly: 0 which also add the day. But when set dateonly: 1 you only see the date as state underneath the icon.
The corresponding code:
# Sourcecode by vdbrink.github.io
# Entities Card Configuration
type: custom:auto-entities
card:
  type: glance
  title: Afval kalender
  columns: 4
filter:
  include:
    - entity_id: sensor.cyclus_*
sort:
  method: attribute
  attribute: Days_until
  numeric: true
As list
Show the default entities as a list, without a header, ordered by date.
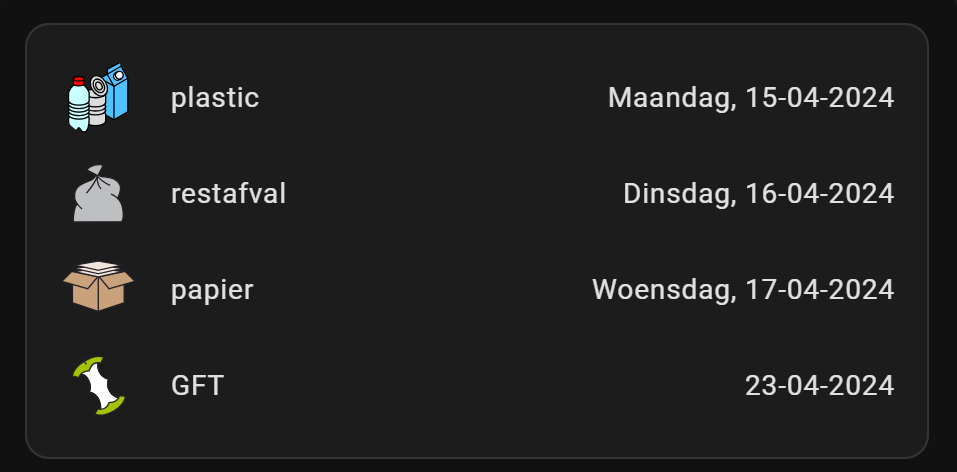
The corresponding code:
# Sourcecode by vdbrink.github.io
# Entities Card Configuration
type: custom:auto-entities
card:
  type: entities
filter:
  include:
    - entity_id: sensor.cyclus_*
sort:
  method: attribute
  attribute: Days_until
  numeric: true
As list - days countdown
Show the default entities as a list, ordered by date and show the days until bin day.
Unfortunately: It’s not possible to show an attribute value in combination with card type glance.
I created new helper countdown entities which make this possible.
The corresponding code:
# Sourcecode by vdbrink.github.io
# Entities Card Configuration
type: custom:auto-entities
card:
  type: entities
  title: 'Afval kalender'
filter:
  include:
    - entity_id: sensor.cyclus_*
      options:
        type: custom:template-entity-row
        state: >
          {{state_attr(config.entity,'Days_until')}} dagen
sort:
  method: attribute
  attribute: Days_until
  numeric: true
As 2x2 raster
Show the default entities in a 2x2 raster, ordered by date.
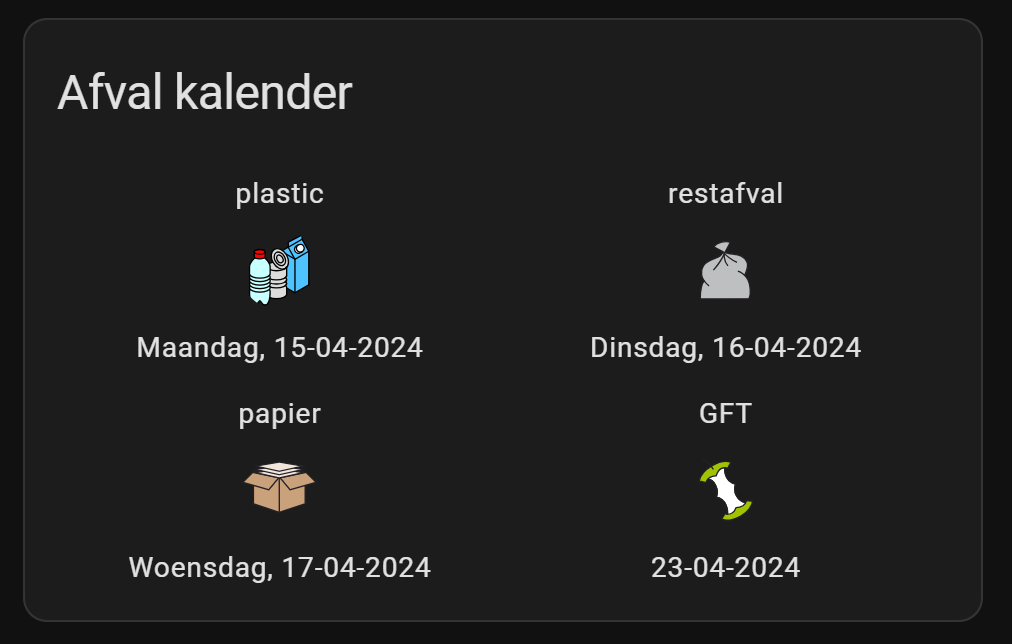
The corresponding code:
# Sourcecode by vdbrink.github.io
# Entities Card Configuration
type: custom:auto-entities
card:
  type: glance
  title: Afval kalender
  columns: 2
filter:
  include:
    - entity_id: sensor.cyclus_*
sort:
  method: attribute
  attribute: Days_until
  numeric: true
Custom helper entities: days countdown
I wanted my presentation like this:
- Only with the numbers of days instead of the full date as the state value.
- A more subtle icon that matches the rest of the icons on my dashboard.
- Ordered by days left
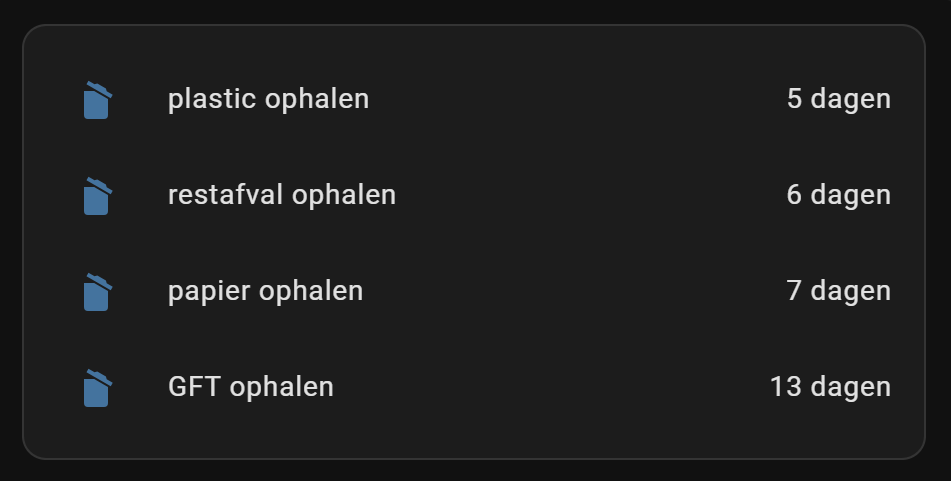
To get this done, I needed to create some new helper sensors with the countdown in days as state value.
Add this to configuration.yaml (or add it to sensor.yaml without the first sensor: line.)
# Sourcecode by vdbrink.github.io
# configuration.yaml
sensor:
  - platform: template
    sensors:
      paper_waste_pickup_countdown:
        friendly_name: "papier ophalen"
        value_template: >-
          {% set datex = state_attr('sensor.cyclus_papier','Sort_date') | string %}
          {{ ((as_timestamp(strptime(datex, '%Y%m%d')) - as_timestamp(now())) / (60 * 60 * 24)) | round(0, 'ceil')  }}
        icon_template: mdi:delete-empty
        unit_of_measurement: "dagen"

  - platform: template
    sensors:
      gft_waste_pickup_countdown:
        friendly_name: "GFT ophalen"
        value_template: >-
          {% set datex = state_attr('sensor.cyclus_gft','Sort_date') | string %}
          {{ ((as_timestamp(strptime(datex, '%Y%m%d')) - as_timestamp(now())) / (60 * 60 * 24)) | round(0, 'ceil')  }}
        icon_template: mdi:delete-empty
        unit_of_measurement: "dagen"

  - platform: template
    sensors:
      rest_waste_pickup_countdown:
        friendly_name: "restafval ophalen"
        value_template: >-
          {% set datex = state_attr('sensor.cyclus_restafval','Sort_date') | string %}
          {{ ((as_timestamp(strptime(datex, '%Y%m%d')) - as_timestamp(now())) / (60 * 60 * 24)) | round(0, 'ceil')  }}
        icon_template: mdi:delete-empty
        unit_of_measurement: "dagen"

  - platform: template
    sensors:
      plastic_waste_pickup_countdown:
        friendly_name: "plastic ophalen"
        value_template: >-
          {% set datex = state_attr('sensor.cyclus_pmd','Sort_date') | string %}
          {{ ((as_timestamp(strptime(datex, '%Y%m%d')) - as_timestamp(now())) / (60 * 60 * 24)) | round(0, 'ceil')  }}
        icon_template: mdi:delete-empty
        unit_of_measurement: "dagen"
Sorted by new countdown entities
As row
Show the new countdown entities, with the countdown days, all with the same icon, ordered by date in a row.
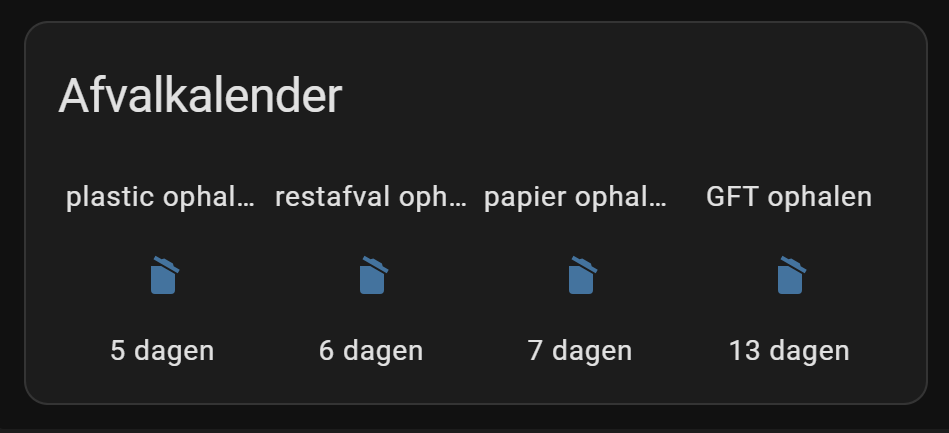
The corresponding code:
# Sourcecode by vdbrink.github.io
# Entities Card Configuration
type: custom:auto-entities
card:
  type: glance
  title: 'Afvalkalender'
filter:
  include:
    - entity_id:  sensor.*waste*countdown
sort:
  method: state
  numeric: true
As list
The countdown entities sorted by days in a list.

The corresponding code:
# Sourcecode by vdbrink.github.io
# Dashboard card code
type: custom:auto-entities
card:
  type: entities
  show_header_toggle: false
  state_color: false
filter:
  include:
    - entity_id: sensor.*waste_pickup_countdown
  exclude: null
show_empty: false
sort:
  method: state
  numeric: true
Show conditional, only for the next 5 days
Show only the waste pickup for the upcoming 5 days.
In this case there is only one pickup in the next 5 days, otherwise more entities will be visible.

# Sourcecode by vdbrink.github.io
# Dashboard card code
type: custom:auto-entities
card:
  type: entities
filter:
  include:
    - entity_id: sensor.*_waste_pickup_countdown
      state 1: < 6
      state 2: '> 0'
Mushroom element
On top of my dashboard, I also show a small Mushroom icon which trash can must be outside.
I have for each type a different color. Orange for plastic, green for green, blue for paper and gray for the grey container with rest trash.
These are all the possible visible icon options (only one is visible at the same time).

I use here also my extra created countdown helper entities.
The condition is: If tomorrow some waste must be placed outside, it shows the corresponding colored trash can, otherwise there is no trashcan visible in the circle.
# Sourcecode by vdbrink.github.io
# Dashboard card code
type: custom:mushroom-chips-card
chips:
  - chip: null
    type: template
    entity: sensor.cyclus_gft
    icon: mdi:trash-can-outline
    content: ''
    card_mod:
      style: |
        :host {
          --card-mod-icon-color:
          {% if states('sensor.gft_waste_pickup_countdown')|int == 1 %}
           green
          {% elif states('sensor.paper_waste_pickup_countdown')|int == 1 %}
           blue
          {% elif states('sensor.plastic_waste_pickup_countdown')|int == 1 %}
           orange
          {% elif states('sensor.rest_waste_pickup_countdown')|int == 1 %}
           brown
          {% else %}
           #1C1C1C
          {% endif %}
        }
LED strip indicator
I created a separated page how I setup a LED strip under my dresser to light up the evening before trash bin day.
<< See also my other Home Assistant tips and tricks
Home Assistant dashboard custom element: Auto-entities >>
