Node-RED + Home Assistant: team work


Combine the power of Node-RED and Home Assistant.
Examples:
- Home Assistant state change -> trigger Node-RED flow
- Node-RED + Home Assistant: Full moon trigger
- Node-RED flow -> HA App notification
Initial setup
You need to install some extra Home Assistant nodes in Node-RED, so they can communicate with each other.
Install the extra nodes
To get data from Home Assistant you need, in Node-RED, to install the extra nodes node-red-contrib-home-assistant-websocket.
- Go to the hamburger menu on the top right and select the menu item “Manage pallete”
- Select the tab Install and enter “home-assistant-websocket”
- Click on the install button to install it.
- After the installation, you see a set new node in your left sidebar.
Configure your Home Assistant server
-
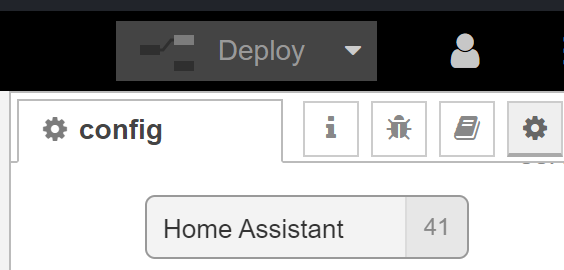
Go to the sidebar and open the Configuration nodes (the wheel icon).

-
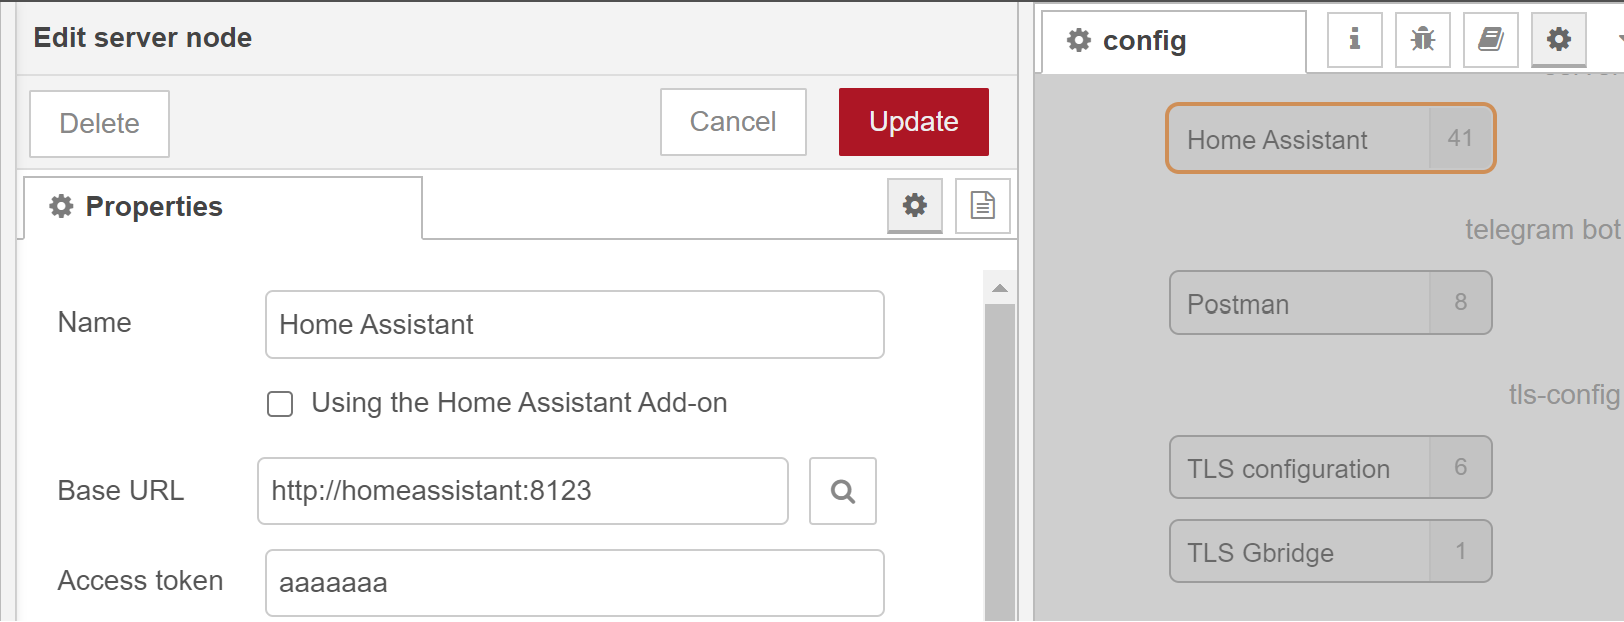
Under the section ‘On all flows’ scroll to server and double-click on the Home Assistant element.
-
Define the Base URL, this must be the url where Home Assistant can be reached from Node-RED. If you run both in a docker in the same network, you can use the name of the docker image as host name. For example http://homeassistant:8123 Now Node-RED reach Home Assistant from inside the docker network. It’s also possible to use the IP-address, but this can change, and then it access it outside the docker and via your network which can act slower.

-
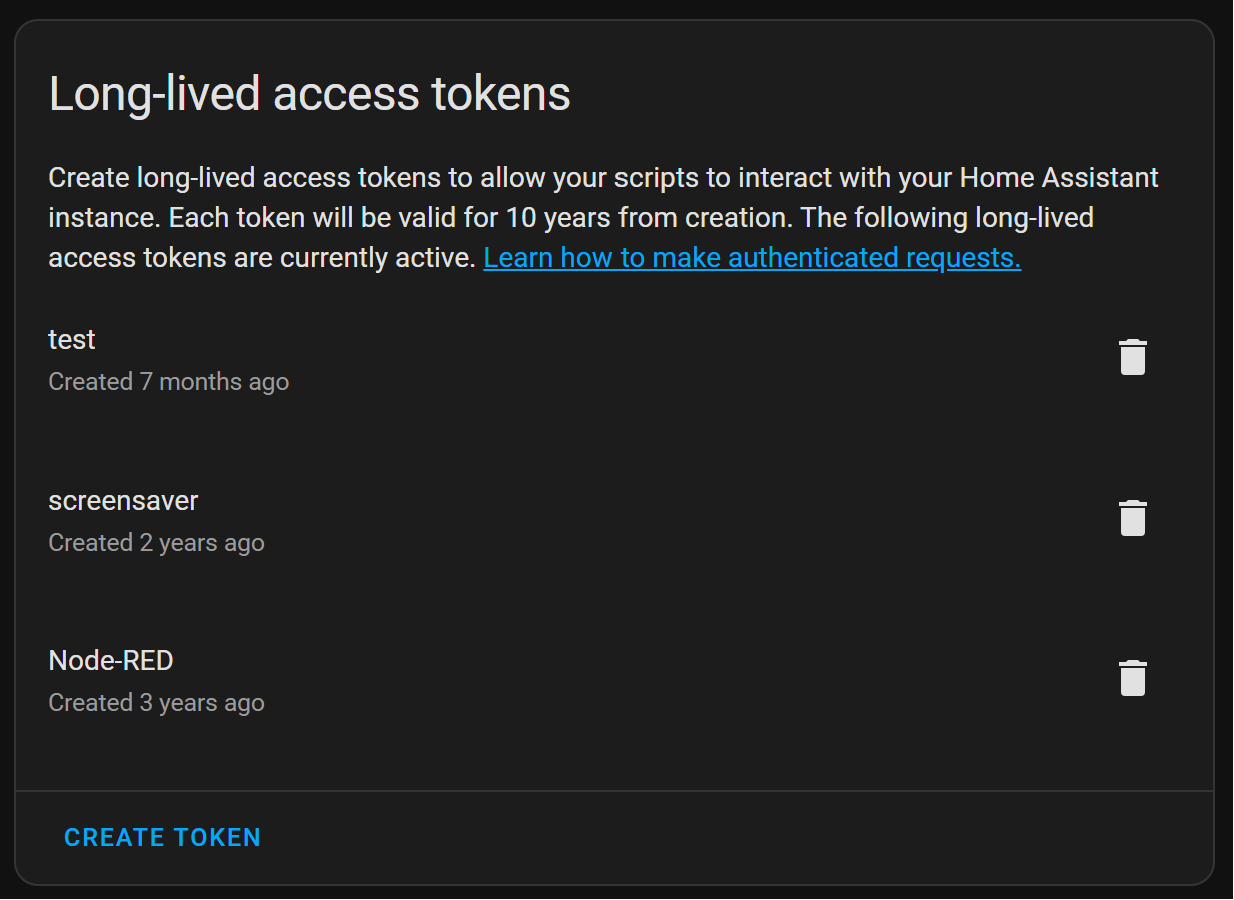
The Access token can be created when you logged in into Home Assistant. Select your user from the menu and scroll down on your profile to “Long-Lived Access Tokens” and click on Create Token. Give it a name like ‘Node-RED’. Now you get the token, copy the token in the field.

<< See also my other Node-RED pages