Packages mailbox - Allux 600
I was looking for a package mailbox where 80% of my ordered packages would fit, so I don’t have to wait at home for the delivery person to arrive, but I can still receive my package.

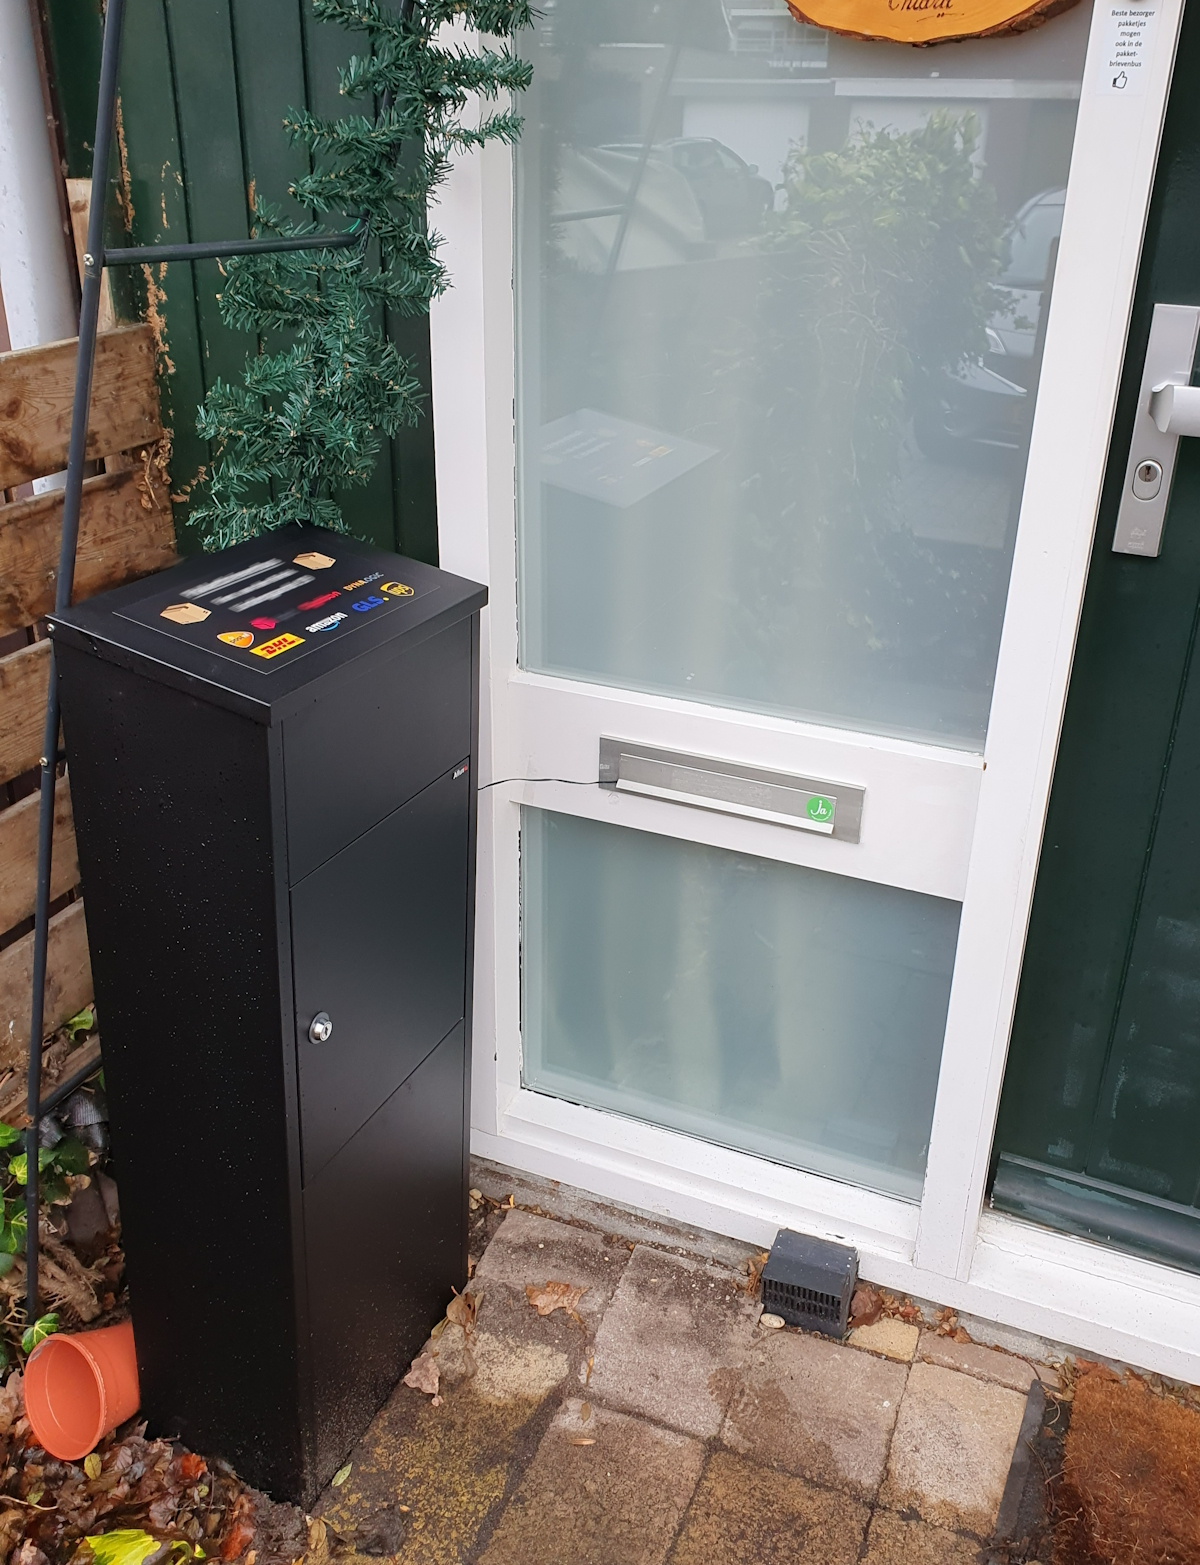
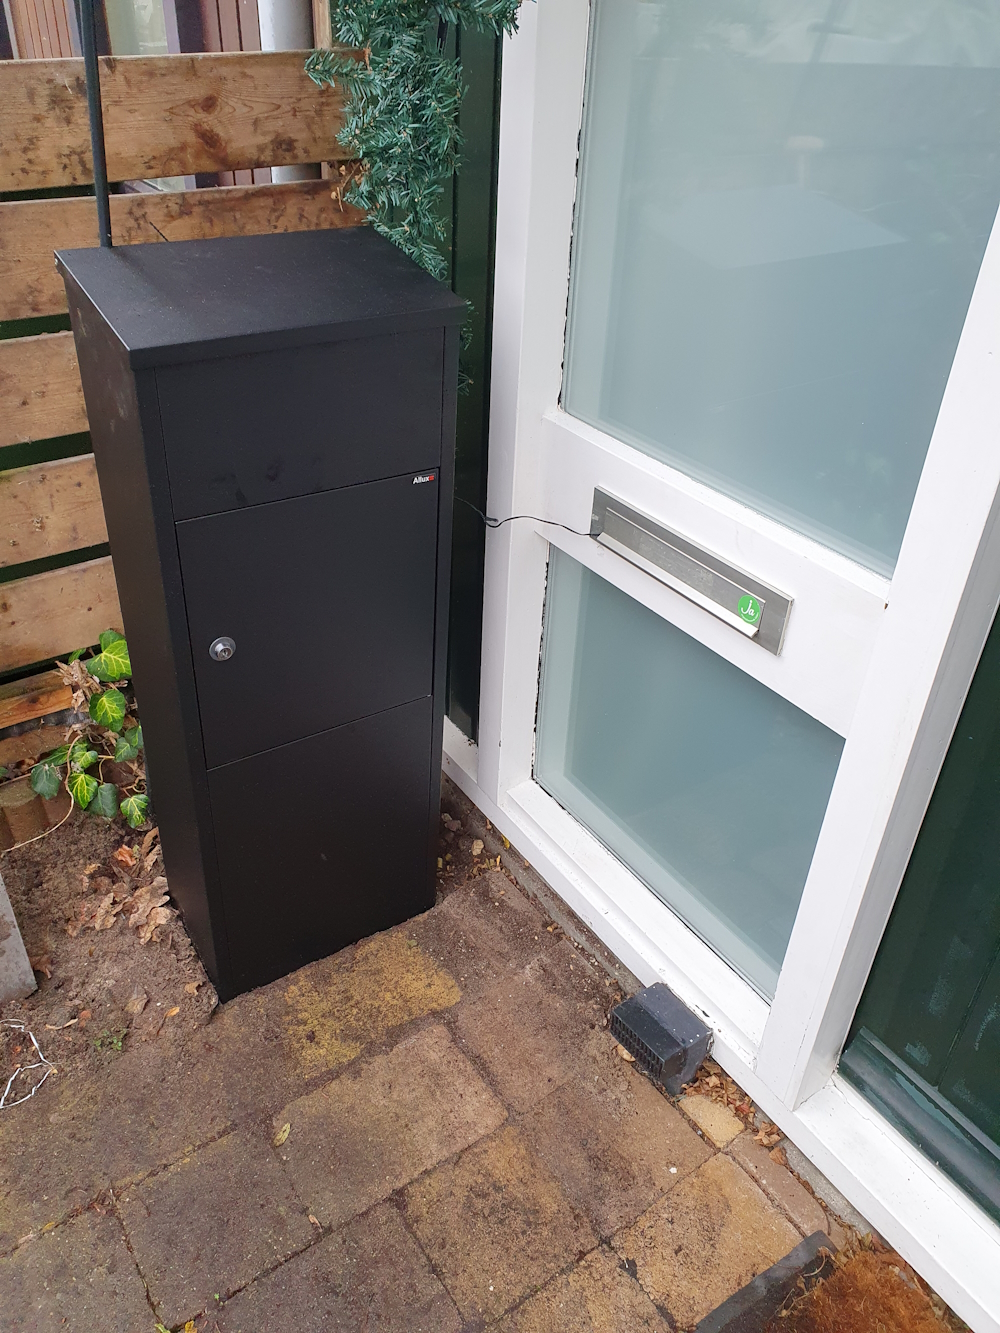
My final automated packages mailbox
Table of Contents
- My requirements
- Product specs
- Mounting to the ground
- Stickers
- Automations
- PostNL set package box a default deliver location
- Where to buy
- Alternatives package boxes
My requirements
I was looking for a package mailbox with the following specifications:
- All weatherproof;
- A shoebox-package-size should fit in it (so it covers 80% of my package sizes);
- It could contain multiple packages;
- Not possible to grab delivered packages out of it;
- A discrete design;
- A maximum price of € 200,- ;
- I found € 200,- already a lot of money for such a box, but in my search I found out this was at the bottom prices in the market. Those boxes, for what I was looking for, reach to prices like € 500,-!
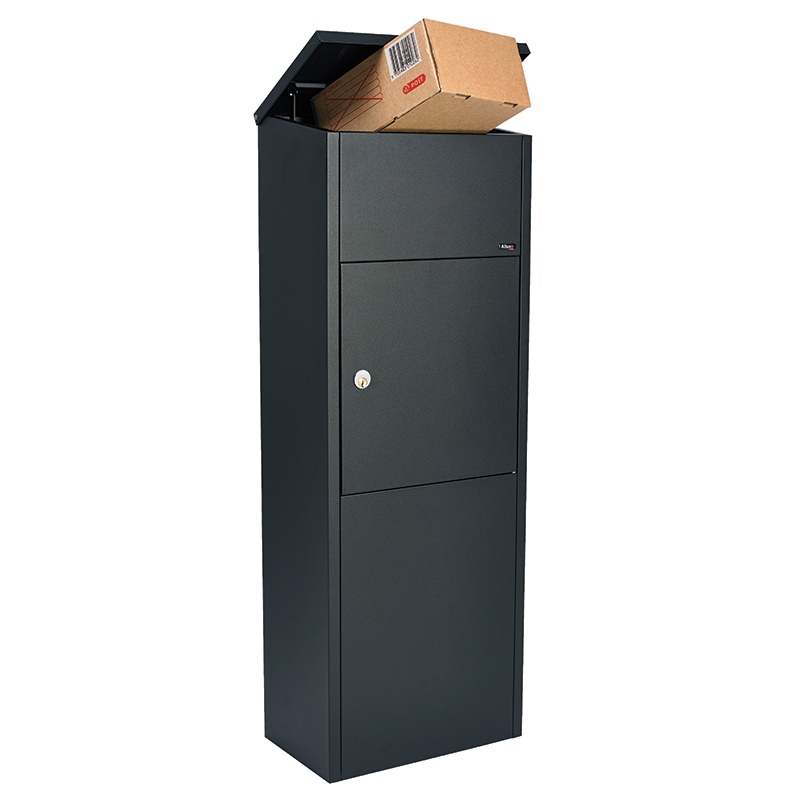
In my search I found the Allux 600 box, which matches almost all my criteria, but the price at that moment was € 250,-. It’s made for outdoor use, made of coated steel, and has a 10-year guarantee against rust. That’s also why the price is so high.
- I found € 200,- already a lot of money for such a box, but in my search I found out this was at the bottom prices in the market. Those boxes, for what I was looking for, reach to prices like € 500,-!
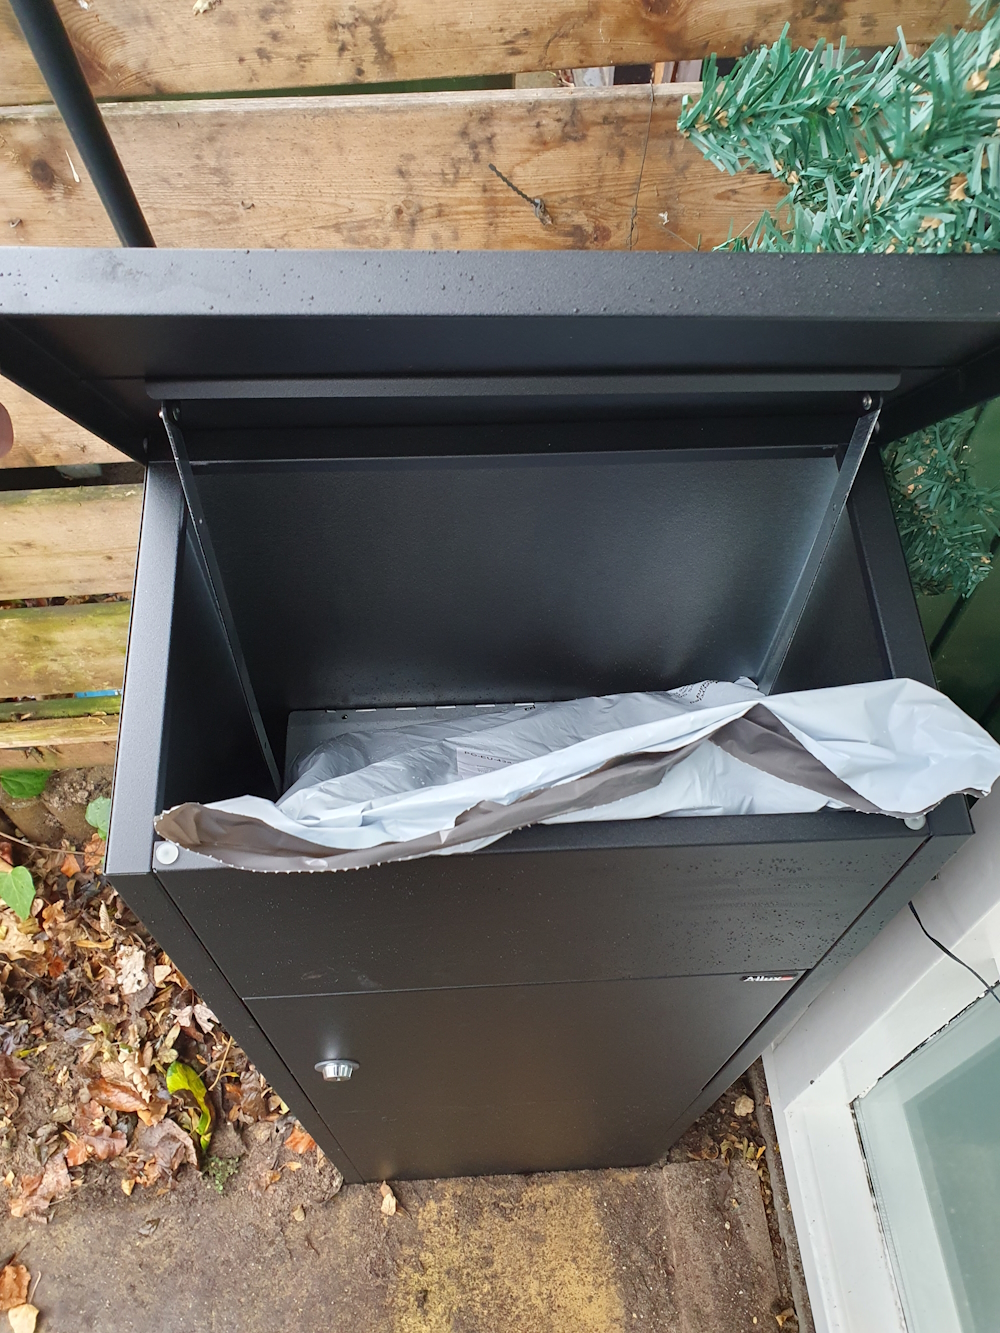
A shoebox can fit in it.
And multiple packages can be dropped in it, but it isn’t possible to grab one out of it afterward.
The design is a tight mat black box that doesn’t attract too much attention when you see it from the street.
Because the price was a bit high, and I didn’t need it right away, I decided to put it on my wishlist and created a rule in my Node-RED daily-check-for-good-offers list, alongside the laundry detergents, to wait for a price drop.
I forgot about it until Black Friday, when I received a notification that it was on sale for € 189,-. Now it matched all my criteria and I ordered it! In the meantime, I hadn’t found any other box with better specs.
Product specs
The box is made of coated steel, so it’s strong and won’t rust, they give a 10-year guarantee against rust. It should stand for years outside in all weather conditions.
Total outside sizes of the mailbox:
Height: 105 cm
Width: 38 cm
Depth: 23 cm
Weight: 11.5 kg
The maximum size of the packages to fit in:
Height: 15 cm
Width: 32 cm
Depth: 29 cm
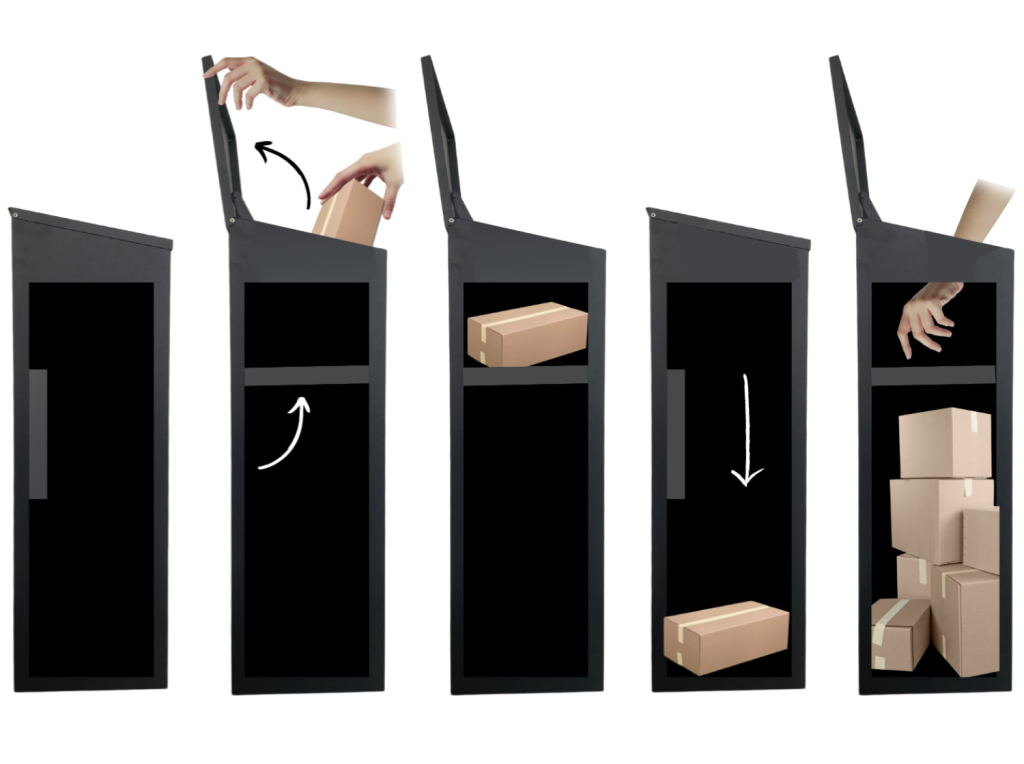
The top view when opening the lid.

It has some bump cushions, so it doesn’t close with a lot of noise.
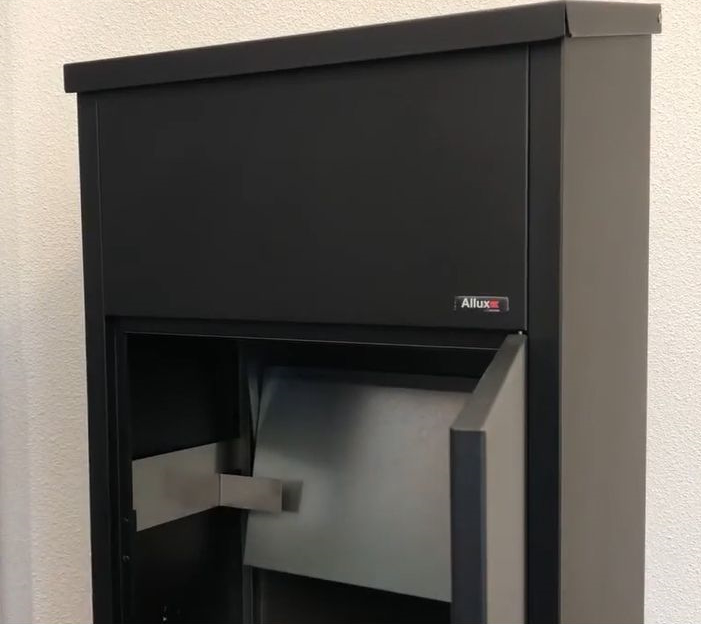
In front there is a locked door to get the packages out of the box.
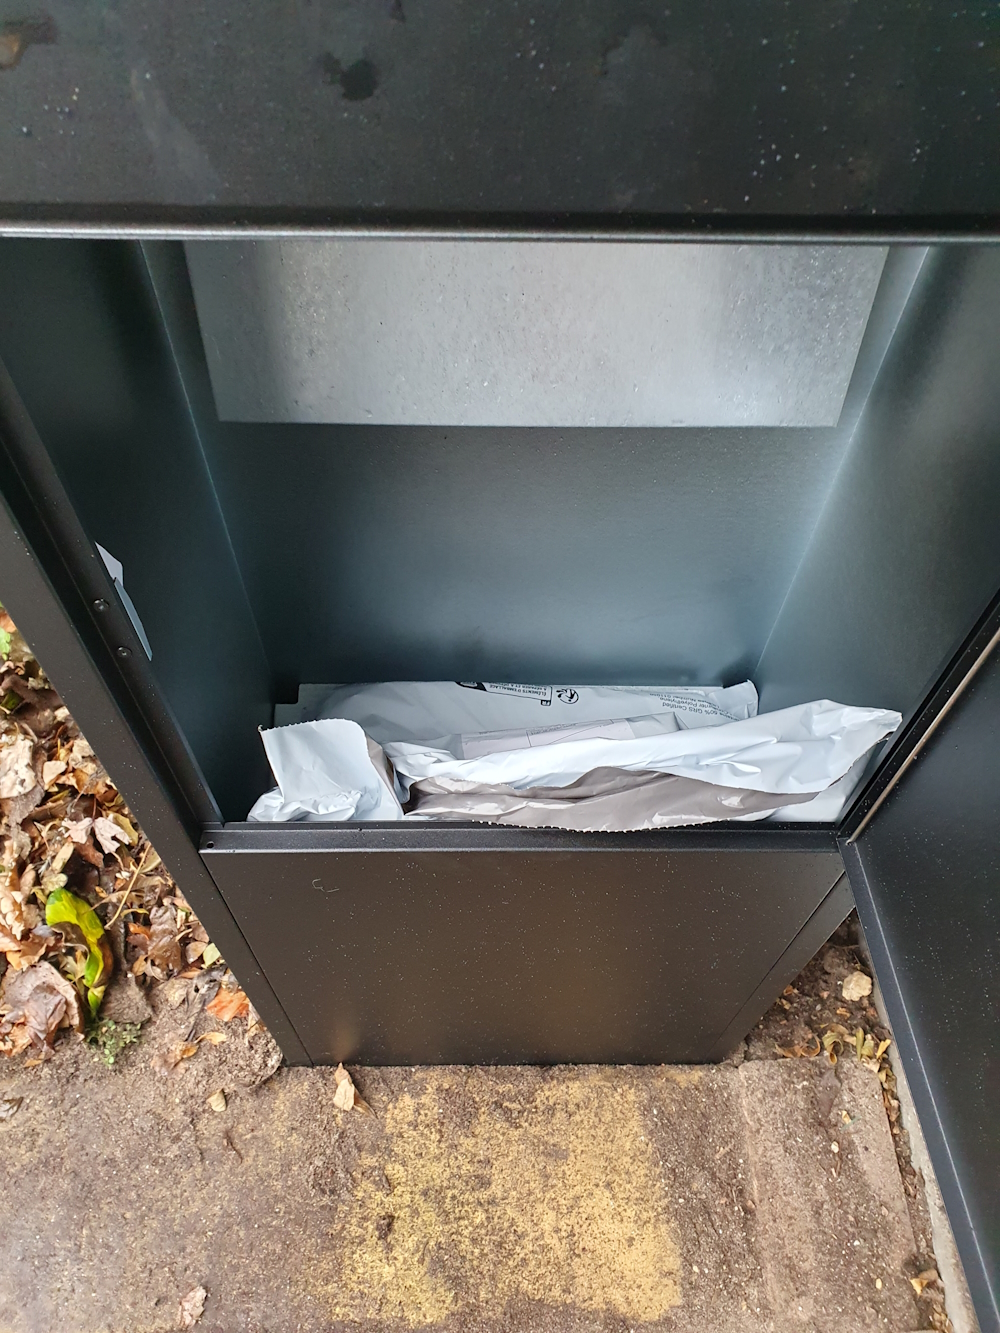
This is how the system works to prevent taking a previously delivered package out of the box.
An instruction video about how the Allux 600 works:
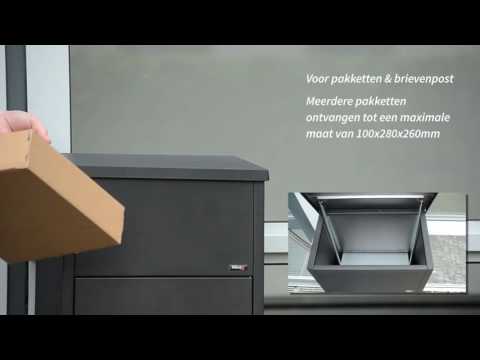
Click on the above image to see the video.
Mounting to the ground
The regular Allux 600 is without any mounting materials. The only provided solution to mount the box on the ground is a ~€ 90,- steel frame. In my opinion, way too expensive, and it should also be possible to solve this for way less, but that needs a creative solution.
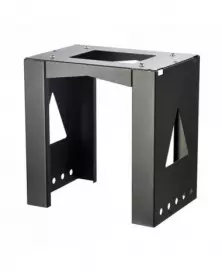
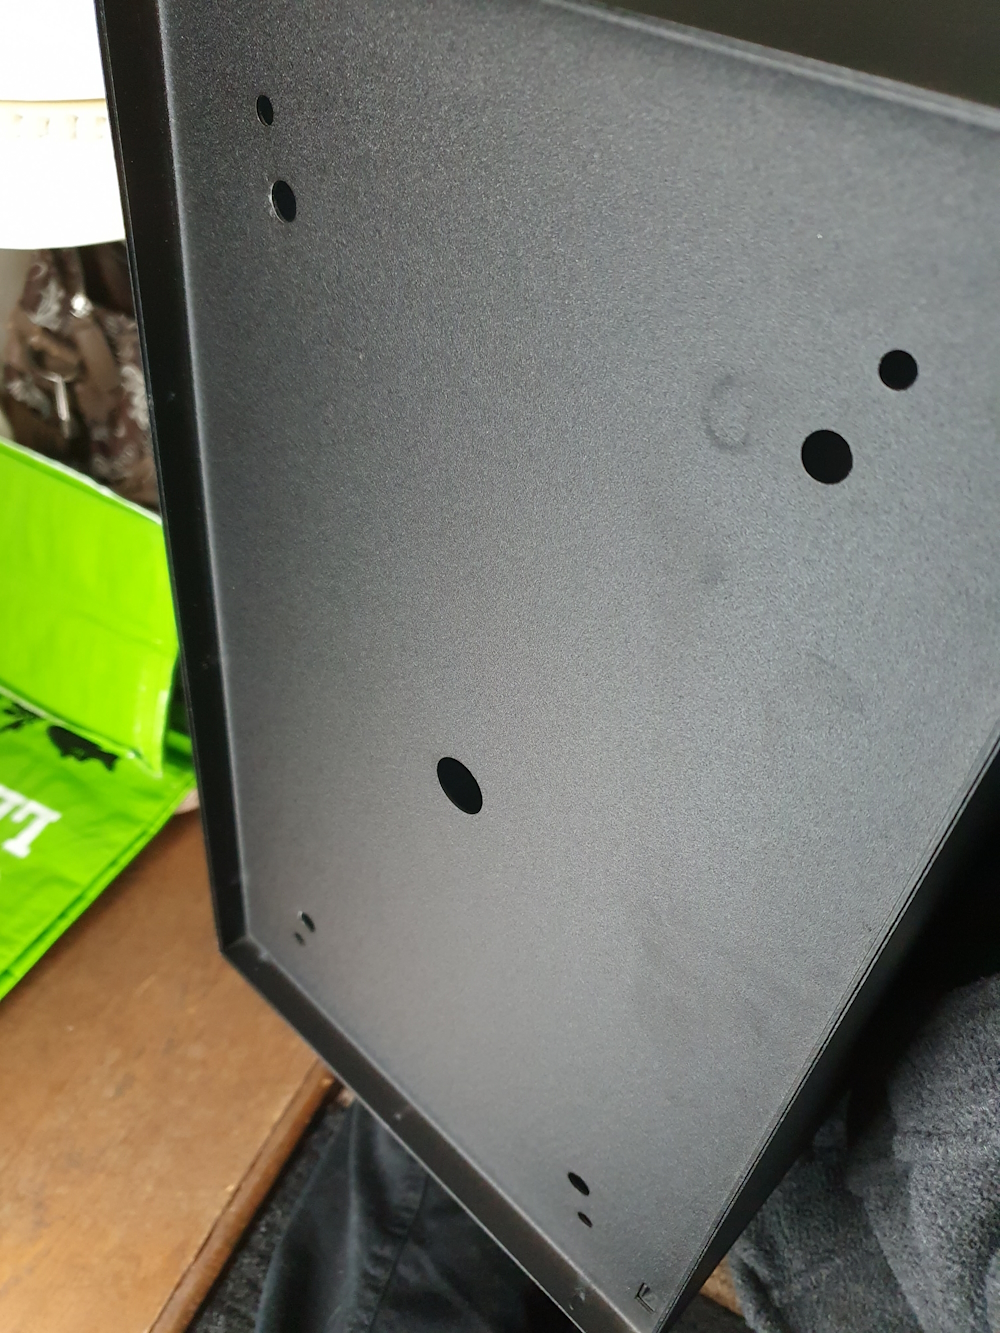
The Allux already has pre-drilled holes in the bottom, in each corner and in the center. If you have tiles, you can also drill holes in them and mount it directly.
Used parts for my DIY ground mount
I came up with a DIY solution that would work for me.
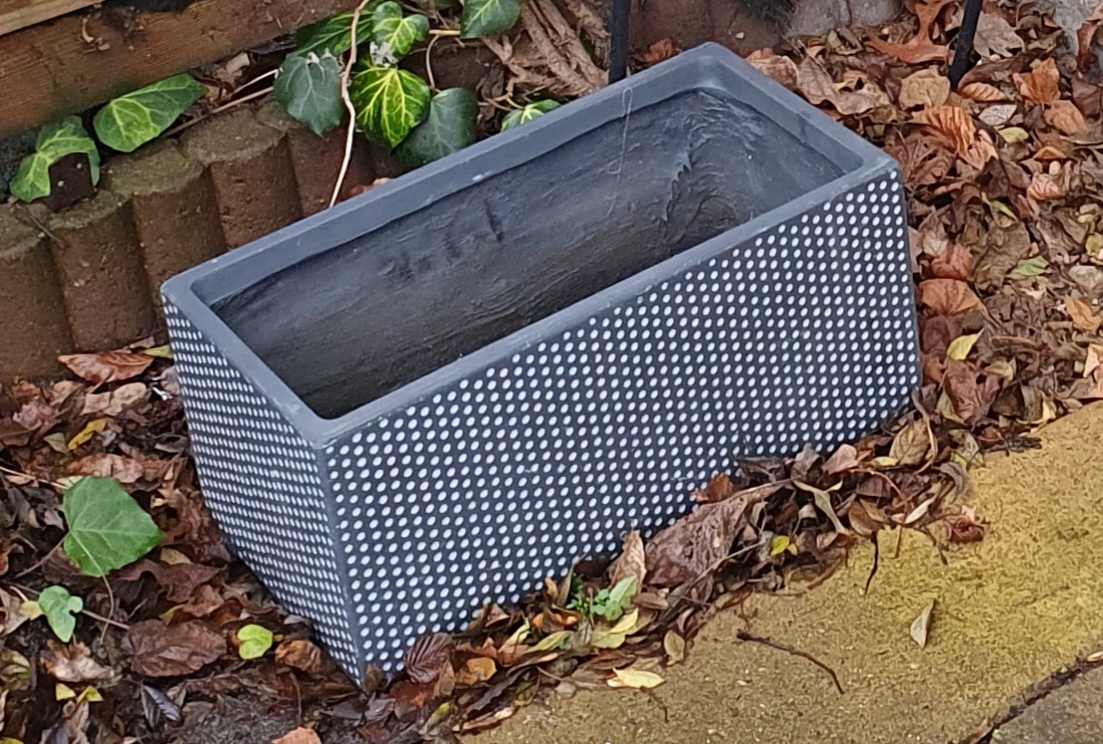
My box is placed on soil. So I decided to dig a hole under the box, place something heavy in the ground, and mount that to the box,
so you can’t pick it up and walk away with it.
This was my shopping list for my DIY ground mount:
- A heavy flower box, it was in the sales at the local garden shop [€ 7,-]
- The flower box already had a hole in the middle.
-
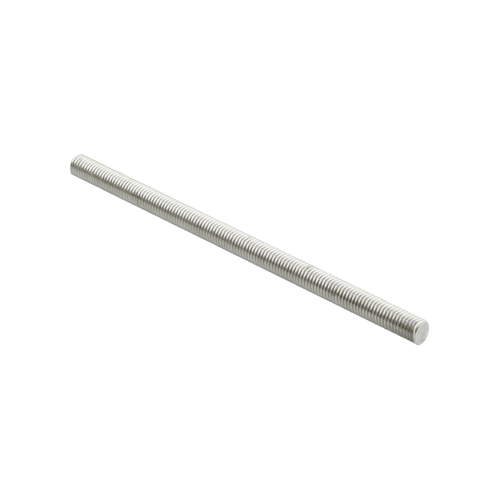
1x Stainless Steel Threaded End Pipes 12mm x 100 cm [€ 13,79 at Gamma]
-
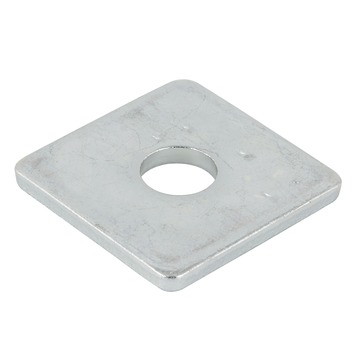
A box with 4x galvanized metal plate 40x40mm [€ 5,59 at Gamma]
-
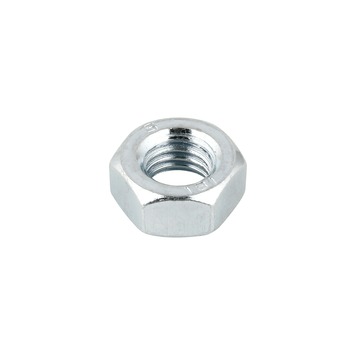
A box with 4x galvanized 12mm bolts [€ 2,59 at Gamma]
Which make the total costs for my DIY ground mount € 28,97. This saves me ~€ 60,-
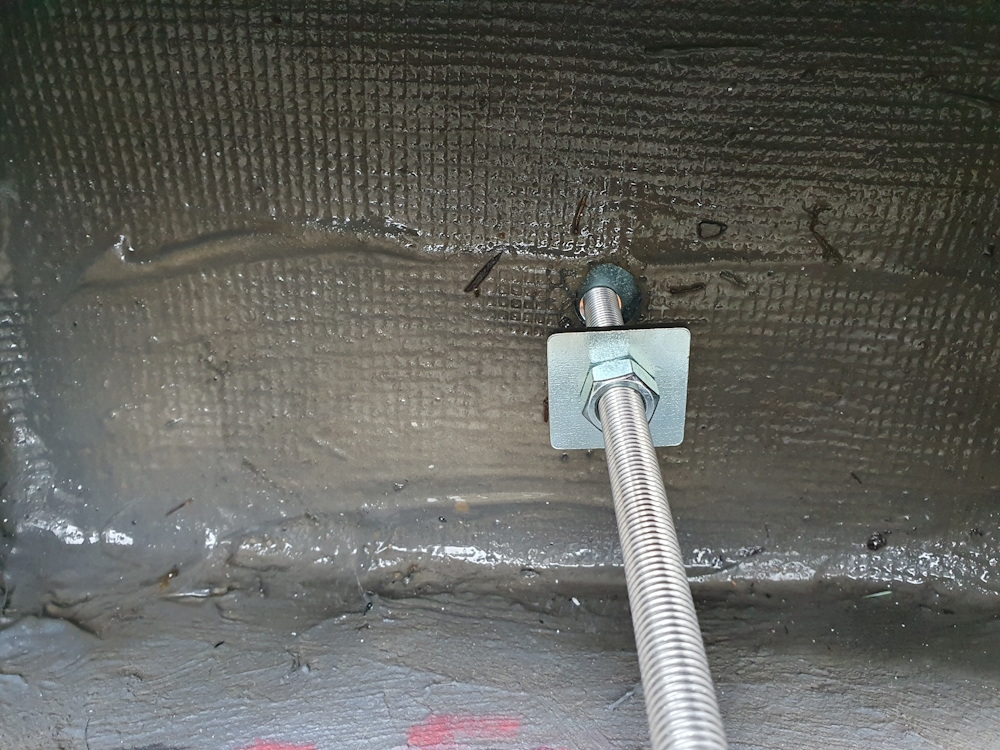
Assembling the ground mount
I screw a bolt and plate on each side of the hole in the flower box so the pipe is strongly attached to the flower box. The pipe must stick only 15 cm above street level, and the rest will be in the ground underneath the flower box.
I dug a hole under the spot where the box will stand, matching the size of the flower box, put it in the ground and filled it back with sand and stones for extra weight.
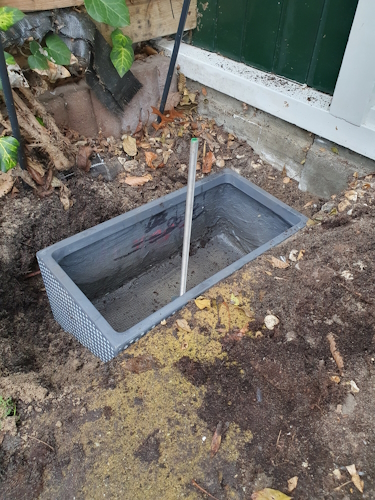
Now only the pipe is above the ground.
I screw the bolt on the pipe, almost to the ground, and add a plate above it.
I placed the box over the pipe and check if the plate touches the bottom of the box when the corners of the package box touch the ground. Then I add the plate inside the box over the pipe and screw the bolt from the inside too. Now the bolts and plates are firmly clamped together on each side of the bottom of the box.
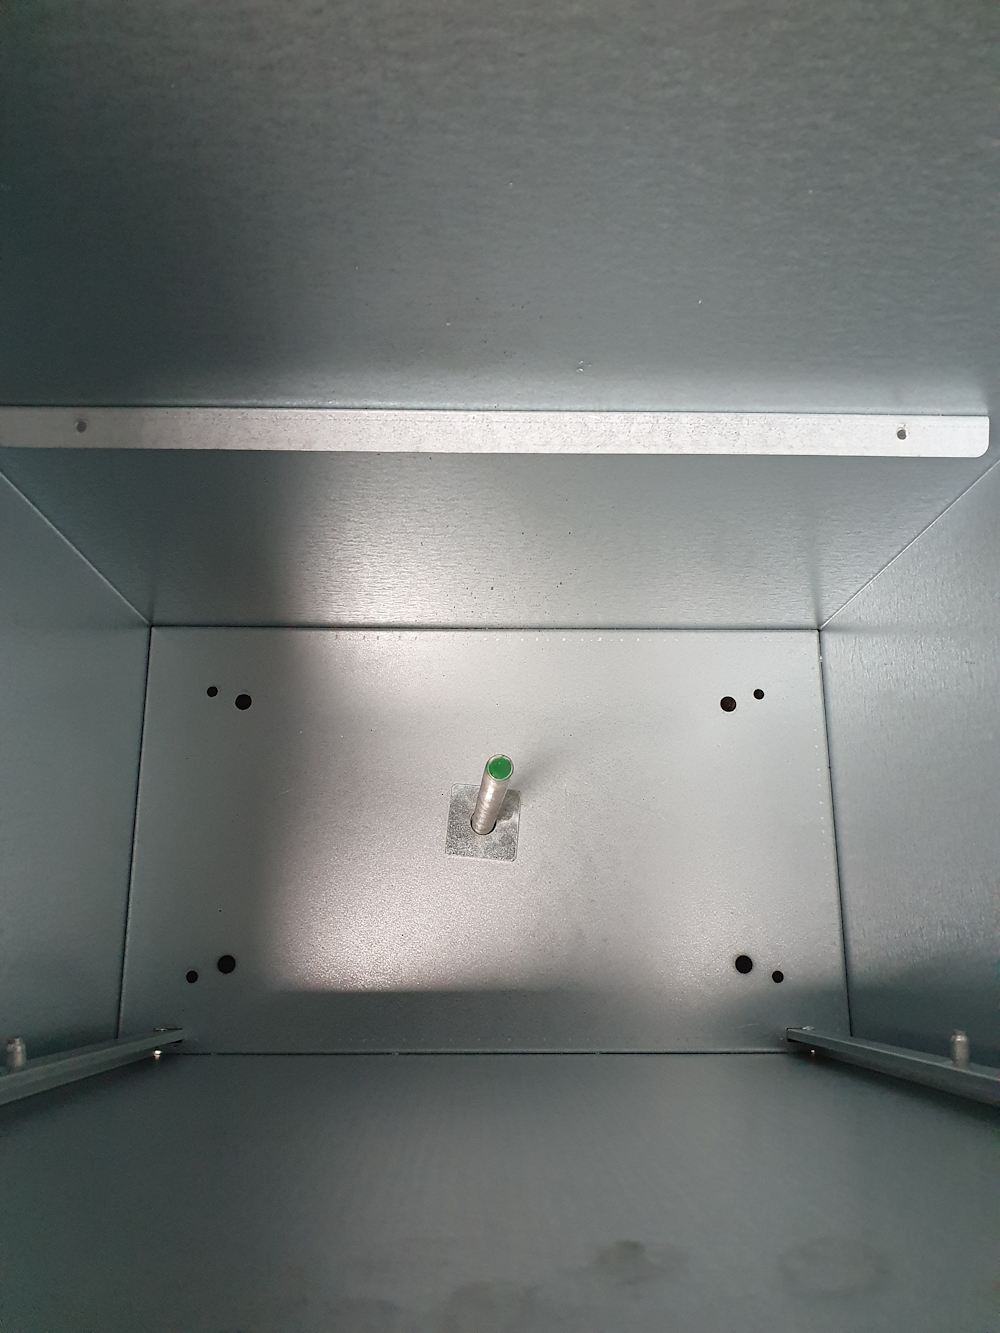
Now the box isn’t easy to move anymore! And it isn’t visible at all how it’s mounted to the ground.
Stickers
Because the box has a discreet design, it may not be immediately clear to a delivery person that it’s meant for packages.
On the Dutch forum Tweakers.net I found this thread about these kind of package boxes and someone had good experience with making and ordering outdoor stickers from stickermaster.nl. This sticker is one which is also used on cars, so it’s weatherproof. Exactly what I need!
So I designed two stickers:
- One to place on the lid of the box.
-
I gathered some delivery company logo’s, created an image and placed the text that this is a package mailbox, my name and street name with house number on it (blurred on the photo).
Download here the Paint.net PDN file of this sticker. Download Paint.net
Download here the Photoshop PSD file of this sticker.
These are my ordered sticker specs, you can also make the sticker a bit bigger that it will cover the complete top.Specs Value Width 30 cm Height 17 cm Shape Square Material Bubblefree Finishing Mat 
-
And I placed the other one direct under the doorbell with a reference there is also a package box.
Download here the Paint.net PDN file of this sticker.
Download here the generated PNG file of this sticker.
These are my ordered sticker specs, you can also make the sticker a bit bigger that it will cover the complete top.Specs Value Width 4 cm Height 7 cm Shape Square Material Bubblefree Finishing Mat 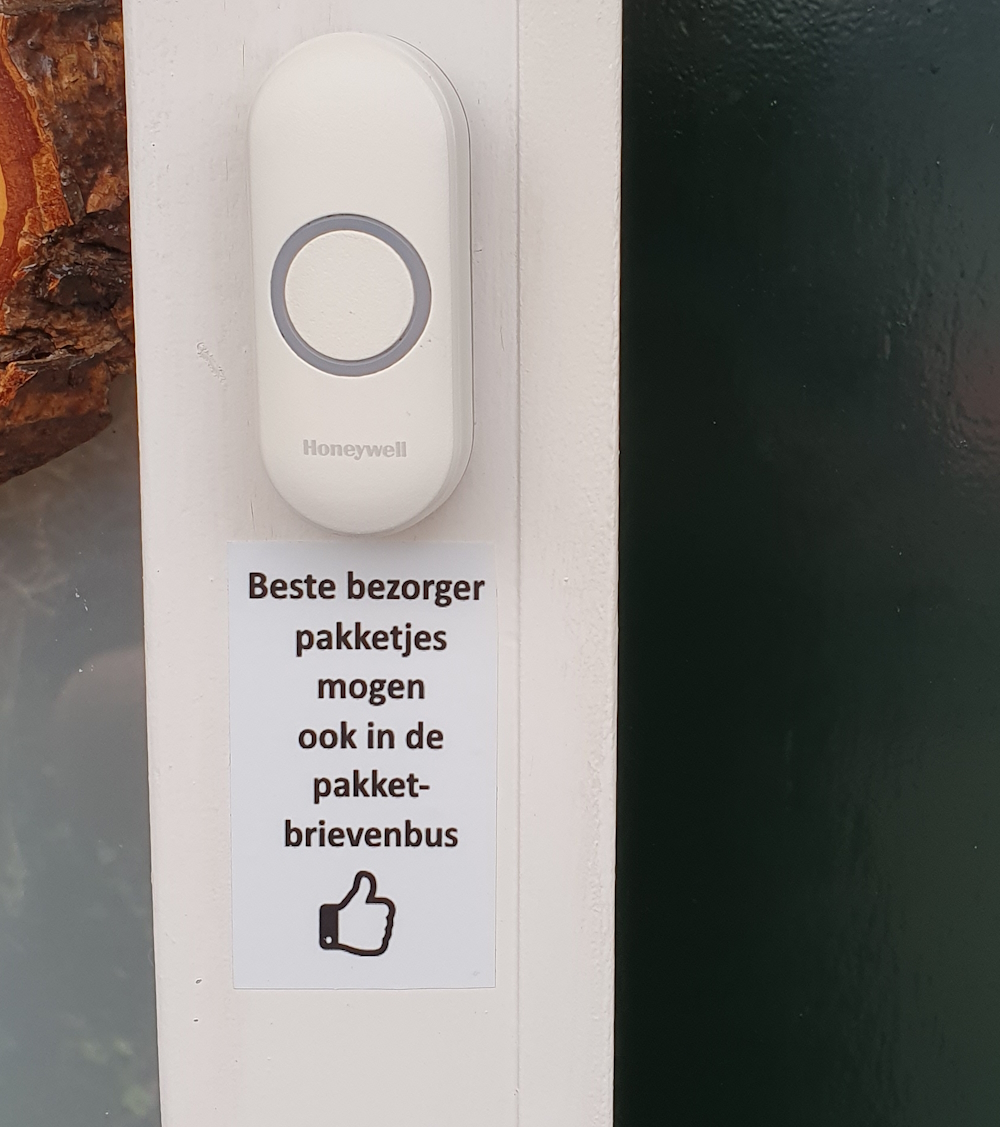
-
Automations
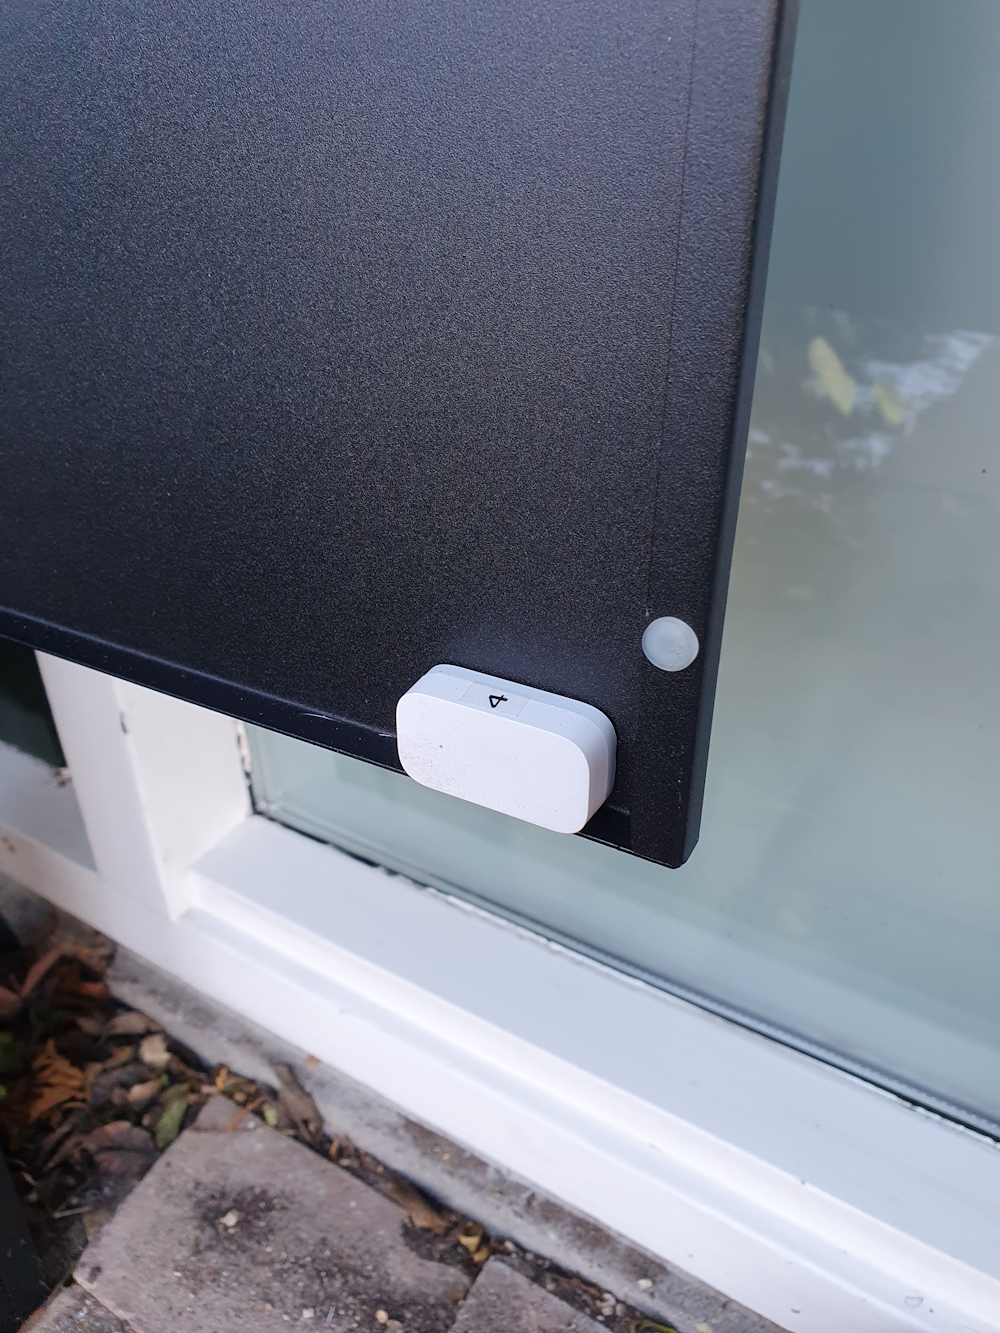
This package box is not smart by itself, but it was easy to make it smart.
I have already a Zigbee network up and running, so I added two contact sensors (you can use any brand) inside the box.
I created automations for notifications and added the status to my Home Assistant dashboard.
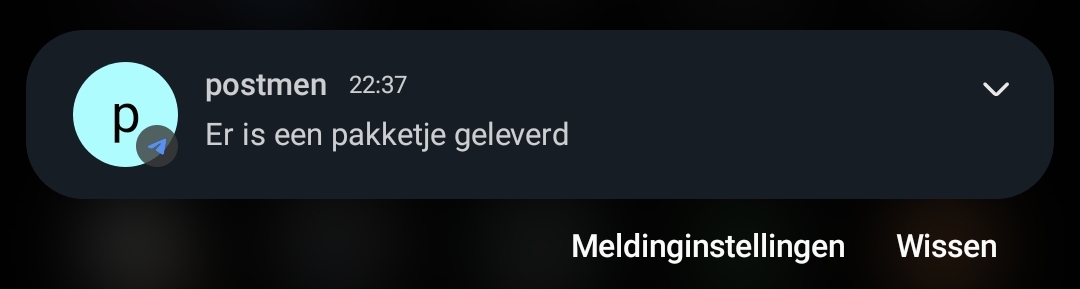
Notification when a package is delivered
-
The first Zigbee contact sensor is mounted under the inner metal plate where the packages are place on when the lid is opened. When the lid is opened, the contact breaks and a trigger is sent. This location is also nice because the sensor isn’t visible from outside and don’t get in contact with weather conditions. The signal is strong enough to get through the steel. I have at 1.5m, inside the house, a smart socket installed to receive the Zigbee signals.

-
The second contact sensor is placed in the front door. So when the box is opened with the key, this contact breaks, and a trigger is sent by this other sensor.
Is this full-proof? No, everybody who opens the lid triggers that there is a package inside. It can be improved by adding a camera inside the box, make a photo when a new package arrived and compare it with the previous photo. But for me, this is now good enough.
Node-RED flow
For creating all my automations around the house, I have a home server running and use the software Node-RED to make automations based on all my sensors input.
In Node-RED, I defined a custom MQTT topic to indicate if there is a package in the box.
I named it homeassistant/packagebox.
If the lid Zigbee contact sensor sent a message to my server, the contact value is false (open), this flow sets the value of my custom topic to true.
When the package box front door is opened, the door sensor sent then false, then the custom topic is set to false.
This topic now indicates if there is a package inside.
I also send a notification to the phones and speaker in the living room when a package has arrived.
This is how my Node-RED flow looks like.

> Click here to see the corresponding Node-RED flow code >>
[
    {
        "id": "a53024c24cc27d45",
        "type": "tab",
        "label": "Flow 2",
        "disabled": false,
        "info": "",
        "env": []
    },
    {
        "id": "31bb94a252a5b949",
        "type": "link out",
        "z": "a53024c24cc27d45",
        "name": "",
        "mode": "link",
        "links": [
            "d2c82c3.f526fd"
        ],
        "x": 1065,
        "y": 240,
        "wires": []
    },
    {
        "id": "0bfe1c92b7b611c0",
        "type": "mqtt in",
        "z": "a53024c24cc27d45",
        "name": "",
        "topic": "zigbee2mqtt/contact_packagebox_lid",
        "qos": "0",
        "datatype": "json",
        "broker": "7527d055.ed7e2",
        "nl": false,
        "rap": false,
        "inputs": 0,
        "x": 180,
        "y": 180,
        "wires": [
            [
                "9e3b3412c84df26b"
            ]
        ]
    },
    {
        "id": "7dc4f7d852e74e71",
        "type": "mqtt out",
        "z": "a53024c24cc27d45",
        "name": "",
        "topic": "homeassistant/packagebox",
        "qos": "",
        "retain": "",
        "respTopic": "",
        "contentType": "",
        "userProps": "",
        "correl": "",
        "expiry": "",
        "broker": "7527d055.ed7e2",
        "x": 820,
        "y": 160,
        "wires": []
    },
    {
        "id": "6cccfb30fd5ceb8b",
        "type": "switch",
        "z": "a53024c24cc27d45",
        "name": " false",
        "property": "payload.contact",
        "propertyType": "msg",
        "rules": [
            {
                "t": "false"
            }
        ],
        "checkall": "true",
        "repair": false,
        "outputs": 1,
        "x": 430,
        "y": 140,
        "wires": [
            [
                "b6983093fd18c3d9"
            ]
        ]
    },
    {
        "id": "b6983093fd18c3d9",
        "type": "template",
        "z": "a53024c24cc27d45",
        "name": "false",
        "field": "payload",
        "fieldType": "msg",
        "format": "handlebars",
        "syntax": "plain",
        "template": "false",
        "output": "str",
        "x": 590,
        "y": 140,
        "wires": [
            [
                "7dc4f7d852e74e71"
            ]
        ]
    },
    {
        "id": "0f9c67ba6465cf62",
        "type": "template",
        "z": "a53024c24cc27d45",
        "name": "true",
        "field": "payload",
        "fieldType": "msg",
        "format": "handlebars",
        "syntax": "plain",
        "template": "true",
        "output": "str",
        "x": 590,
        "y": 180,
        "wires": [
            [
                "7dc4f7d852e74e71",
                "e44b23317f3dad73"
            ]
        ]
    },
    {
        "id": "9e3b3412c84df26b",
        "type": "switch",
        "z": "a53024c24cc27d45",
        "name": " false",
        "property": "payload.contact",
        "propertyType": "msg",
        "rules": [
            {
                "t": "false"
            }
        ],
        "checkall": "true",
        "repair": false,
        "outputs": 1,
        "x": 430,
        "y": 180,
        "wires": [
            [
                "0f9c67ba6465cf62"
            ]
        ]
    },
    {
        "id": "36951a27de045d9e",
        "type": "delay",
        "z": "a53024c24cc27d45",
        "name": "",
        "pauseType": "rate",
        "timeout": "5",
        "timeoutUnits": "seconds",
        "rate": "1",
        "nbRateUnits": "3",
        "rateUnits": "minute",
        "randomFirst": "1",
        "randomLast": "5",
        "randomUnits": "seconds",
        "drop": true,
        "outputs": 1,
        "x": 940,
        "y": 240,
        "wires": [
            [
                "31bb94a252a5b949"
            ]
        ]
    },
    {
        "id": "e44b23317f3dad73",
        "type": "template",
        "z": "a53024c24cc27d45",
        "name": "package delivered",
        "field": "payload",
        "fieldType": "msg",
        "format": "handlebars",
        "syntax": "mustache",
        "template": "Er is een pakketje geleverd",
        "output": "str",
        "x": 750,
        "y": 240,
        "wires": [
            [
                "36951a27de045d9e"
            ]
        ]
    },
    {
        "id": "a4e7e663ab8bcff5",
        "type": "mqtt in",
        "z": "a53024c24cc27d45",
        "name": "",
        "topic": "zigbee2mqtt/contact_packagebox_door",
        "qos": "0",
        "datatype": "json",
        "broker": "7527d055.ed7e2",
        "nl": false,
        "rap": false,
        "inputs": 0,
        "x": 190,
        "y": 140,
        "wires": [
            [
                "6cccfb30fd5ceb8b"
            ]
        ]
    },
    {
        "id": "7527d055.ed7e2",
        "type": "mqtt-broker",
        "name": "",
        "broker": "mosquitto",
        "port": "1883",
        "tls": "bbaa4676.58e4c8",
        "clientid": "node-red-client",
        "autoConnect": true,
        "usetls": false,
        "protocolVersion": "5",
        "keepalive": "60",
        "cleansession": false,
        "birthTopic": "",
        "birthQos": "0",
        "birthPayload": "",
        "birthMsg": {},
        "closeTopic": "",
        "closePayload": "",
        "closeMsg": {},
        "willTopic": "",
        "willQos": "0",
        "willPayload": "",
        "willMsg": {},
        "userProps": "",
        "sessionExpiry": ""
    },
    {
        "id": "bbaa4676.58e4c8",
        "type": "tls-config",
        "name": "",
        "cert": "",
        "key": "",
        "ca": "",
        "certname": "m2mqtt_srv.crt",
        "keyname": "m2mqtt_srv.key",
        "caname": "m2mqtt_ca.crt",
        "servername": "",
        "verifyservercert": false
    }
]
Notification on my phone
I already have a separate Node-RED flow to send messages to my phone.
I use a link out node (most right bottom block in the screenshot) to connect to that flow.
And every message it received will be sent to my phone to notify me there is a package.
You can use your own preferred notification app here, like the Home Assistant Companion app, Whatsapp, Xabber, Telegram, Pushbullet, etc
Home Assistant
How MQTT works
The advantage of MQTT is that multiple applications can send and receive messages on a topic.
A topic is a kind of channel.
The messages are in standard JSON format.
In my case, Node-RED updates the status of topic homeassistant/packagebox and Home Assistant also listens to it and uses it for its own automations and dashboard.
Check online tutorials for all ins and outs about MQTT.
MQTT entity
In Home Assistant, I added YAML code in configuration.yaml.
I defined a sensor for a MQTT topic to listen to.
It becomes a binary sensor in Home Assistant.
When on the topic homeassistant/packagebox a payload true is received the Home Assistant sensor sets the status to ON and with topic value false the state will be OFF.
# Sourcecode by vdbrink.github.io
# configuration.yaml
binary_sensor:
  - unique_id: packagebox
    name: "packagebox"
    state_topic: homeassistant/packagebox
    payload_on: "true"
    payload_off: "false"
Mushroom icon
In my Home Assistant dashboard, there will be an orange box icon visible if there is a package inside the box.
![]()
This conditional mushroom box icon is visible based on the previous defined binary sensor.
This is the corresponding dashboard code for this icon:
# Sourcecode by vdbrink.github.io
# Dashboard card code
type: custom:mushroom-chips-card
chips:
  - type: conditional
    conditions:
      - entity: binary_sensor.packagebox
        state: 'on'
    chip:
      type: template
      icon_color: orange
      icon: mdi:package-variant
      entity: binary_sensor.packagebox
      content: ''
Conditional row
In my Home Assistant dashboard, I have a list of conditional items which are only visible if it’s relevant or any action is required. Like in this case, it’s only visible when you need to empty the package box.
To show the package box entity like this:

I used a Vertical Stack card in my dashboard with this code:
# Sourcecode by vdbrink.github.io
# Dashboard card code
type: vertical-stack
cards:
  - type: entities
    entities:
      - type: conditional
        conditions:
          - entity: binary_sensor.packagebox
            state: 'on'
        row:
          entity: binary_sensor.packagebox
Entities card
To show the package box entity like this:
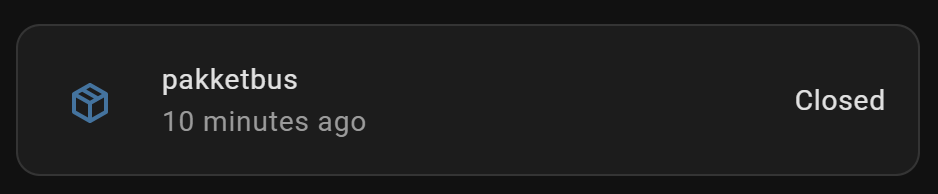
This is the time when the lid was (opened and) closed for the last time.
Use this entities card yaml:
# Sourcecode by vdbrink.github.io
# Dashboard card code
type: entities
entities:
  - entity: binary_sensor.contact_packagebox_lid_contact
    secondary_info: last-changed
The same code, with the other sensor, can be used to show when the last time was when it’s emptied.
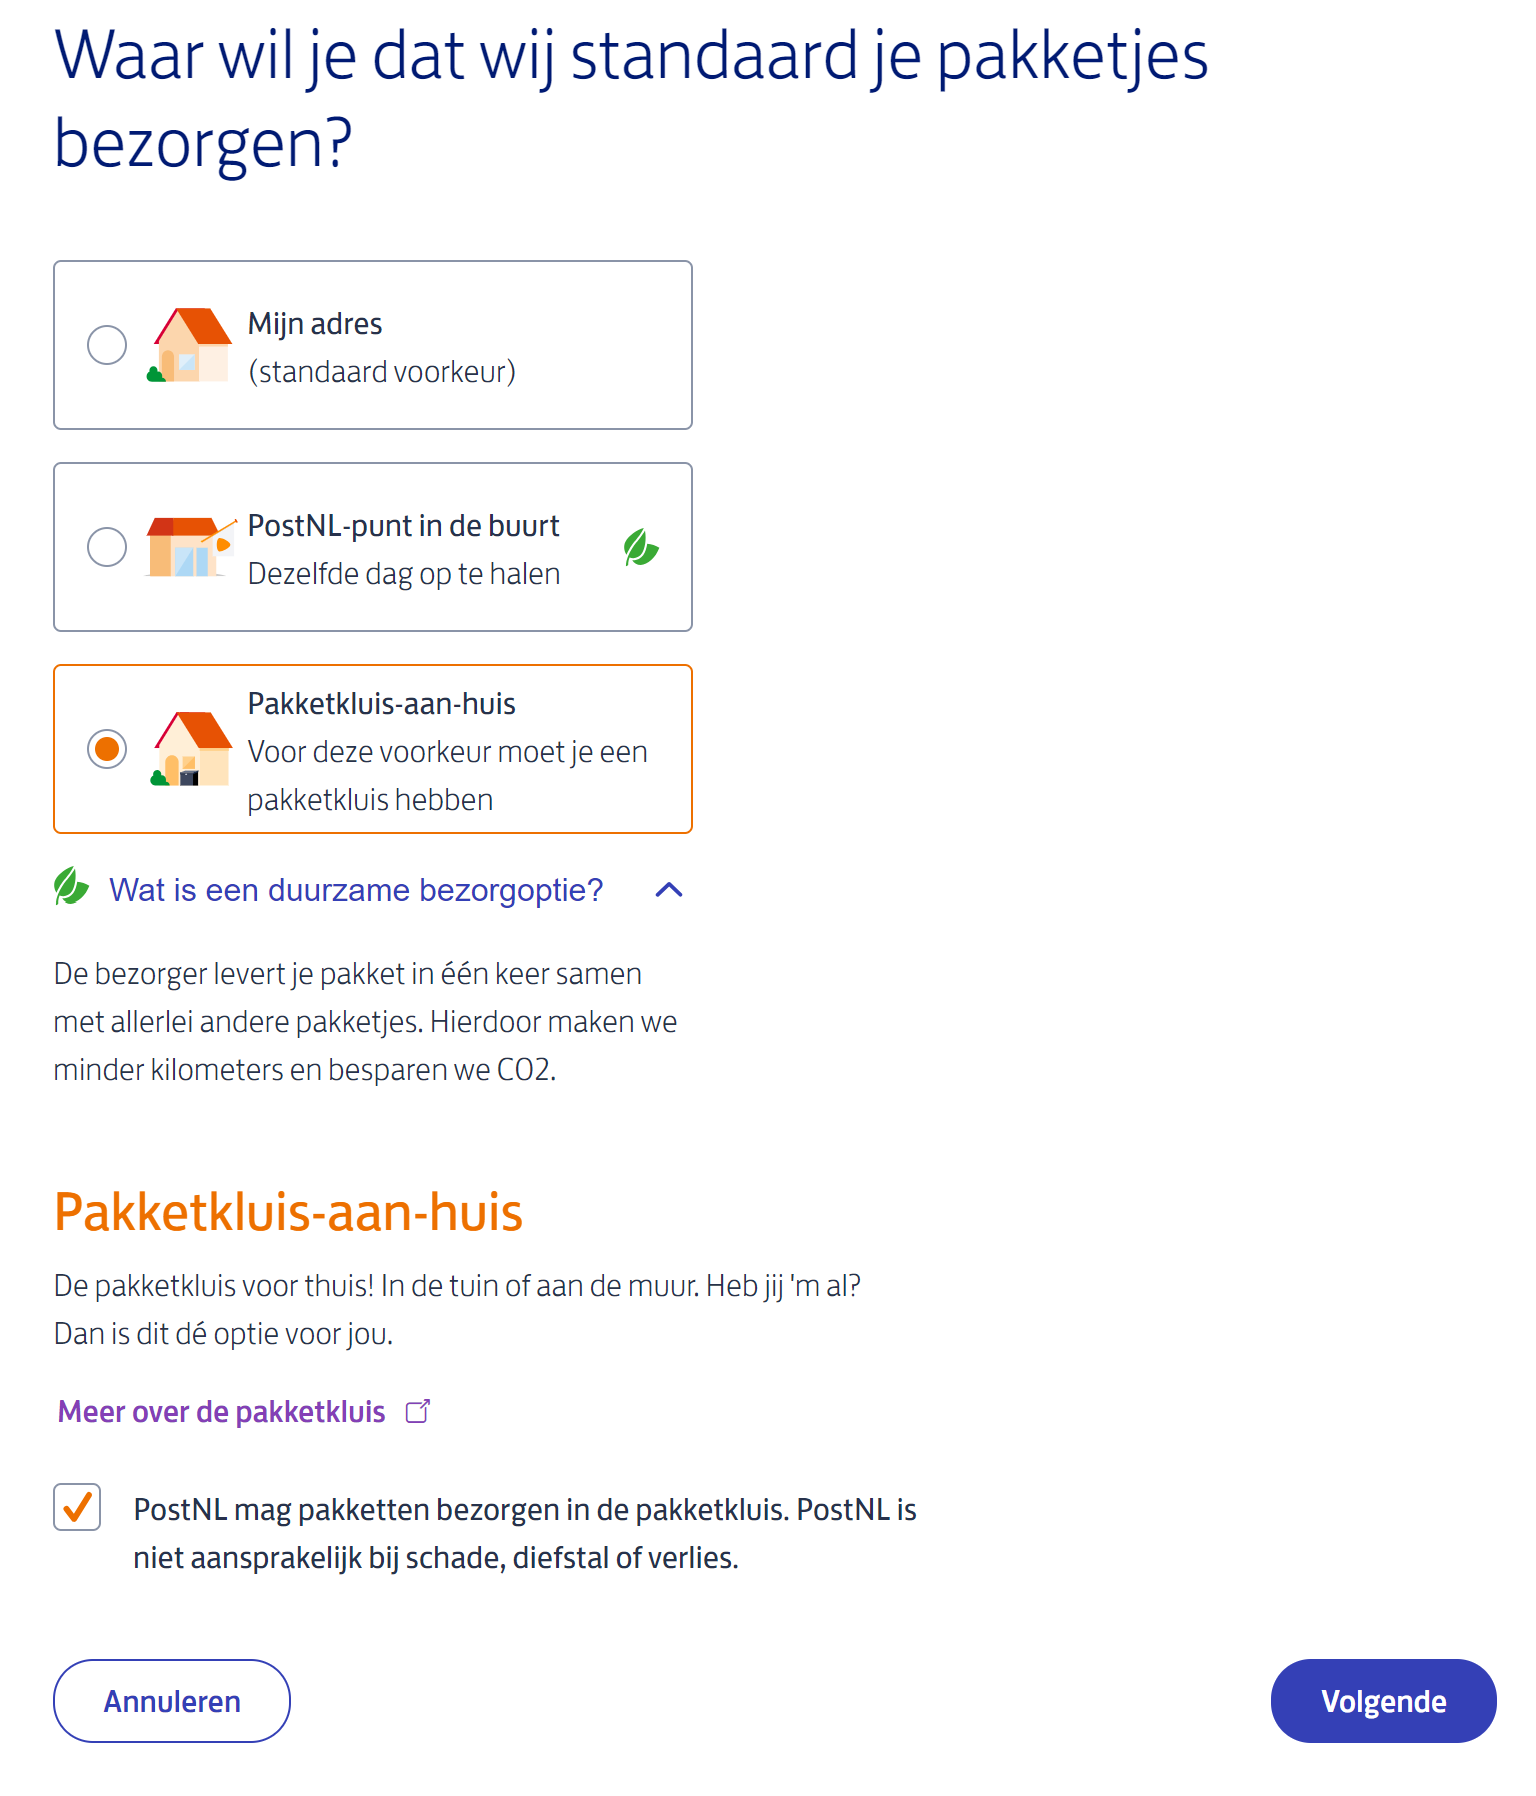
PostNL set package box a default deliver location
For the Dutch delivery company PostNL you can define that you have a package box at home where you want to receive your package in.
Login with your PostNL account and go to https://jouw.postnl.nl/account/nl-NL/ontvangstvoorkeur/standaard-bezorging to set this up.
Where to buy
Here are some links where you can find actual prices for the Allux 600.
Firework protection
You can also buy a small additional metal plate to block the lid from opening, to prevent fireworks being thrown into the box at the end of the year.
Did you create one yourself? Let me know!
Alternatives package boxes
I found some alternative package boxes:
- Veehaus - Lucas Plus Statief 1000 (Exact the same model as the Allux 600)
- Allux 800 - bigger version
- Allux 800L - even bigger version
- PakketPanda Classic – XXL Pakketbrievenbus
- PostNL advertise with a GePro Box
- Logixbox Multibox-S
Do you have another interesting package box? Share it with me or share it public on the Dutch Tweakers forum in this thread https://gathering.tweakers.net/forum/list_messages/1663741
Links to other sections of this blog site.
| Main page | Other projects | Home Assistant | ESPHome | Node RED |
^^ Top | Homepage | Best Buy Tips | Automation Ideas | Blog posts