Home Assistant dashboard:
on a tablet in Kiosk mode
With Fully Kiosk Browser
![]() Home Assistant has multiple ways to show you the dashboard.
It has an Android native app which can be used on an Android tablet or phone, or you can browse to the frontend on any device with a browser.
In all these scenarios, you see all Home Assistant side and top menu items, can edit all screens, and can see the browser with its URL.
Home Assistant has multiple ways to show you the dashboard.
It has an Android native app which can be used on an Android tablet or phone, or you can browse to the frontend on any device with a browser.
In all these scenarios, you see all Home Assistant side and top menu items, can edit all screens, and can see the browser with its URL.
If you want to show only the content of a single dashboard in fullscreen, you need to define this page in kiosk mode.
Here you can read how to configure it.
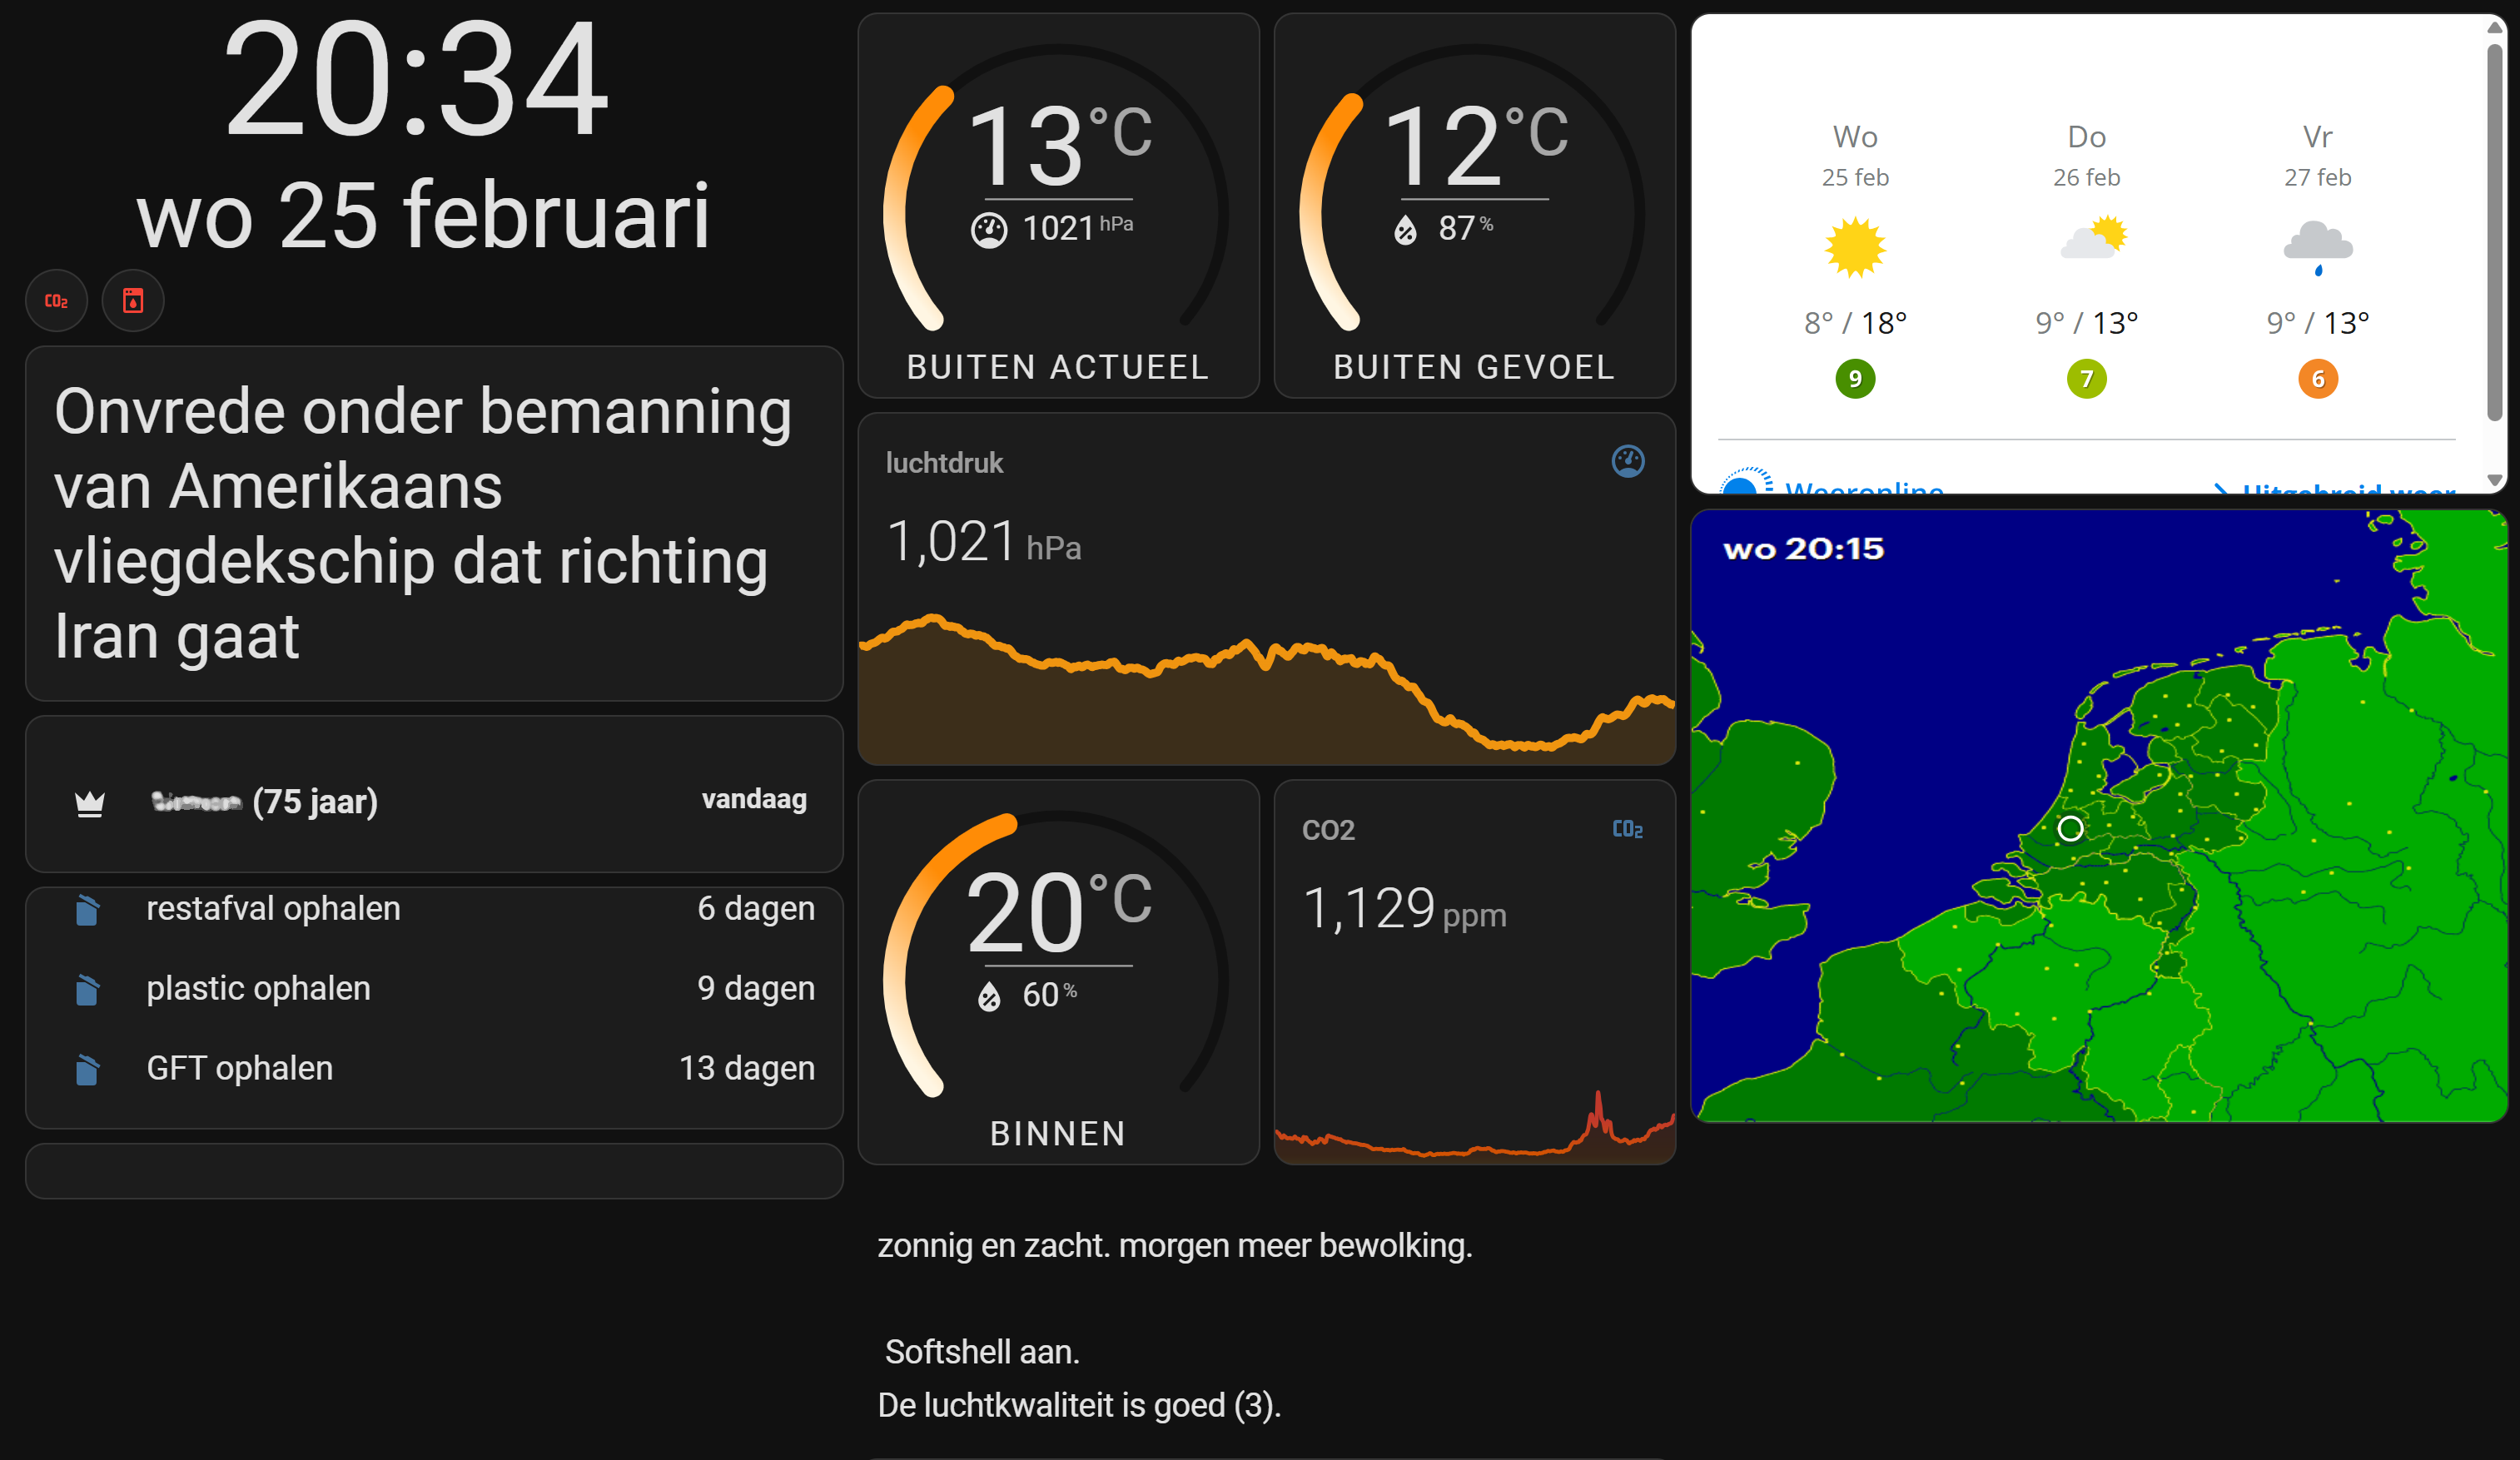 Example of a Home Assistant dashboard presented on a tablet.
Here you can go directly to the Home Assistant dashboard section on this page.
Table of Contents
- What is Kiosk mode?
- Set Home Assistant in Kiosk mode
- Set a tablet in Kiosk mode
- Configure Fully Kiosk Browser
- Create a tablet dashboard
What is Kiosk mode?
 A kiosk is a standalone computer with a touchscreen (also like a tablet) which runs a single website.
It has only limited functionality.
A kiosk is a standalone computer with a touchscreen (also like a tablet) which runs a single website.
It has only limited functionality.
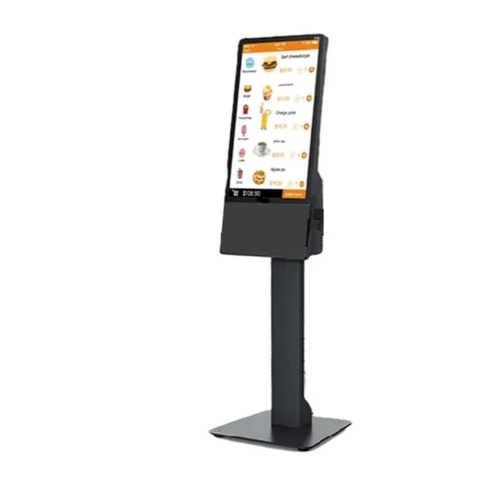
An example of a kiosk is a terminal used to order a meal in a fast-food restaurant.
In the background, this is just a website or application with payment functionality attached to it.
When it is in a public place, it is also restricted, without access to the rest of the computer or browser.
In the context of Home Assistant, we want access to a single overview dashboard without menu items.
Set Home Assistant in Kiosk mode
By default, you only want to show a single page on the tablet without the default toolbars to navigate to other dashboards.
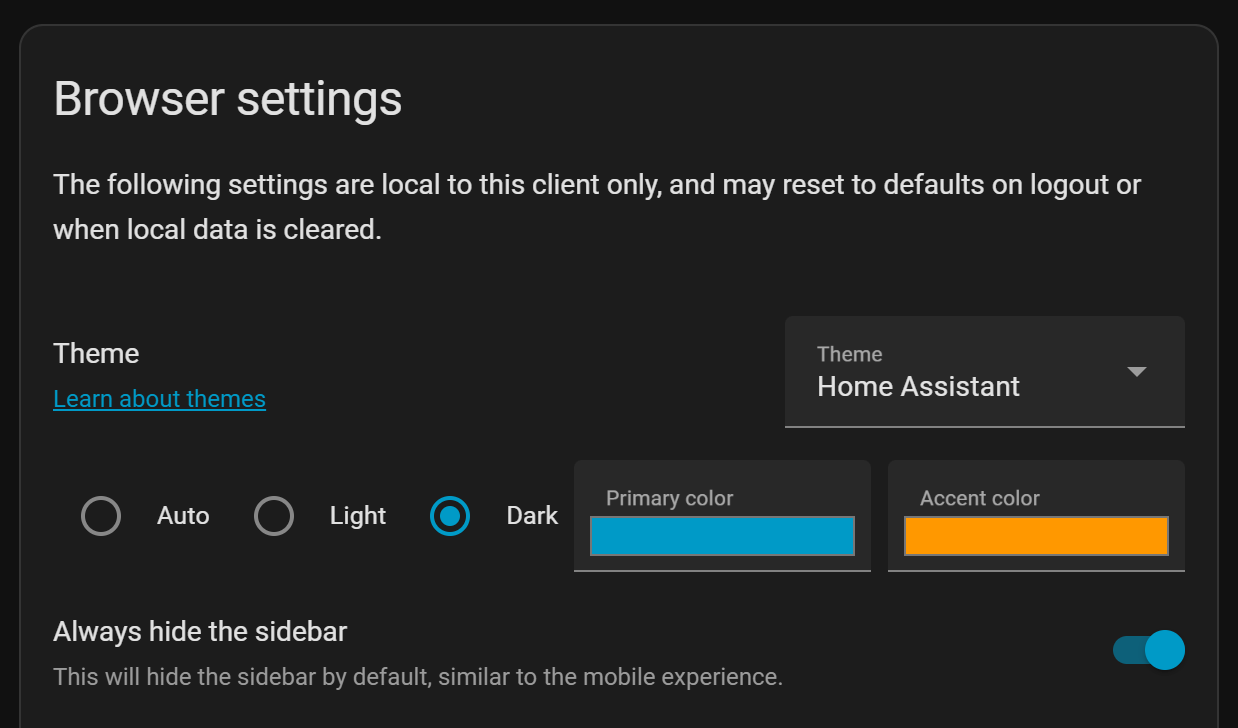
Hide side toolbar
There is a setting for the user to hide the side menu by default.
In the side toolbar, select the last item: the currently logged-in user.
This shows a list of settings, one of which is Always hide the sidebar.
The best way is to create a custom user for your tablet and enable the feature to hide the sidebar. Use a different user on your desktop and phone so the default menu items still show there.
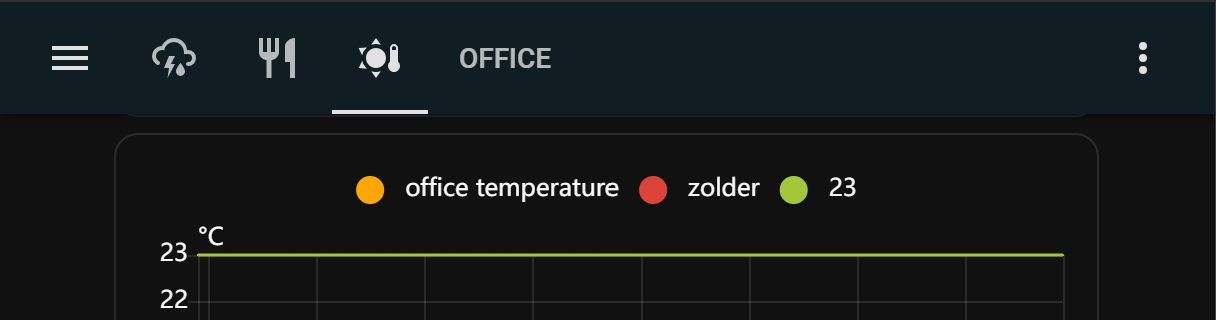
Hide top toolbar
We want to hide this top menu by default. This can be achieved with the integration kiosk-mode.
Install the kiosk-mode integration via this button

Once installed, some dashboard properties have to be set in the raw dashboard editor.
To set these properties, select the three dots in the top-right corner of the dashboard in edit mode, and select Raw configuration editor.
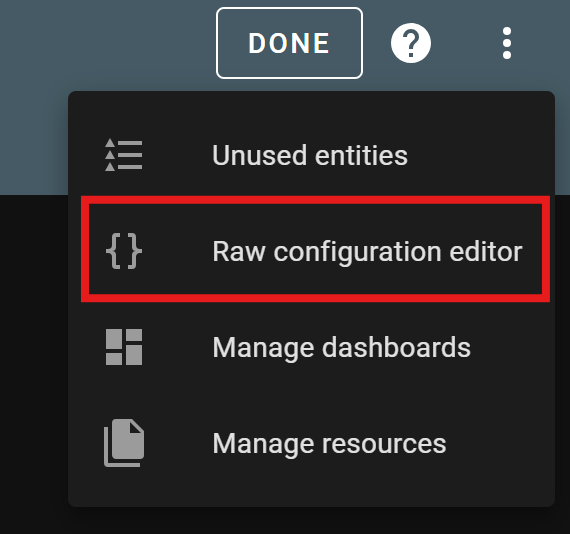
See all possible configuration parameters at https://github.com/NemesisRE/kiosk-mode
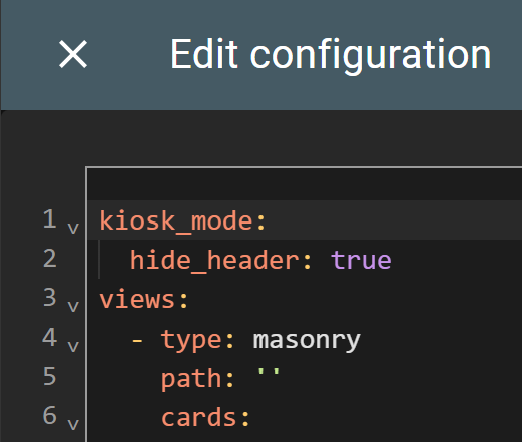
To hide the top bar, it is enough to define hide_header: true.
# Sourcecode by vdbrink.github.io
# Raw configuration editor
kiosk_mode:
  hide_header: true
views:
  ...
To show the top toolbar again, add ?disable_km= to the URL.
Swipe to other dashboard view
You can still swipe left/right to go to other defined views on the same dashboard without using the extra top toolbar.
With the HACS integration Swipe Navigation
Repo: https://github.com/zanna-37/hass-swipe-navigation
Install this integration, via this button, into your own Home Assistant instance.
Set a tablet in Kiosk mode
To show a dashboard on a tablet, you can open a browser and go to the Home Assistant dashboard URL and use that as the dashboard. The downside is that you lose a lot of screen space to the OS and browser controls. Better is to show only the page content in fullscreen.
Fullscreen browser
Browsers also support kiosk mode on their own. From a single website, you can create a Progressive Web App that hides the browser menus and URL.
In Chrome, open the page you want to convert into a single app.
Go to the menu, select Cast, save and share, then select Install page as app....
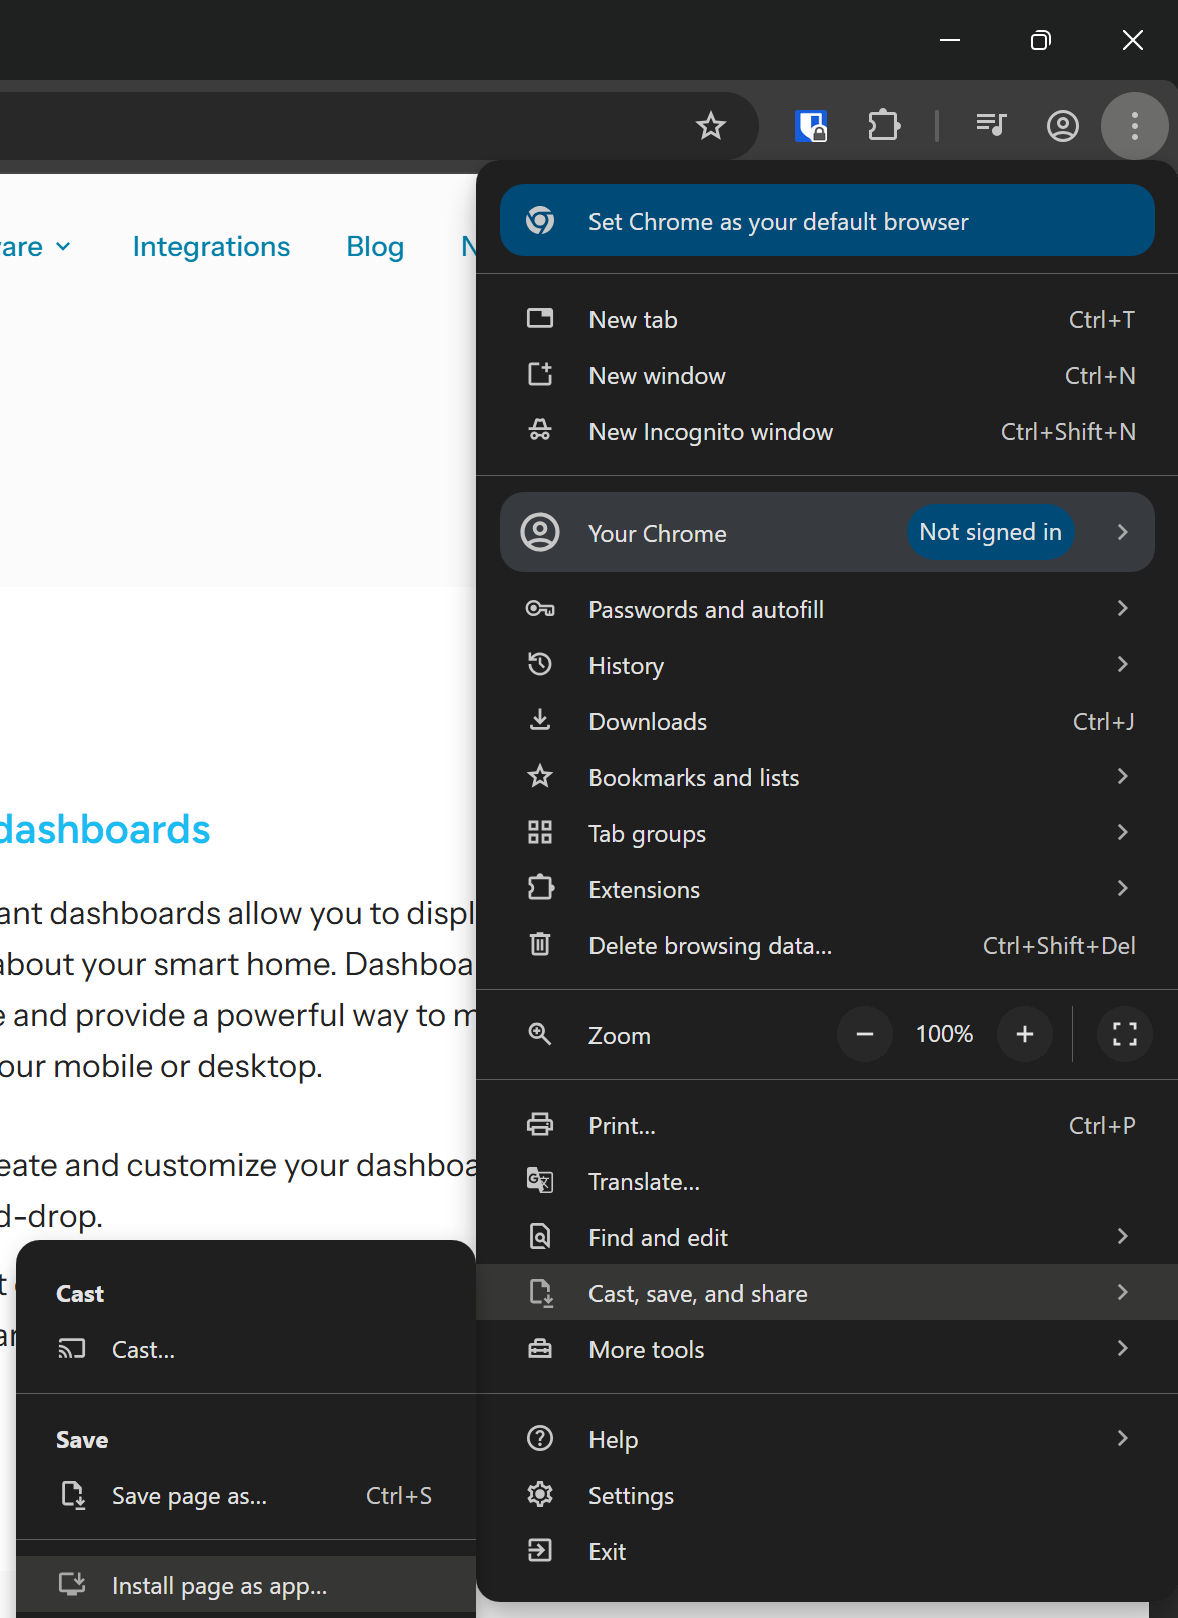
How to create an app in Chrome from a single page.
Now you only have a small top bar.
Even this can be removed by choosing the Full screen option.
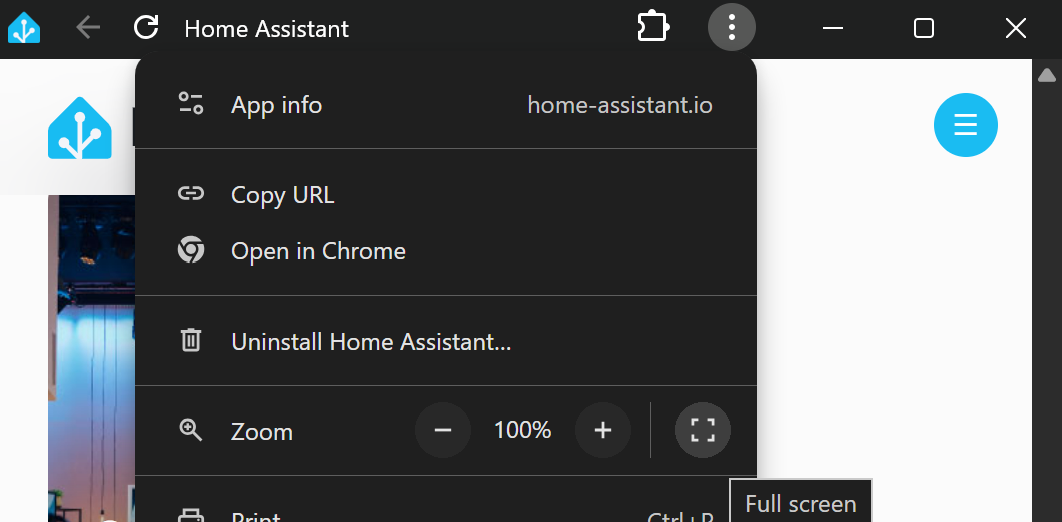
Page as an app in fullscreen
This app can also be cast to a TV!
Android tablet
If you want to show a page in fullscreen on an Android tablet, the app Fully Kiosk Browser can do this and much more.
There is a free version with a watermark and limited functionality. For € 7,90 + VAT you can buy an unlimited lifetime single pc license.
It has many features; I use these:
- Define a URL to load on startup:
- Automatically load the latest state of the page on startup.
- Light detection via the camera:
- Disable the screen if the room is completely dark.
- Nearby detection:
- Enable the screen when someone is nearby.
- Remote screen on/off via an API call:
- Enable the screen when someone enters the room.
- Disable the screen at a certain time or without presence.
- Monitor the battery level:
- Control a smart socket to charge the tablet only between 20% and 80%.
It has many more features!
See here the full list of features.
Tablet as wall panel
I use myself a Samsung 10” tablet as display with Home Assistant.
If I had to buy a new display today for my Home Assistant screen, it would be one of these Android tablets with a higher resolution:
- Lenovo Tab M11 - 11” with a resolution of 1920x1200 (AliExpress) (Amazon US) (Amazon NL)
- Samsung Galaxy Tab A9+ - 11” with a resolution of 1920x1200 (Amazon US) (Amazon NL)
iOS iPad tablet
For the iPad, the app Kiosker: Fullscreen Web Kiosk can be used to define a page that runs in kiosk mode.
Do you know better options for iOS? Please let me know!
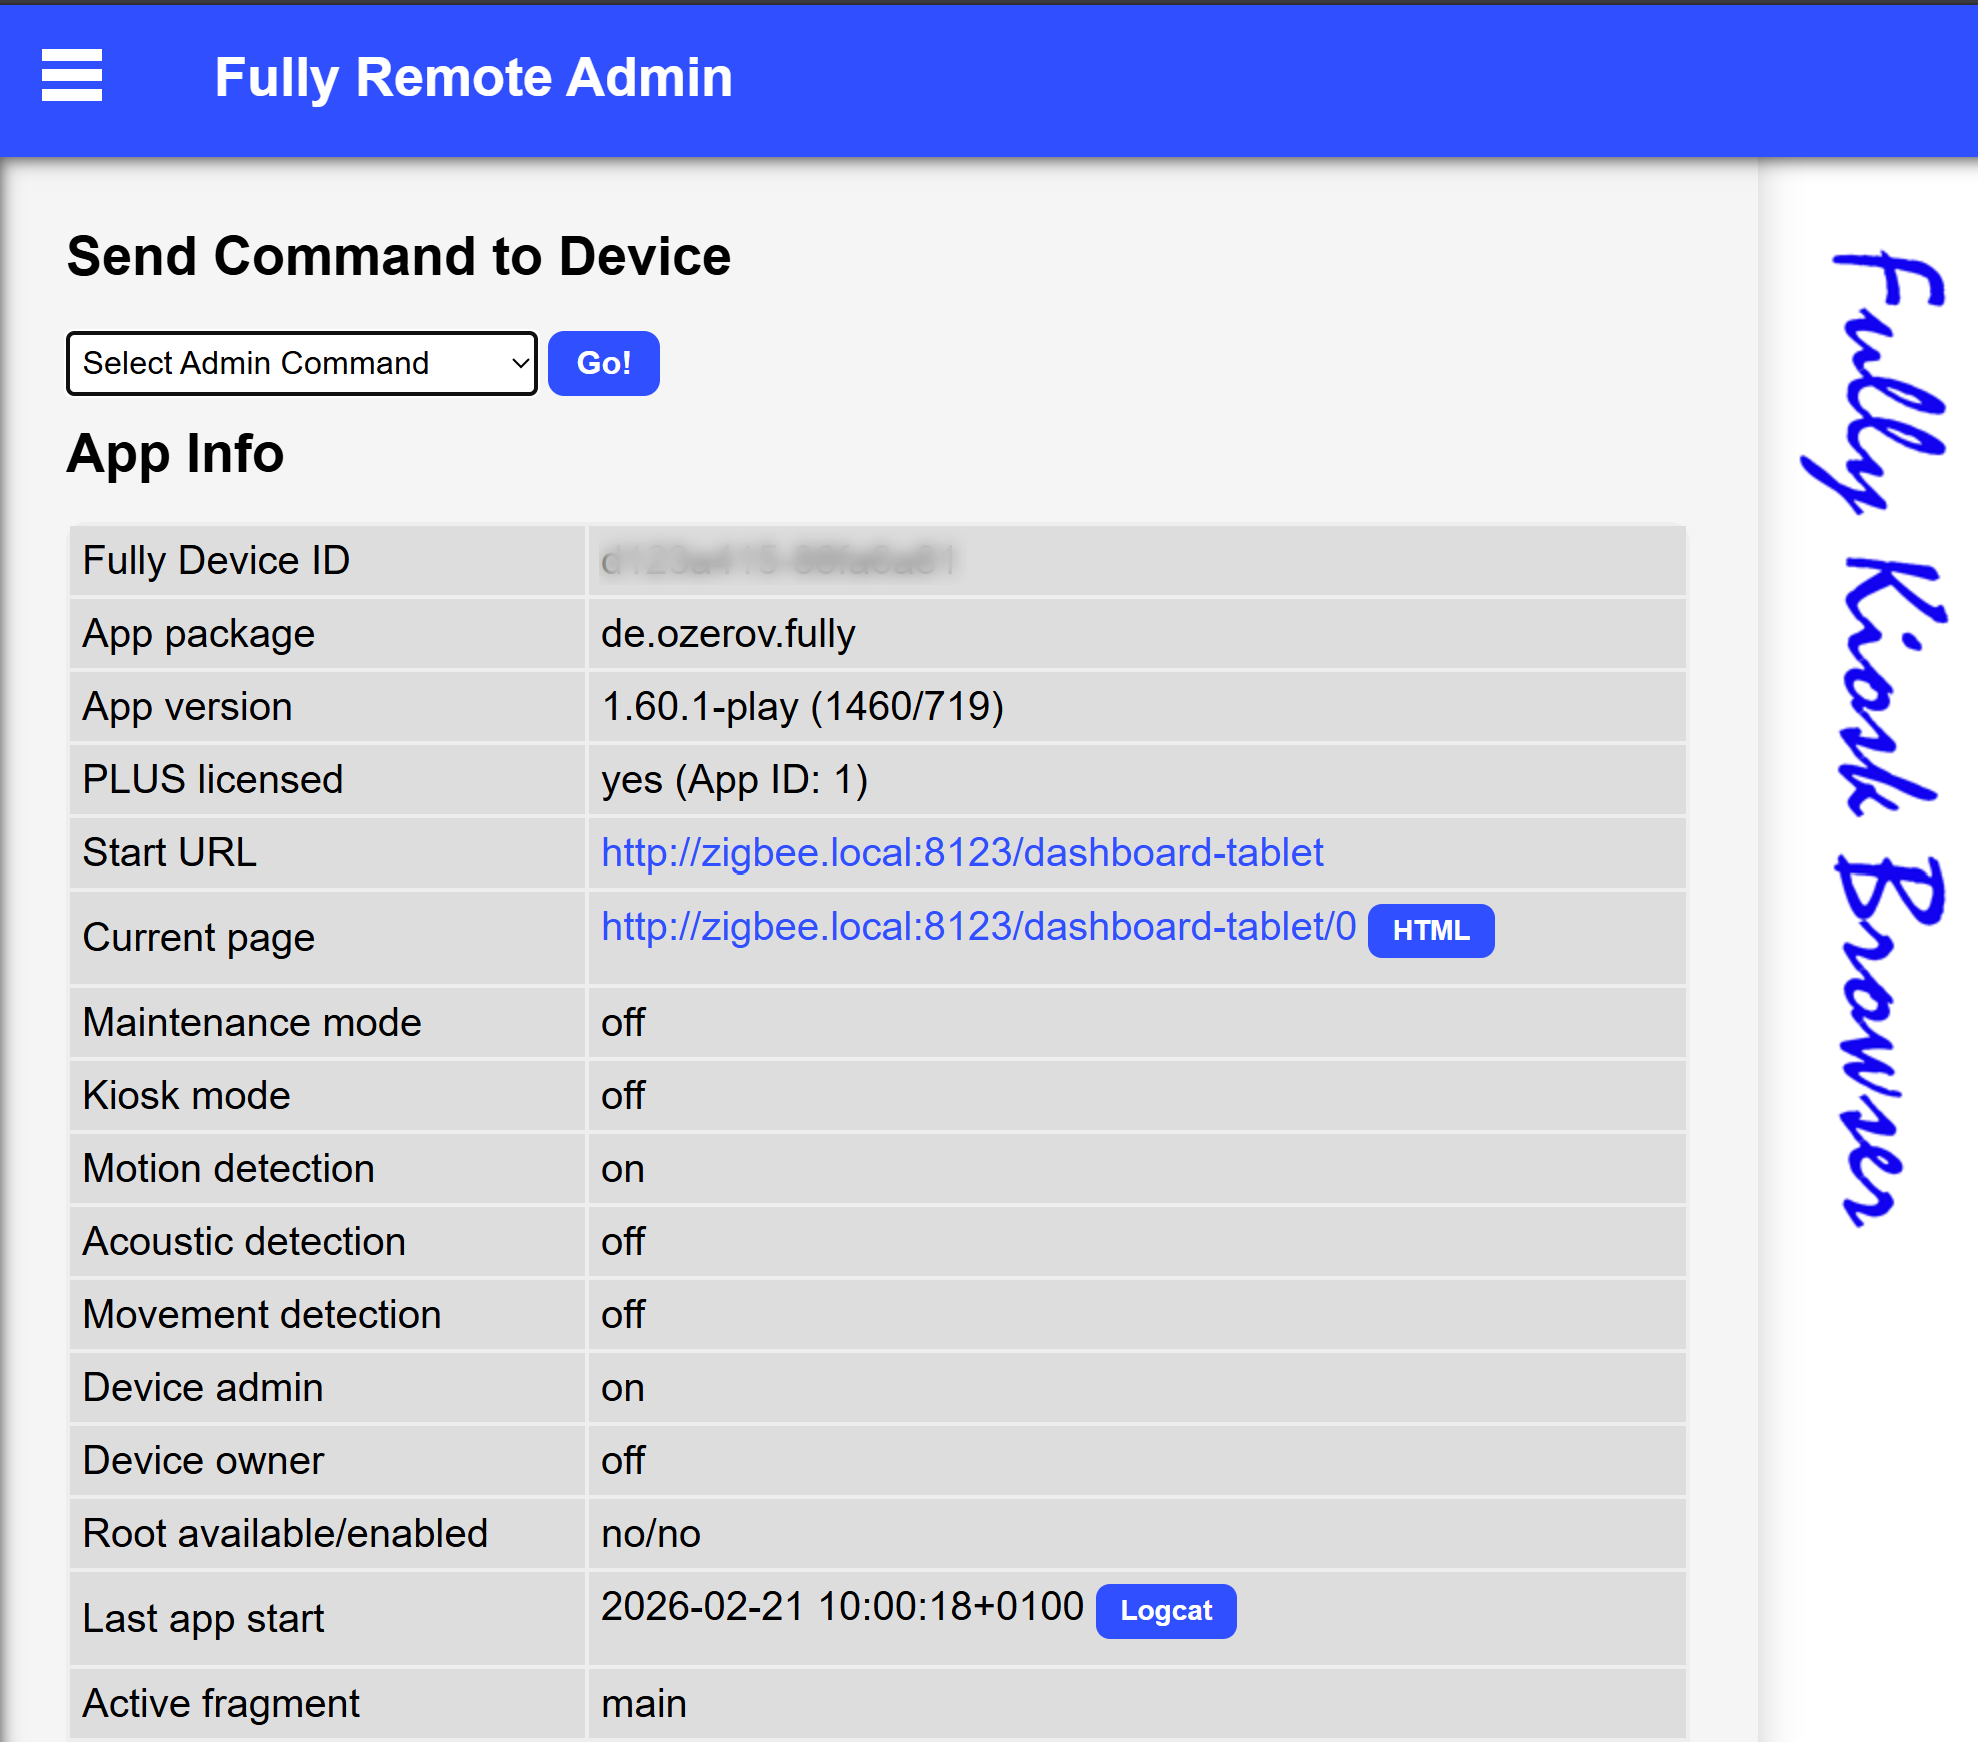
Configure Fully Kiosk Browser
The Android app Fully Kiosk Browser can be used to control the tablet remotely.

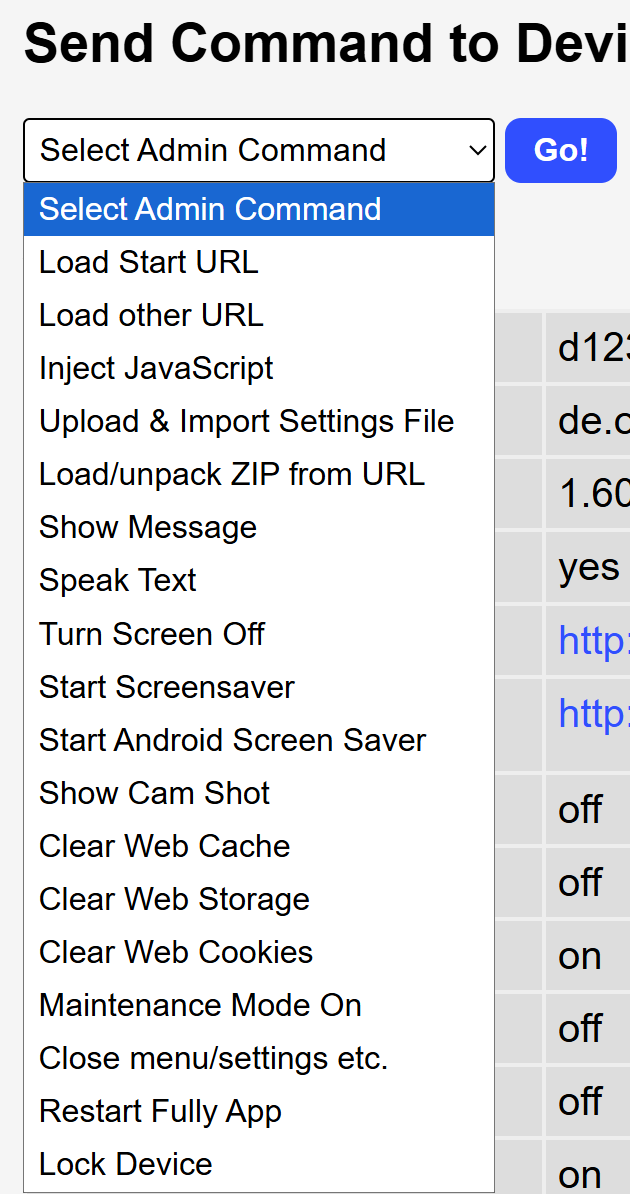
Enable remote admin
Auto screen on
Using the API GET call http://192.168.1.x:2323/?cmd=screenOn&password=<password>
you can turn the screen on.
Auto screen off
Using the API GET call http://192.168.1.x:2323/?cmd=screenOff&password=<password>
you can turn the screen off.
Only charge tablet battery when needed
I have a smart plug connected to my tablet. To avoid damaging the battery, I only charge it when needed. If the battery level drops below 15%, I charge it until it reaches at least 80%, and then turn the power off again. That way, it always has enough charge without charging all day.
Fully Kiosk can push tablet and other kiosk state data to the MQTT topic fully/deviceInfo/<hash>.
One of those properties is batteryLevel; based on this value, I trigger an automation to control the smart socket to charge the tablet.
Create a tablet dashboard
Before you start with your dashboard ask yourself the next questions:
- Horizontal or vertical?
- How many data do you want to show, what resolution do you need/have?
- Two, three, more columns?
- Do you want to show data conditional?
- Which data do you want to show?
- Date and time
- Weather: current, forecast, alarms, temperatures, air pressure
- Important house states: open doors, windows, CO2 levels, temperatures
- Camera views
- Calendar: Trash, birthdays, appointments
- Latest news
Check here or here for copy-paste examples in these categories.
Or continue to see also more examples.
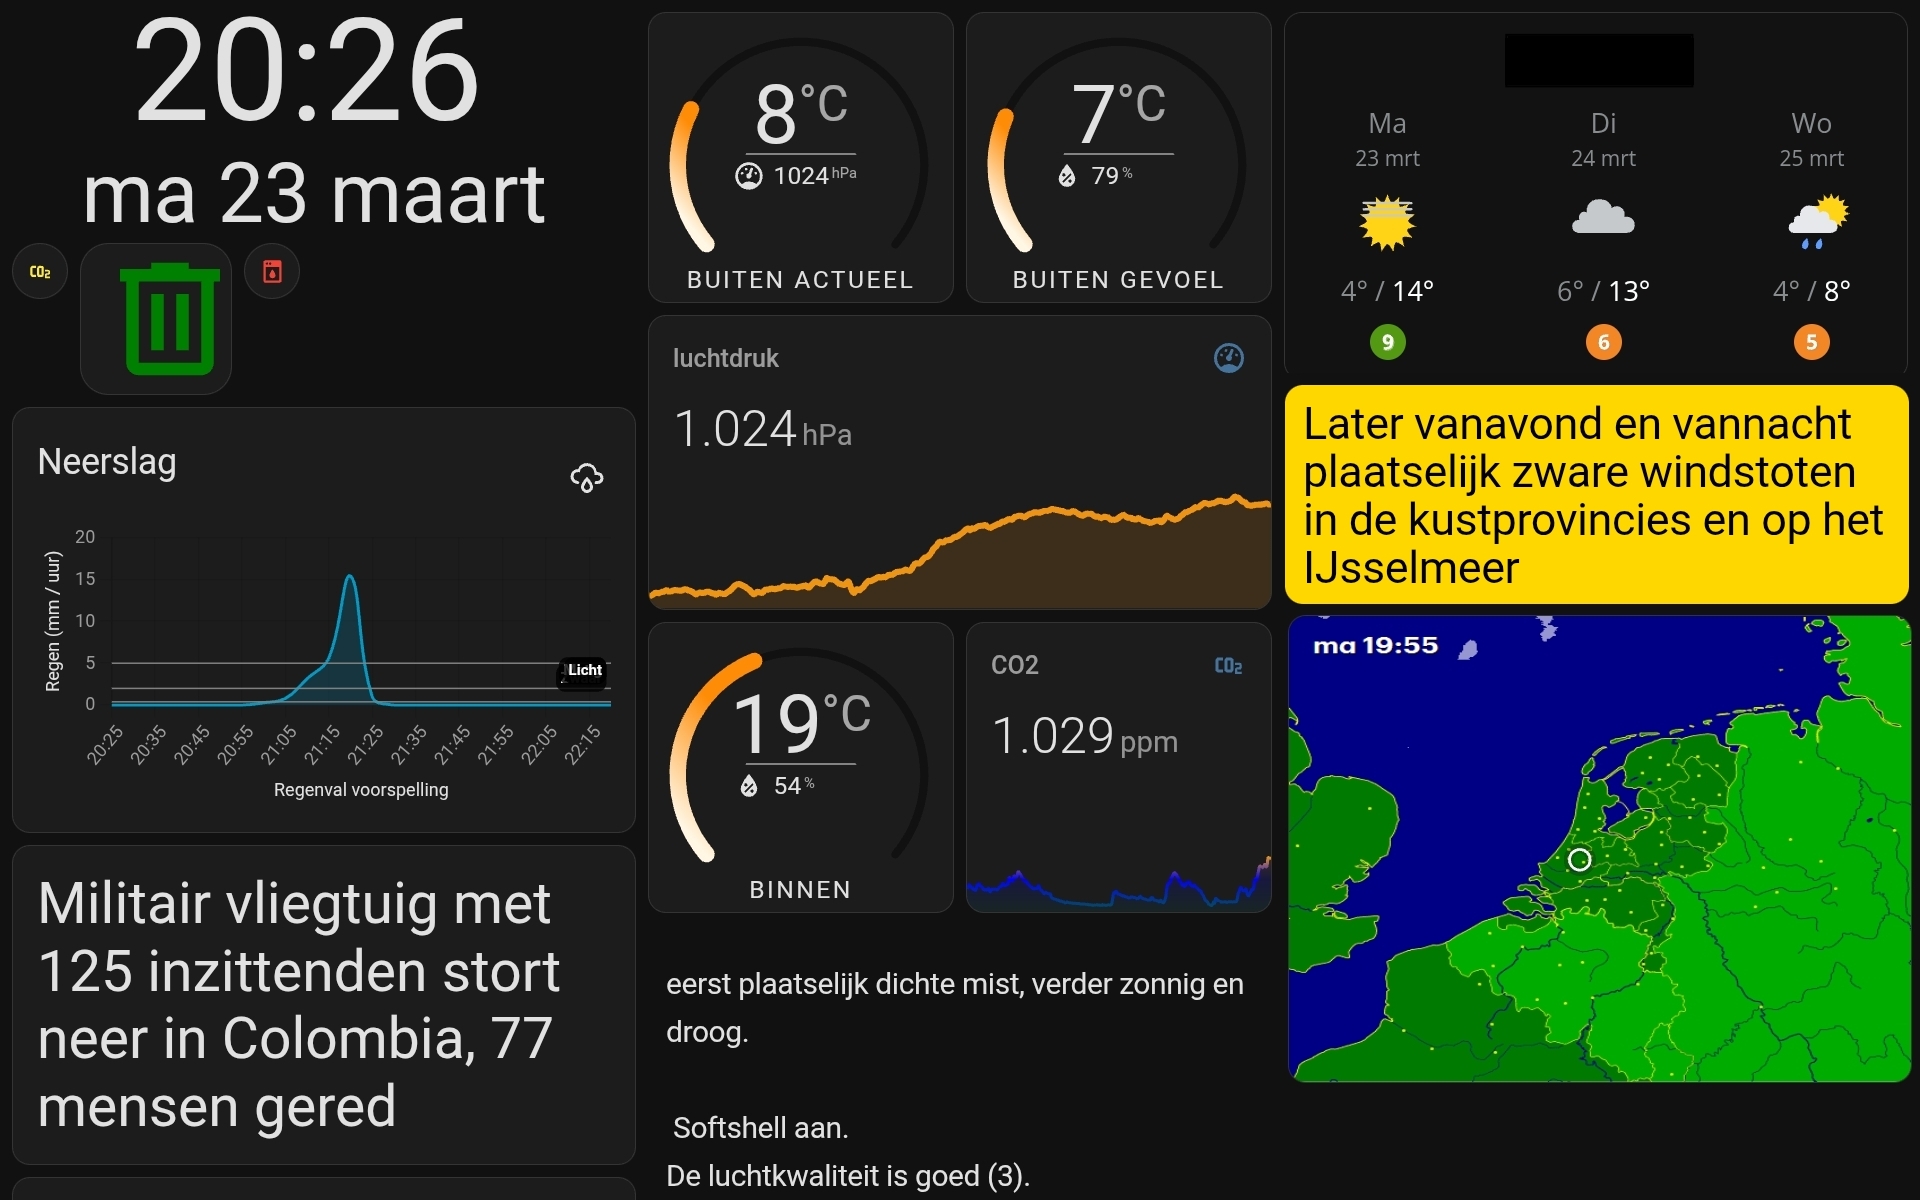
What’s on my dashboard
Basic elements
This screenshot is an interactive, clickable image of my dashboard. You can click on a dashboard element and you get redirected to the card details.
Clickable dashboard: each element is linked to the corresponding code
Optional elements
On my dashboard, I also have elements that are hidden by default and only visible when it is relevant.
My optional elements are:
- Rain prediction graph, only if rain is expected in the upcoming hours
- Trash can reminder, if tomorrow is pickup day
- Weather alert text, only if there is a weather alarm
- Camera stream, only if someone is detected at the front door
- Upcoming birthdays, only if someone has their birthday within X days
- Mushrooms:
- Bigger trash can icon, if tomorrow is bin day
- CO2 level, if it is too high
- Amount of open windows
- Package delivered in my package box
- Mail delivered, in the last 30 minutes
- water/leak detected!
- Rain amount fallen, if there is any rain fallen today
- Is it nice to sit outside?, based on many outdoor weather station sensor values (temperature, humidity, wind, UV index)
- Text if there must be meat or fish out of the freezer for the dish of tomorrow, based on the meal planner, only show after 21.00
 Clickable dashboard: each element is linked to the corresponding code
YAML how to make elements conditional
For each condition you need a sensor with a state you can toggle on when the element should be visible. If this doesn’t exist yet, you can create this with a template sensor. I have a page with many examples of how to create these sensors: Home Assistant templates.
This is how you can define a conditional Mushroom element to show only the large bin icon when tomorrow is a bin day.
You need to have the boolean sensor waste_tomorrow created for this condition.
# Sourcecode by vdbrink.github.io
# Dashboard card code
- type: custom:mushroom-chips-card
  chips:
    - type: conditional
      conditions:
        - entity: sensor.waste_tomorrow
          state: "true"
      chip:
        type: template
        entity: sensor.cyclus_gft
        icon: mdi:trash-can-outline
        content: ""
This is how you can define a conditional camera stream element to show only the live stream feed if an extra helper sensor is set to state “on”. This can be set manually with a toggle on the dashboard (to activate it if you expect someone) or automatically when someone is detected on the camera.
You need the boolean helper sensor frontdoor_detection_mode for this condition.
# Sourcecode by vdbrink.github.io
# Dashboard card code
- type: conditional
  conditions:
      - condition: state
        entity: input_boolean.frontdoor_detection_mode
        state: "on"
  card:
    type: custom:webrtc-camera
    url: rtsp://....
Fullscreen camera stream
If you want to show a fullscreen overlay popup when a person is detected by a camera, take a look at the page Home Assistant dashboard: Fullscreen camera stream for how to set this up.
See also my other examples of dashboard elements.
I hope these elements are also useful for you! Any tips or suggestions are always welcome.
^^ Top | Homepage | Best Buy Tips | Automation Ideas | Blog posts